Amazon S3 preparation:
Before we start the cloudHQ wizard to back up your Salesforce data, we first need to create an appropriate Amazon S3 bucket, Amazon AWS IAM user, and configure Amazon Glacier policies for your backup bucket if needed:a
- Create n Amazon S3 bucket to store your backups.
- Create an Amazon AWS IAM user to own this backup. Instructions are here: https://support.cloudhq.net/how-to-create-amazon-iam-user-for-cloudhq-sync-backup-to-amazon-s3/.
- Optionally, you can set up Amazon S3 to Amazon Glacier archiving rules. Instructions are here: https://support.cloudhq.net/how-to-setup-archive-to-amazon-glacier/.
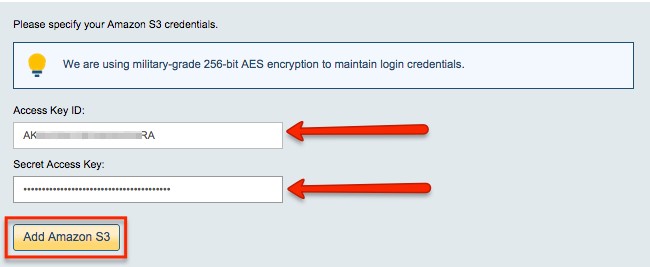
Authorize cloudHQ to access your Amazon S3
In order to back up to Amazon S3, cloudHQ needs to be authorized to access the Amazon S3 bucket you’ve dedicated for backup.
To do that, you must provide a key ID and a secret access key for an IAM user with full read-write access to your backup bucket. If you don’t know what that is, please click here: https://support.cloudhq.net/how-to-figure-out-your-access-key-id-and-secret-key-in-amazon-s3/.
- Go to https://www.cloudHQ.net/services and click the “Amazon S3” icon:

- Authorize your Amazon S3 account:
Start the cloudHQ wizard to create backup sync pairs
There are two pieces of information which will need to be backed up from your Salesforce account:
- Files, documents, attachments and notes (under Salesforce virtual folder “All Files“).
- Records (under Salesforce virtual folder “Data Exports“).
More information about that can be found here.
You will need to create two backup sync pairs—one to back up your files and one to back up records:
Salesforce/All Files -> Amazon S3/backup_bucket/All Files
Salesforce/Date Exports -> Amazon S3/backup_bucket/Data Exports
Create a backup sync pair to back up Salesforce files
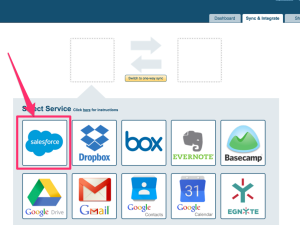
- Start the synchronization wizard to sync two cloud accounts.
- Select the “Salesforce” icon:
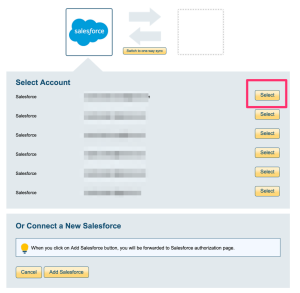
- Select already authorized Salesforce account or click on “Add Salesforce” to authorize your Salesforce account:
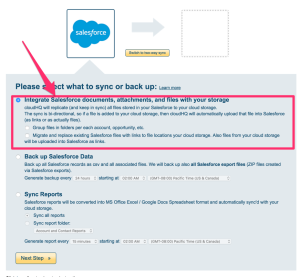
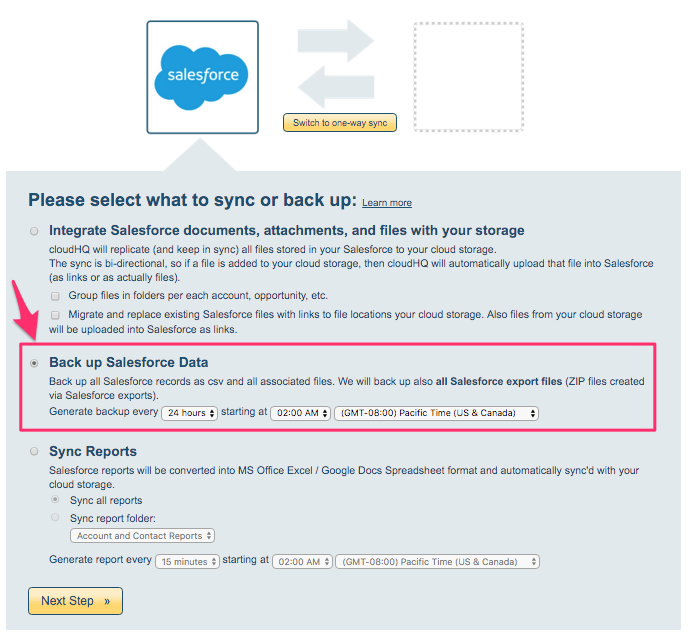
- After authorization finishes, you will promoted to select what to backup. Select, “Integrate or back up Salesforce documents, attachments, and files” and click “Next Step”:
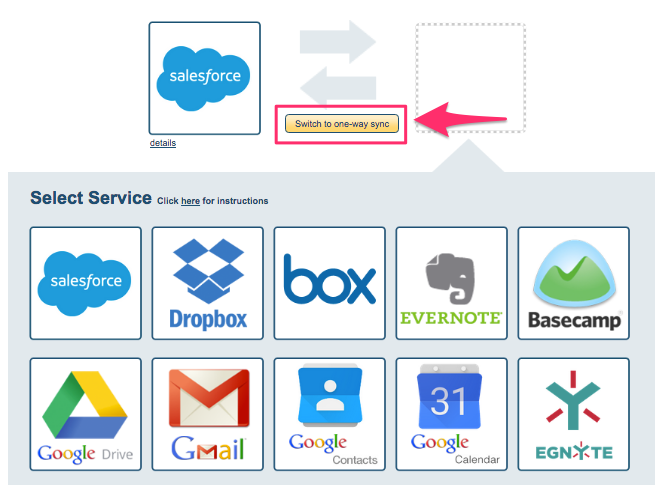
- Click on “Switch to one-way sync”
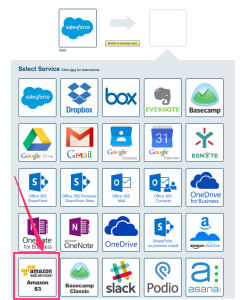
- Click on “Amazon S3” icon:
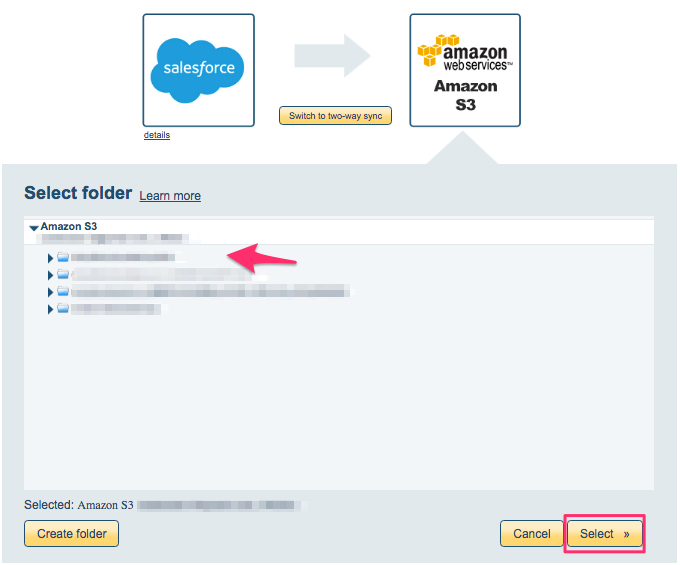
- Select Amazon S3 bucket you dedicated for backup and then create folder under that bucket for backup of Salesforce files. You can call that folder “Backup of Salesforce files” or similar
- Select “Archive files before they are deleted or updated by sync”. Optionally you can disable replication
Create backup sync pair to back up Salesforce data exports
- Start synchronization wizard to sync two cloud accounts
- Select “Salesforce” icon:
- Select an already-authorized Salproesforce account or click “Add Salesforce” to add your Salesforce account:
- After authorization finishes, you will be prompted to select what to back up. Select “Backup Salesforce Data,” then click “Next Step”:
- Click “Switch to one-way sync”:
- Click the “Amazon S3” icon:
- Select the Amazon S3 bucket you’ve dedicated for backup, then create a folder under that bucket for the backup of your Salesforce files. You can call that folder “Backup of Salesforce records” or something similar:

- Select “Archive files before they are deleted or updated by sync” option so that previous version of file is kept when modified or deleted.
- The synchronization status will display after the initial synchronization
- Here is How to Monitor Status of Sync.
- An email will confirm the success of the initial synchronization.