Here are short instructions for how to do sync a Gmail label with Evernote:
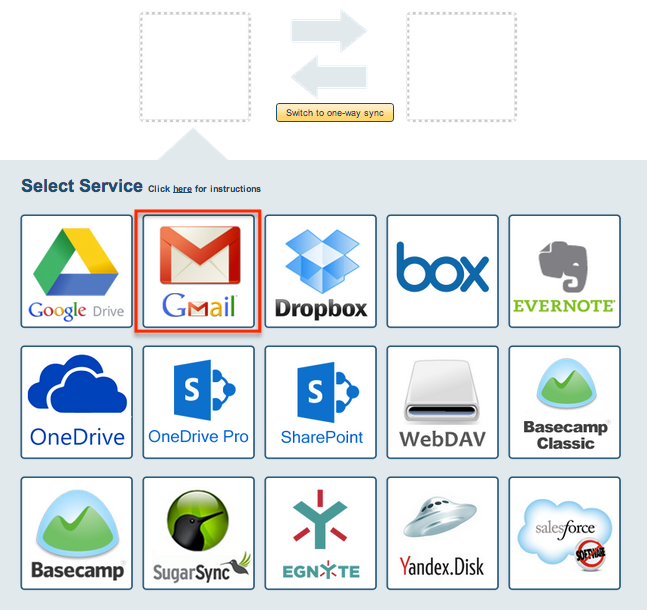
- Start the synchronization wizard to sync two cloud accounts.
- Click the Gmail icon:
- Select an already-configured Gmail account or click “Add Gmail” to add a new Gmail account:

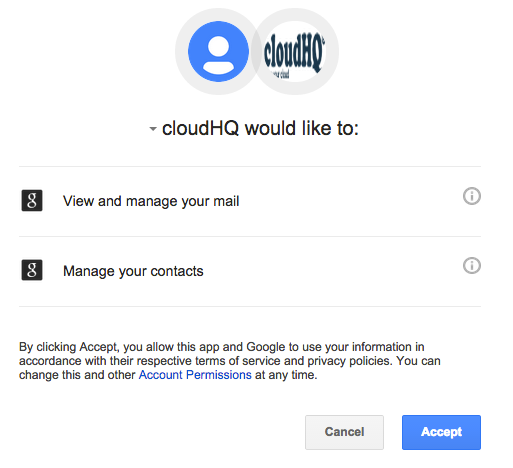
- If you click “Add Gmail,” you will be forwarded to authorize cloudHQ to access your account:
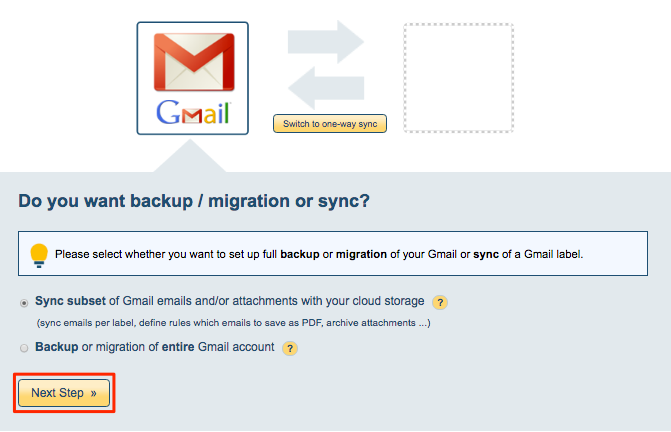
- Select “Sync subset of Gmail emails and/or add attachments with your cloud storage” then click “Next Step”:
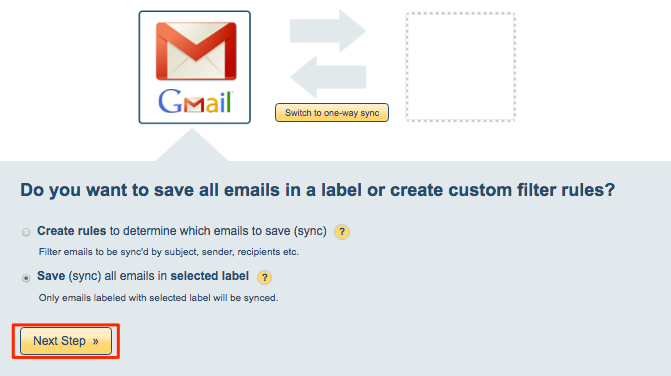
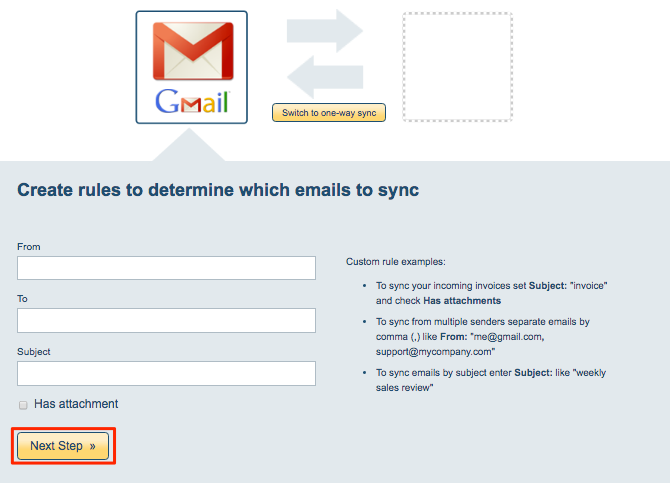
- You can choose to sync all emails in a label or create rules which emails to sync, then click “Next Step”:
- If you click “Create Rules,” you will need to input rules (From or To or Subject) then click “Next Step”:
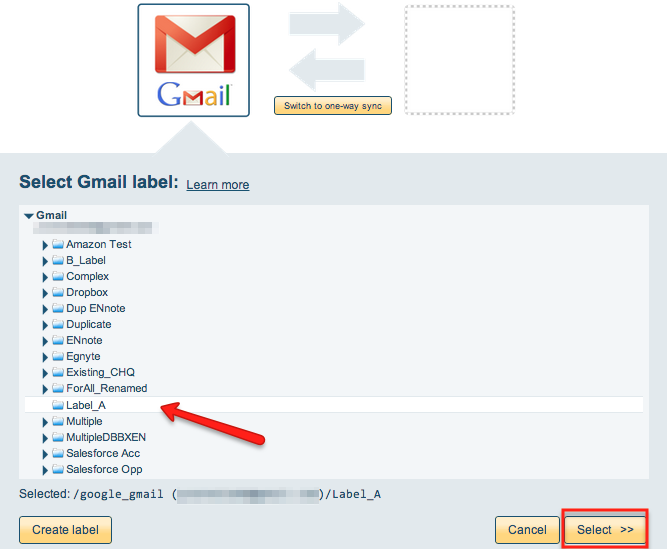
If you had selected “Save (sync) all emails in selected label” then select a Gmail label to sync or click “Create label” to create a new Gmail label:
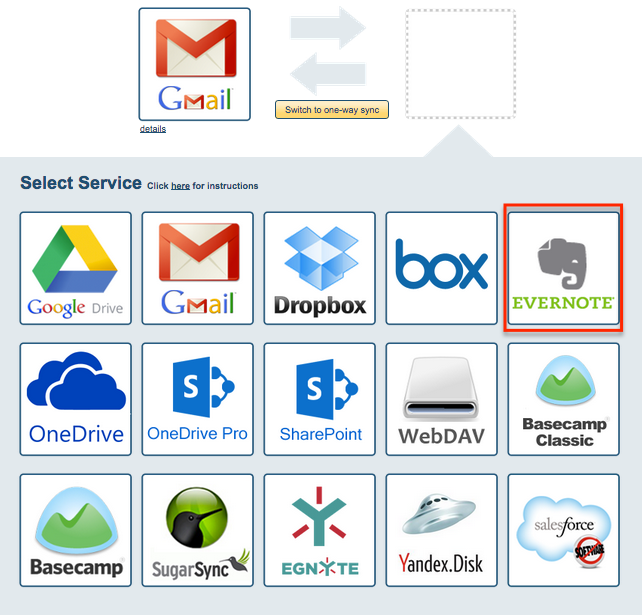
- Click the Evernote icon:
- Select an already-configured Evernote account or add a new Evernote account:
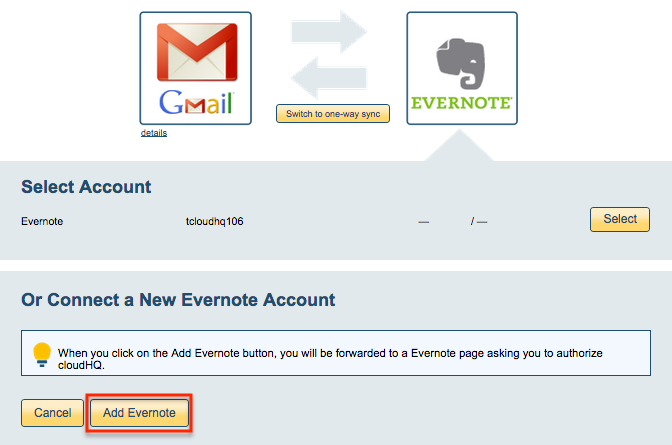
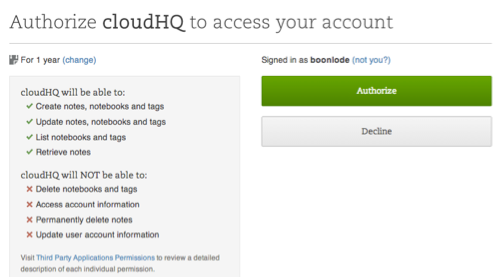
- If you click “Add Evernote,” you will be forwarded to authorize cloudHQ to access your account:
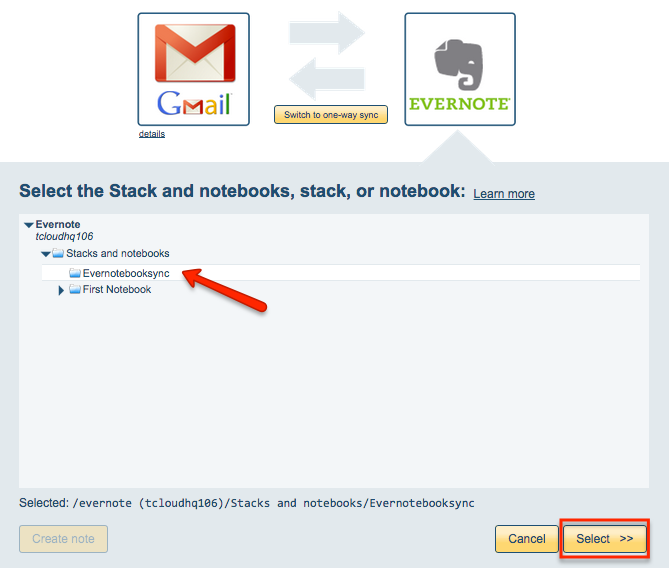
- Select “Stacks and Notebooks” if you want to sync all notebooks and notes or select a single Evernote notebook to sync:
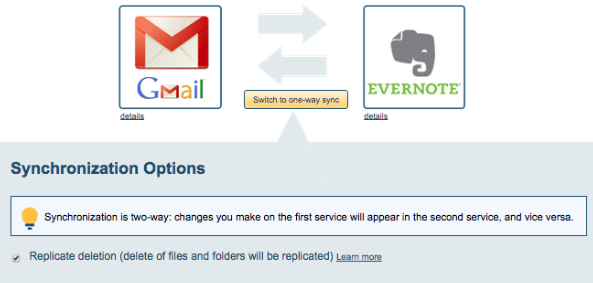
- Choose your options. Synchronization will start automatically:
- The synchronization status will display after the initial synchronization.
- Here is How to Monitor Status of Sync.
- An email will confirm the success of initial synchronization.