To learn more about the Auto BCC for Gmail by cloudHQ, visit the Auto BCC for Gmail by cloudHQ website.
To install the extension, choose your browser from the links below:
To install the extension, choose your browser from the links below:
Your Auto BCC for Gmail dashboard is here.
For help setting up Auto BCC for Gmail for your team, check out this support note on How to set up Auto BCC for Gmail for Teams.
Table of Contents
Introduction
With cloudHQ’s Auto BCC for Gmail, you can create email rules to automatically BCC or CC certain email addresses whenever you write, reply to, or forward an email. You can use these rules on any of your Gmail “From” accounts.
To set up Auto BCC for Gmail for your team, please check this support guide Setting Up Auto BCC for Gmail for Teams.
Use Case
Auto BCC for Gmail functionality is useful in various scenarios:
- Automatically BCC your CRM system to ensure all client communications are logged without manual intervention.
- BCC yourself or an alternate email address for maintaining a personal backup of all sent communications.
- Legal professionals can use this tool to automatically BCC or CC emails to a firm’s central database to maintain compliance and facilitate audits.
- Small teams can use Auto BCC for Gmail to BCC or CC a common email address for team communications to keep everyone informed and on the same page.
Install
-
Install the Chrome browser extension Auto BCC for Gmail from this location: https://chromewebstore.google.com/detail/auto-bcc-for-gmail-by-clo/bfhaienophdigbdknjamfcbhinmmnbha:
- Add the extension to Chrome:
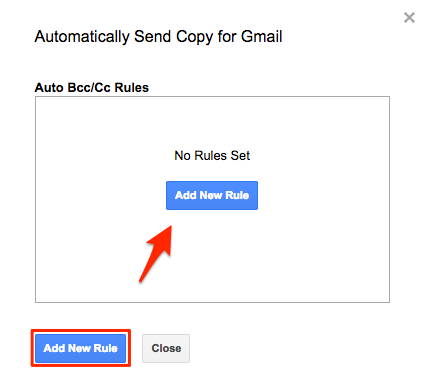
- Click on the cloudHQ icon and then click the Set up BCC/CC rules link:
- If you click “Auto BCC” button, you can add rule by clicking “Add new Rule”:
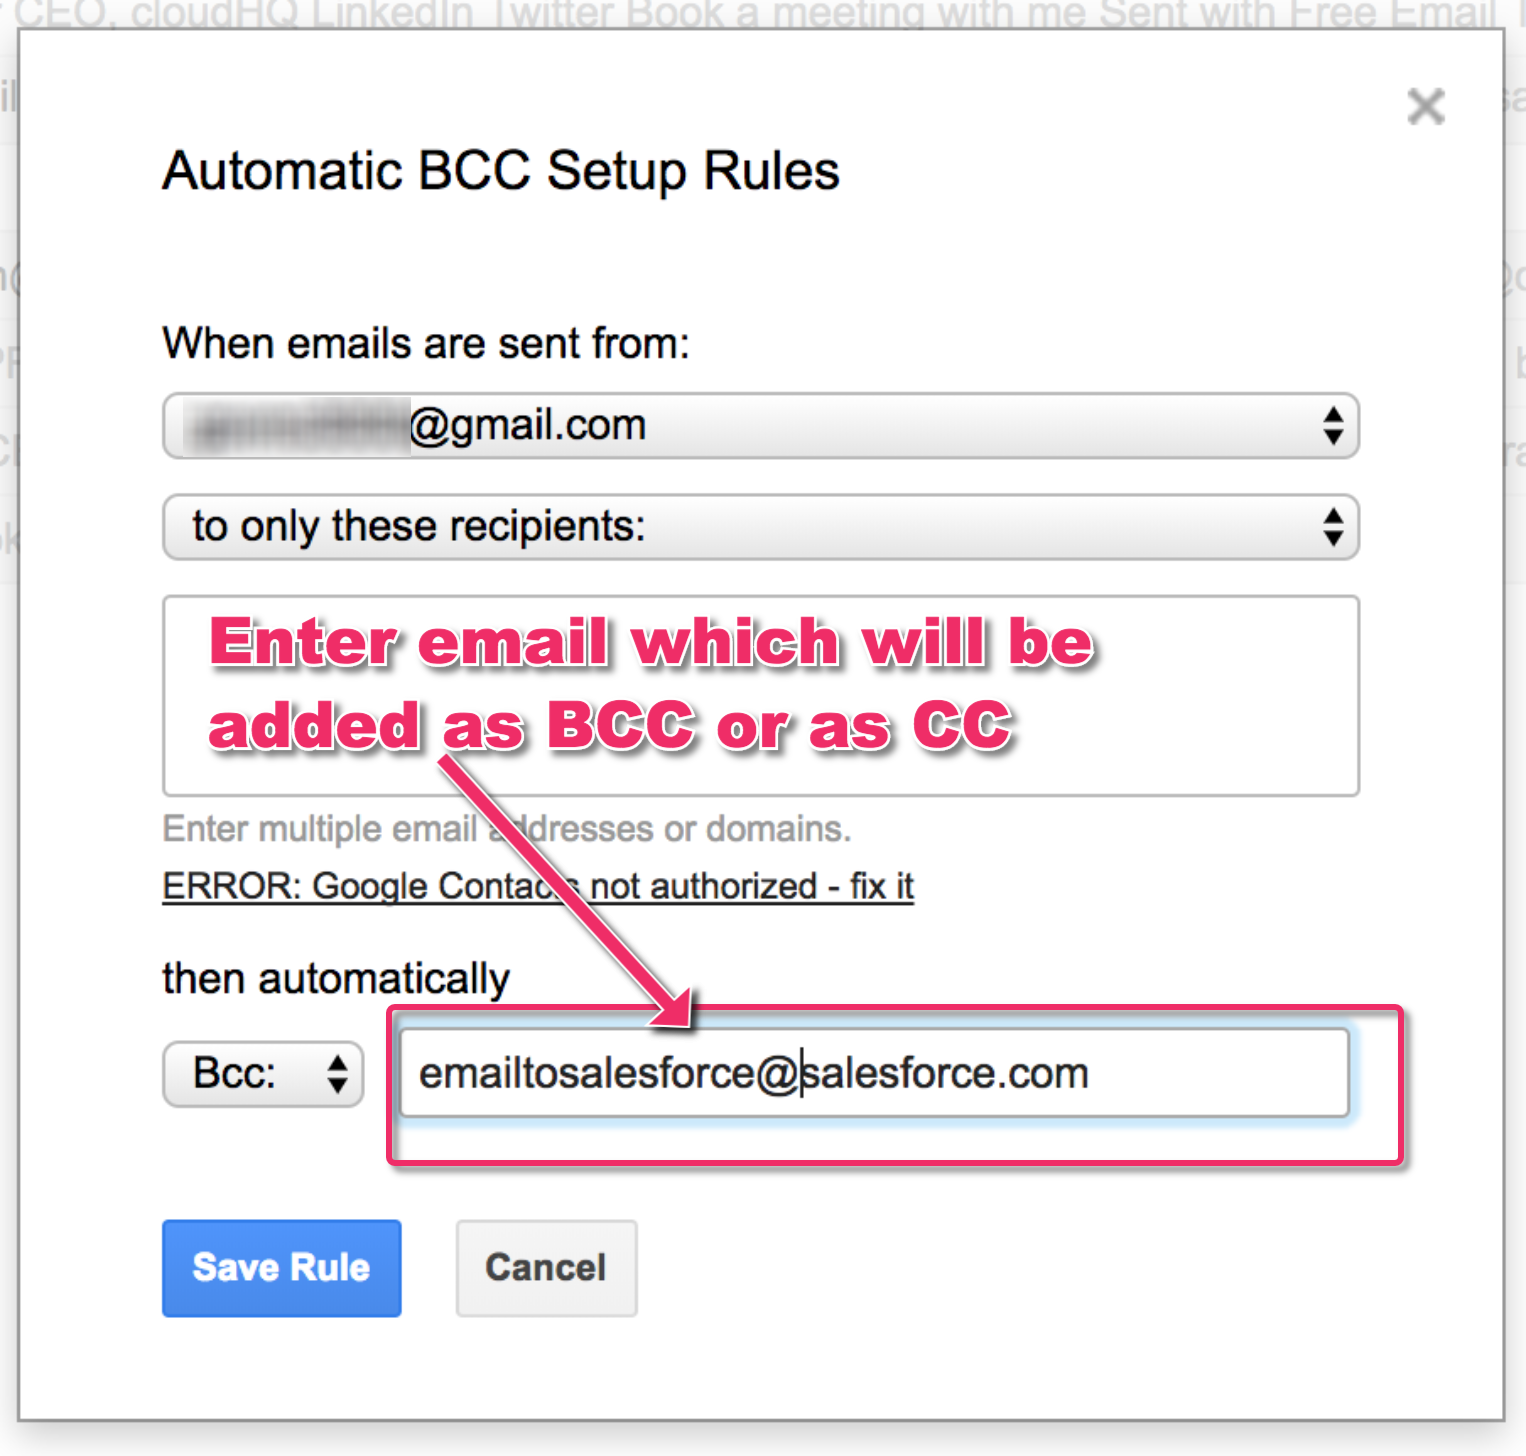
- First, set up the “From”-related terms of your sending rule. If you have multiple Gmail addresses, select the single email address to which you want this rule to apply. For example, if you select “email1@gmail.com,” the extension will only execute your rule when emails are sent from “email1@gmail.com.” If you want the same rule to apply to another one of your Gmail “From” addresses, you must create a separate rule for that address.

-
Next, set up the “To”-related terms of your sending rule. (Note: after typing out an email address/domain, press either the Enter or Tab key to include it in the box.). Here, you have three options for when your sending rule will apply:recipients:
-
Auto BCC will trigger for all recipients: This option sets up “universal” sending rules. Your automatic BCC/CC rule will apply whenever you send an email, no matter the recipient. In other words, if you want that Auto BCC for Gmail to add “bcc” or “cc” to all your emails then select “to everyone but not to” and do not setup any rules:
- Auto BCC will trigger only when sending to certain recipients: You can specify email addresses or domain which will trigger Auto BCC. You can specify a domain (i.e., cloudhq.net, comcast.com) or a full email (email@home.com). In other workds, this option sets up “inclusionary” sending rules. By default, your automatic BCC/CC rule will be triggered if you send an email to any of the recipients/domains that you specify in the box:

- Auto BCC will trigger only when you are not sending to certain recipients: Alternatively, you can also setup exclude sending rules. Exclude rules means that Auto BCC will not be triggered for all emails with recipients match the exclude rule:

Auto BCC will trigger only when you are not sending to certain domains: You can also set up exclude sending rules for all emails in certain domain. Exclude rules means that Auto BCC will not be triggered for all emails with recipients in the domain. In other workds, this option sets up “exclusionary” sending rules – your automatic BCC/CC rule will not be triggered if you send an email to any of the recipients/domains that you specify in the box:

- Set whether Auto BCC for Gmail will do “bcc” or “cc”:
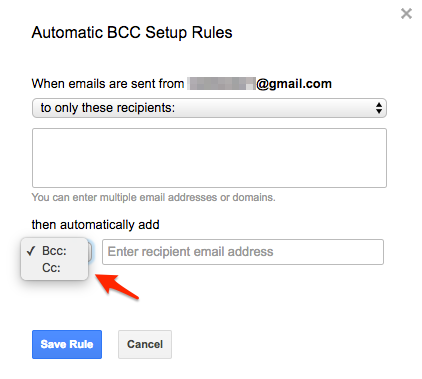
- Enter email addresses to which Auto BCC for Gmail will do “bcc” or “cc”. Press enter key. When done, click “Save Rule”:
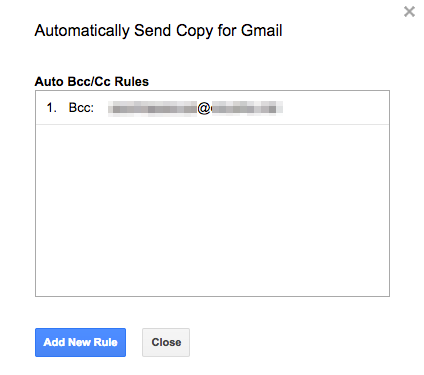
- You will see rule you have saved:
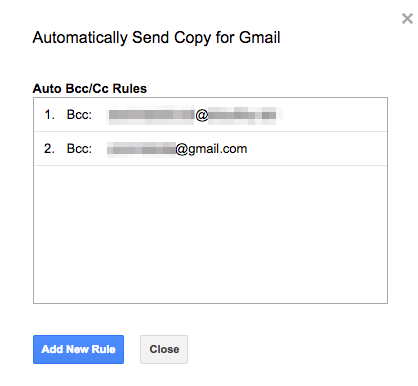
- You can add more rule and bcc or cc as needed:
Create Rules
Here is how to set up and configure auto bcc or cc anyone on your emails with our Chrome extension:
Manage Rules
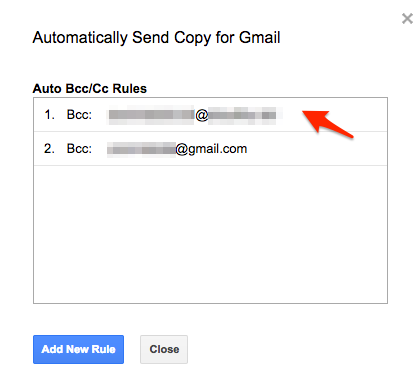
- If you have entered an incorrect rule, just click on the rule:
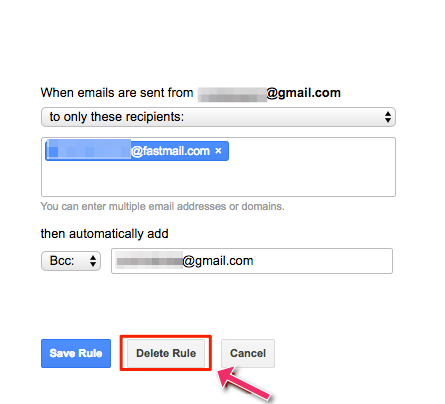
-
Then delete the rule:
Check Rules
- When you compose an email, you can access bcc or cc rules by clicking the ‘auto bcc’ button:
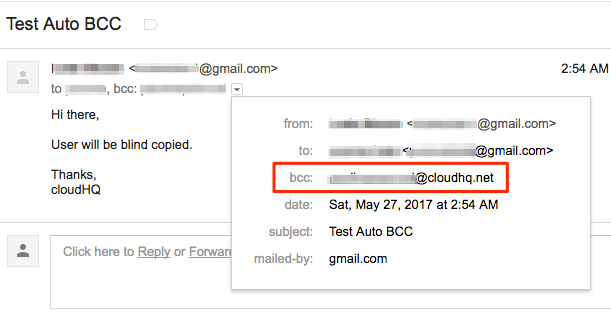
- Once you have sent the email, you should see the person you have blind copied: