With cloudHQ you can set up a real-time backup of all your Office 365 OneDrive accounts to Amazon S3 / Glacier. Real-time data backup is backup of files by automatically making a backup copy of every change made to your OneDrive files. This means that cloudHQ is essentially capturing every version of your OneDrive files and saving them to Amazon S3. It allows the Office 365 administrator to restore data (or create a snapshot of your system) to any point in time. You can think about cloudHQ sync as very powerful version of Apple Time Machine.
Of course, you can back up your organizations Office 365 OneDrive accounts to not only Amazon S3 but also to a Dropbox folder, Google Drive, etc.
And to set up real-time backup of Office 365 OneDrive accounts you basically need to create backup sync pairs (backup sync pairs are basically definition how to backup certain users) which will backup each of your users’ OneDrive account to a dedicated folder. For example, something like this:
Office365 OneDrive (bob@acme.com)   -> Amazon S3/Backup_bucket/Office365 OneDrive (bob@acme.com)
Office365 OneDrive (alice@acme.com) -> Amazon S3/Backup_bucket/Office365 OneDrive (alice@acme.com)
Office365 OneDrive (tom@acme.com)   -> Amazon S3/Backup_bucket/Office365 OneDrive (tom@acme.com)
Office365 OneDrive (jen@acme.com)   -> Amazon S3/Backup_bucket/Office365 OneDrive (jen@acme.com)
...
And here are step-by-step instructions how to achieve that:
Office 365 preparation:
- OneDrive Business accounts have to be fully provisioned. cloudHQ will not provision Office 365 OneDrive Business accounts on your behalf. This means that each of your Office 365 users needs to log in at least once to their OneDrive Business account.
- Your Office 365 admin needs to be added as an admin to users’ personal websites.
The instructions are here: https://support.cloudhq.net/how-to-enable-admin-access-to-all-office-365-onedrive-users. - Please wait as it will take some time to propagate ownership changes.
Amazon S3 preparation:
Before we start cloudHQ wizard to backup of your Office365 One Drive Business accounts we need first to create appropriate Amazon S3 bucket, Amazon AWS IAM user, and if needed configure Amazon Glacier policies for your backup bucket.
- Create Amazon S3 bucket which store your backups.
If you are looking for Amazon S3 encrypted backups then you will need to attach AWS policy which will enforce AWS server-side encryption. The instructions are here: https://support.cloudhq.net/how-to-enforce-aws-server-side-encryption-on-your-amazon-backup-bucket/
- Create Amazon AWS IAM user which will own this backup. Some instructions are here: https://support.cloudhq.net/how-to-create-amazon-iam-user-for-cloudhq-sync-backup-to-amazon-s3/
- Optionally, you can set up Amazon S3 to Amazon Glacier archiving rules. Some instructions are here: https://support.cloudhq.net/how-to-setup-archive-to-amazon-glacier/
Authorize your Amazon S3 account
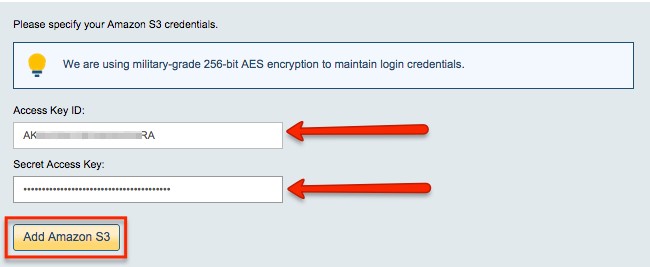
The next step if to authorize AWS IAM user which will write your backups with cloudHQ. To do that you must know an access key ID and a secret access key of that Amazon AWS IAM. If you don’t know what that is, please check here: https://support.cloudhq.net/how-to-figure-out-your-access-key-id-and-secret-key-in-amazon-s3/.
- Go to https://www.cloudHQ.net/services and click on the “Amazon S3” icon:

- Authorize your Amazon S3 account:
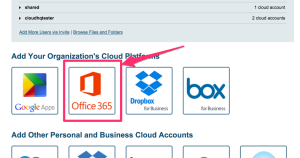
Authorize cloudHQ to access your Office 365 domain
- Go to https://www.cloudHQ.net/services and click the “Office 365” icon:
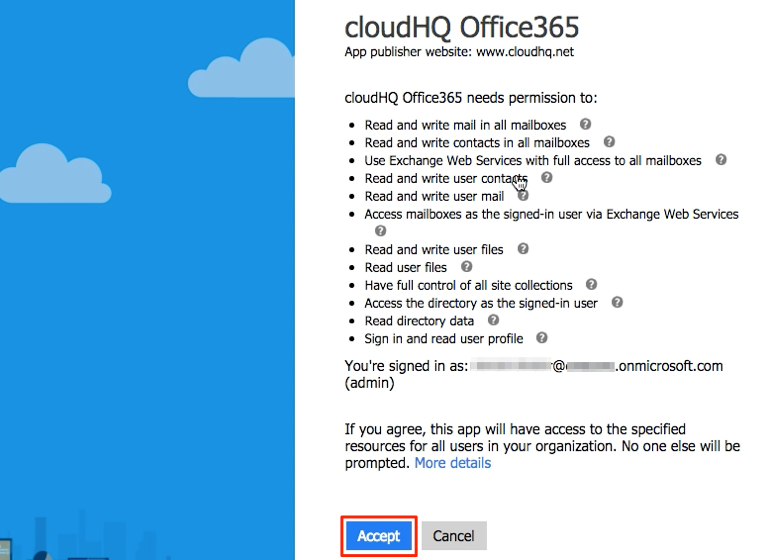
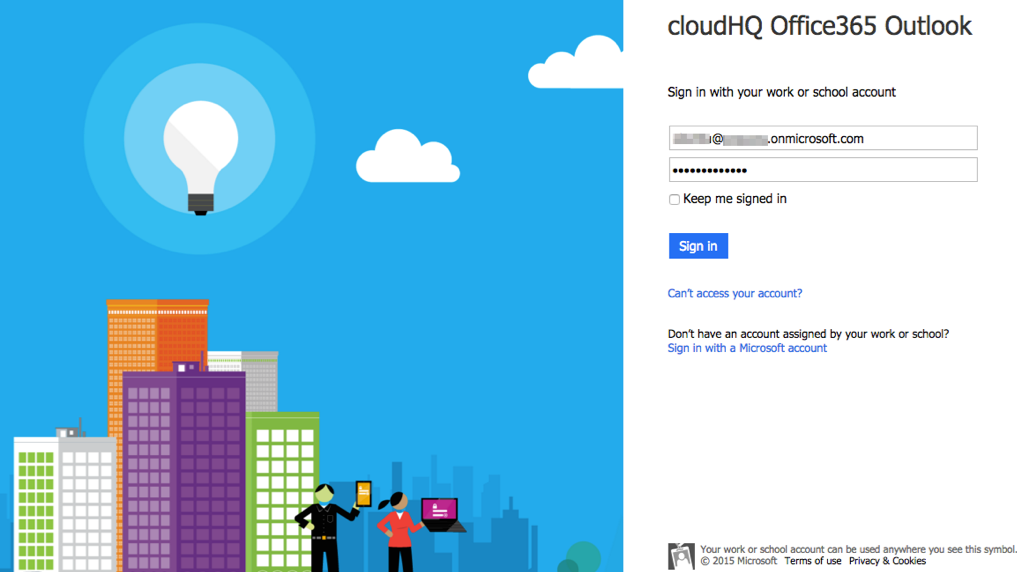
- Accept Office 365 authorization:

Set up backup sync pair between OneDrive for Business and Amazon S3
- Go to https://www.cloudhq.net/multi_setup_wizard?prompt_auth=true:
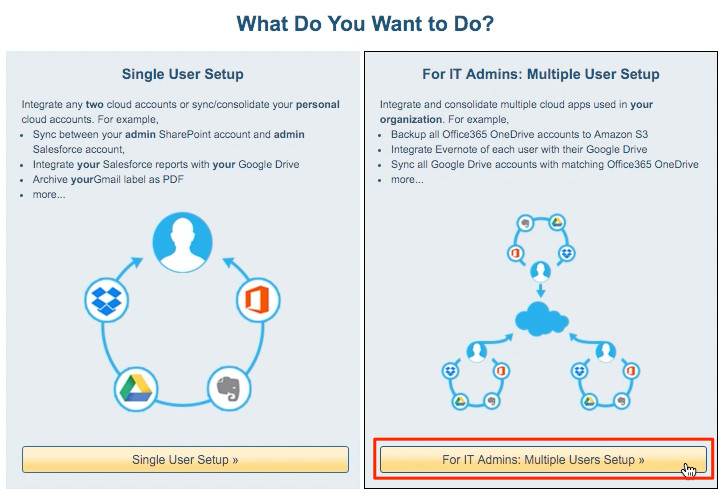
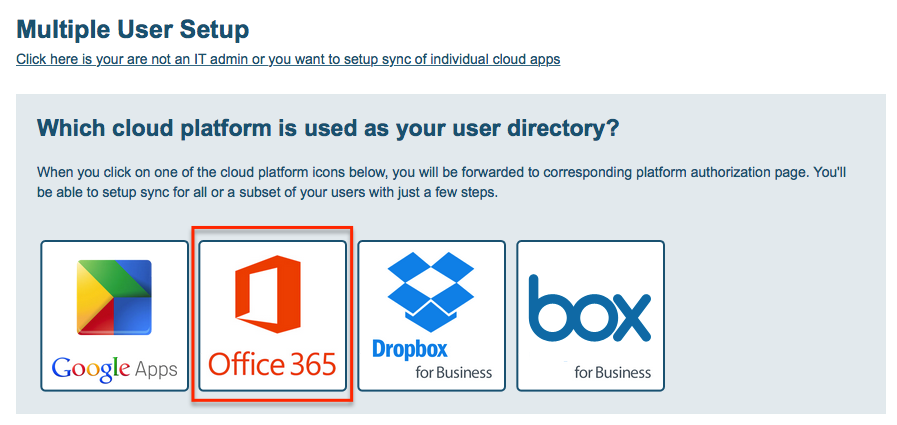
- Select “Office 365” as your Organization’s cloud platform:
- Click the “OneDrive for Business” icon or drag the icon to the left empty box to select it as your backup location:

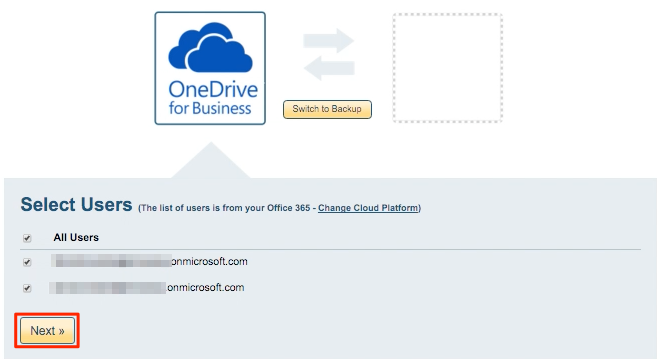
- Select the users accounts whose apps you want to sync. cloudHQ will get a list of users from Office 365 and ask which users you want to sync:
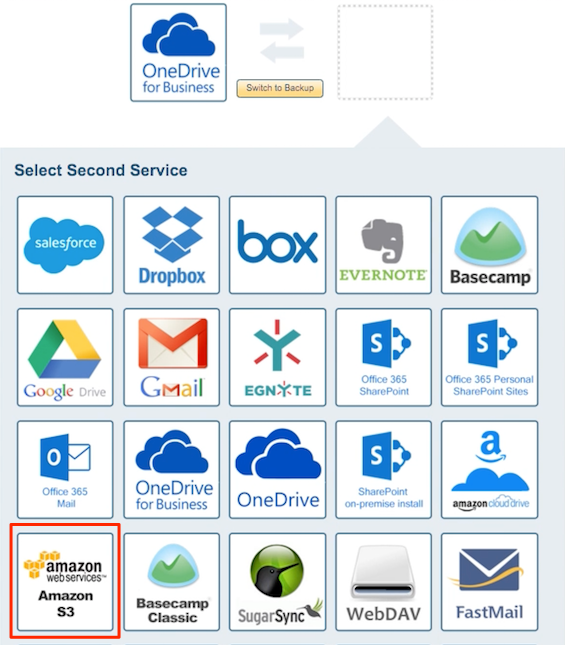
- Click the Amazon S3 icon or drag the icon to the right empty box to select is as your backup location:
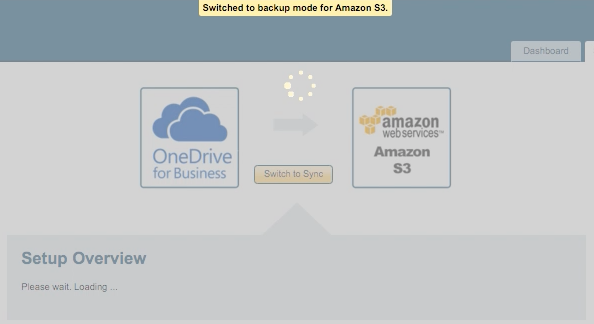
- Please note that the sync will automatically switch to backup:
- Click the folder/bucket where you want to create a backup:

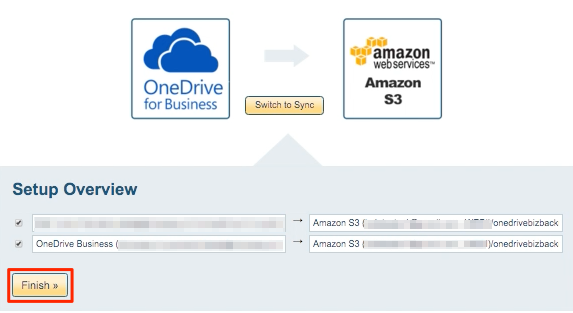
- Verify sync pairs and click “Finish”:
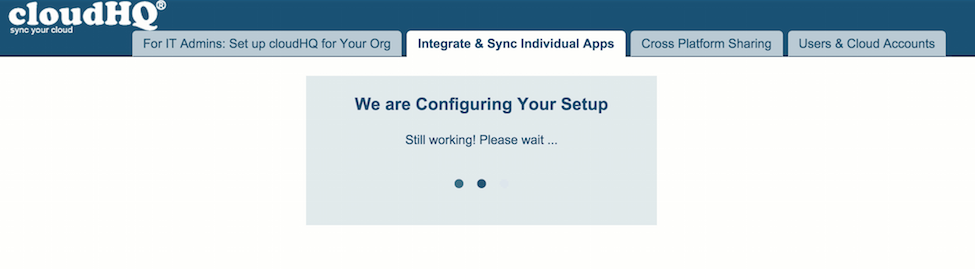
- Configuration will be done by cloudHQ:
- Synchronization pairs will be automatically done by cloudHQ:
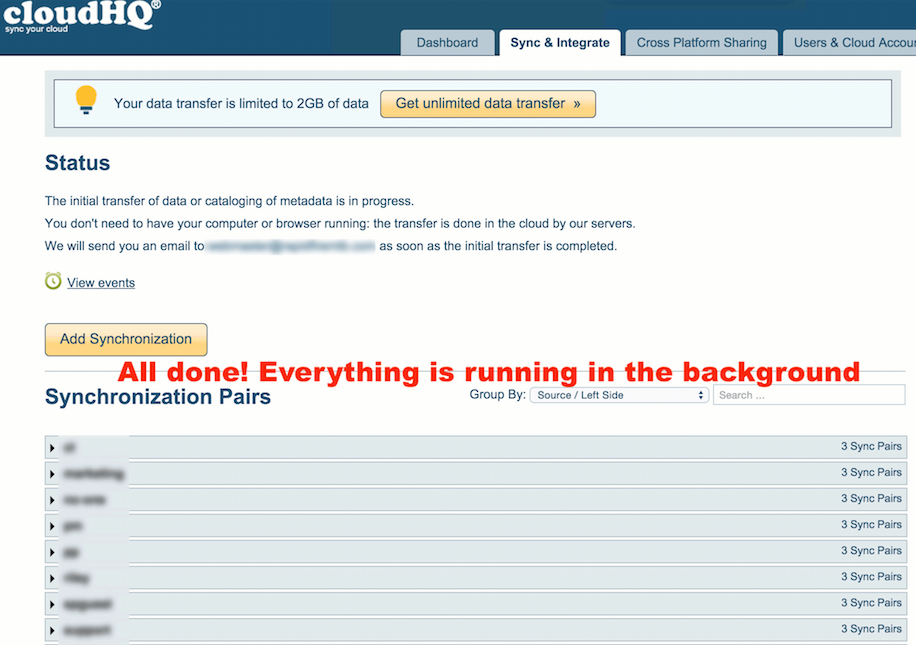
- Synchronization will start. Here is How to Monitor Status of Sync