By default, Office 365 is set up in such a way that the admin has no access to user files stored in users’ Office 365 OneDrive Business accounts.
So in order to allow Office 365 admin to sync or backup users’ Office365 OneDrive Business accounts, you will need to configure Office 365 Sharepoint to allow impersonation for Office 365 OneDrive Business.
There are two options you can use:
Option 1 – Manually configure each user account from within the Microsoft SharePoint Admin Center. If you have only a few users, this is the easiest method.
Option 2 – Run a SharePoint Online Management Shell script to automatically apply the proper permissions to each user account; this is preferred and the fastest. If you have multiple users, this is also the easiest method.
Manually configure each user account
Here is how to manually configure each user account from within the Microsoft SharePoint Admin Center.
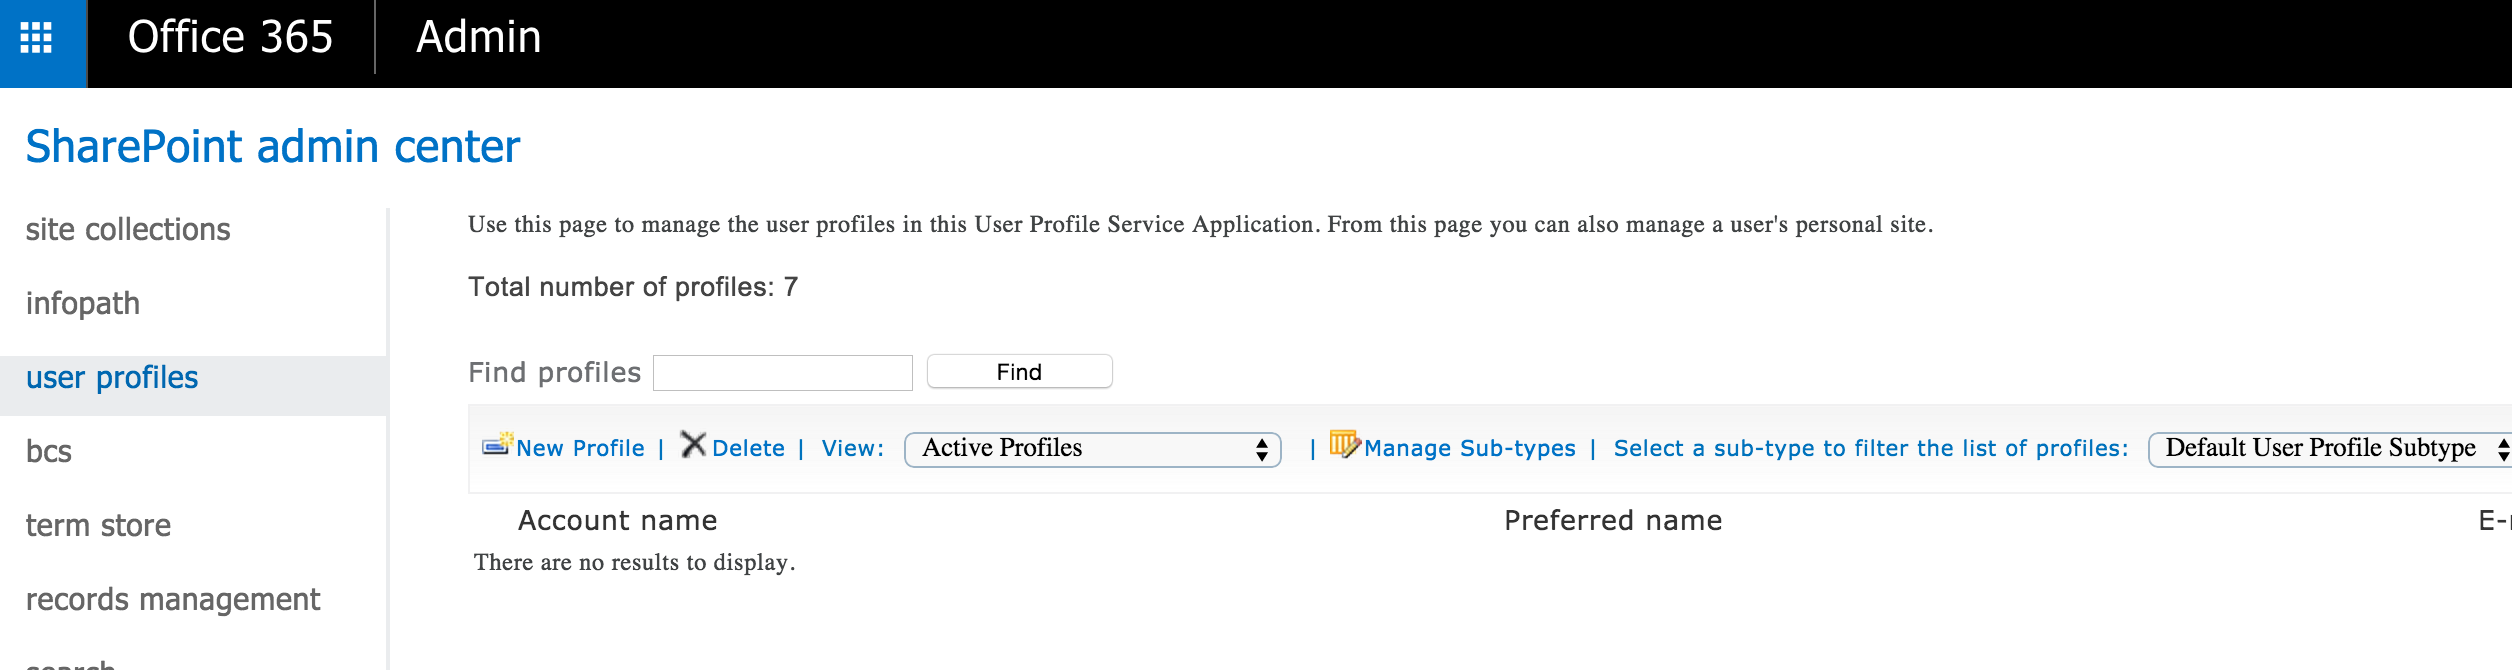
- Go to your SharePoint Online Admin Center » Manage User Profile:
- For each user, do the following:
- Enter the username into “Find profiles,” then click “Find“:
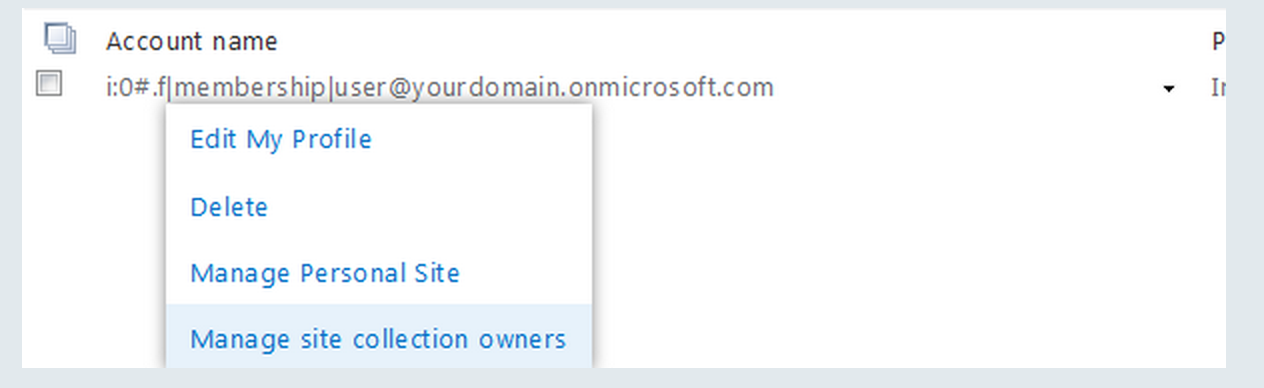
- There will be an entry (like i:0#.f|membership|<yourdomain>.onmicrosoft.com) in a list. Right-click it and select “Manage site collection owners“:
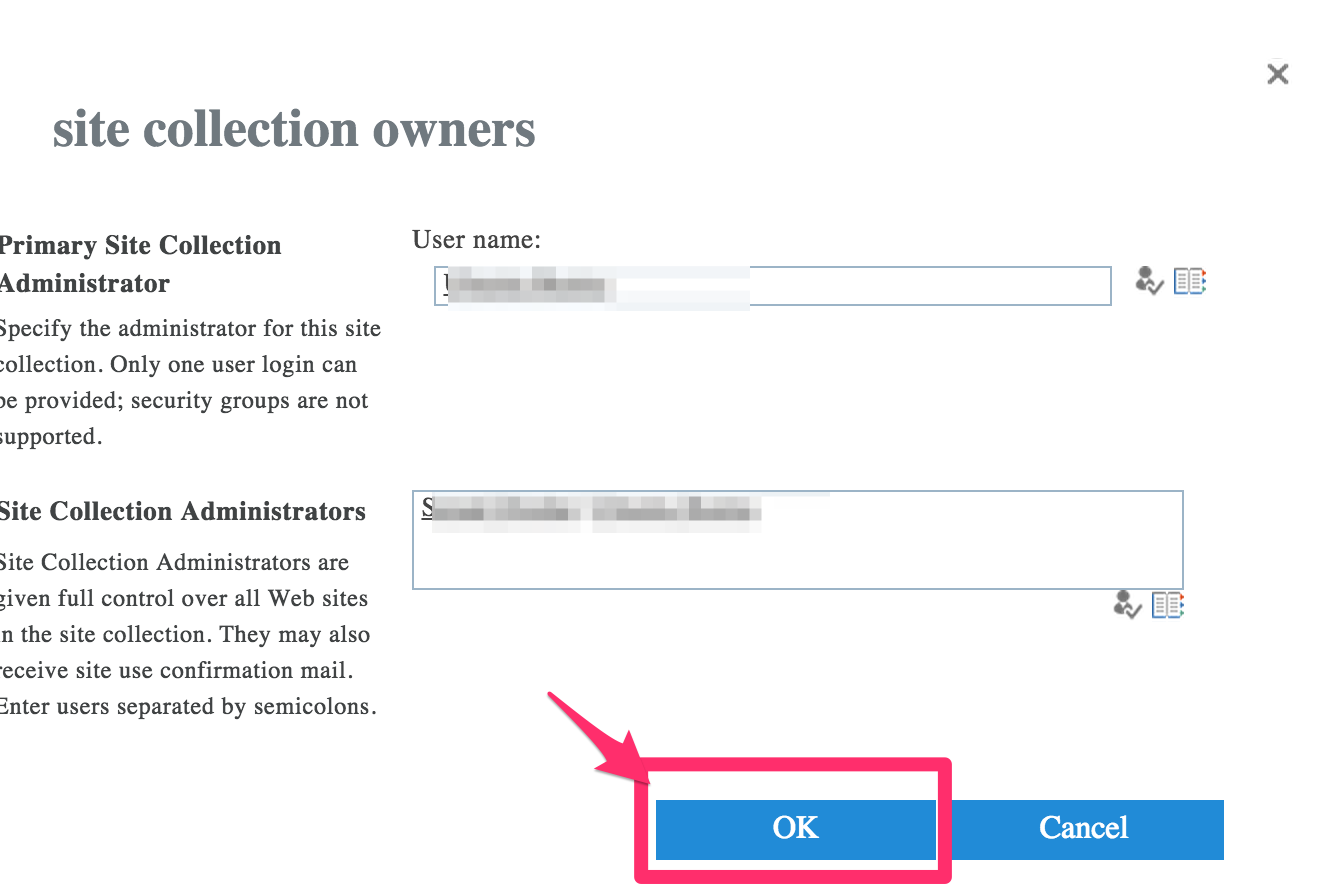
- A modal window will be shown. Under the “Site Collection Administrators” section, enter your admin username, then click the “Check Names” icon (the user icon with the checkbox):
- Click the blue “OK” button to add yourself as a co-owner of the user’s OneDrive:
- Repeat this step for all users.


Run a SharePoint Online Management Shell script
You can run a SharePoint Online Management Shell script to automatically apply the proper permissions to each user account; this is the preferred and fastest. If you have multiple users, this is also the easiest method.
- Install PowerShell client: https://www.microsoft.com/en-gb/download/details.aspx?id=35588
- Download and open the AdminRights.ps1 script using a text editor such as Notepad.
- Navigate to and edit the following four variables:
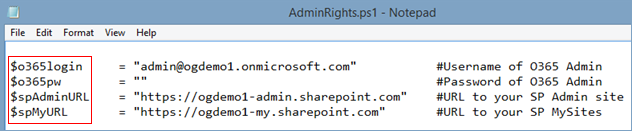
$o365login – Replace with your Office 365 service account or administrator account username.
$o365pw – Replace with your Office 365 service account or administrator account password.
$spAdminURL – Replace with the same URL used in your organization’s OneDrive URL, but suffixed with -admin
$spMyURL – Replace with the same URL used in your organizations’ OneDrive URL, but suffixed with -my - Save and close the script.
- Locate the SharePoint Online Management Shell installed in Step 1, then right-click and click Run as administrator.
- Change your working directory within the SharePoint Online Management Shell to the location where you saved the AdminRights.ps1 script:

-
Run the following command:
Set-ExecutionPolicy Unrestricted

-
Run the following command to run the AdminRights.ps1 script:
.\AdminRights.ps1
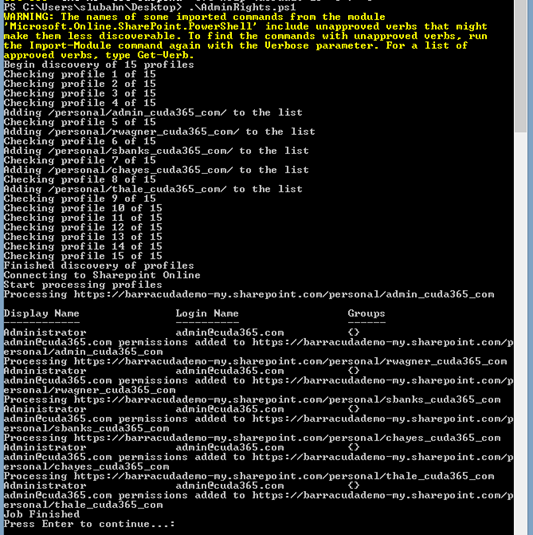
- Press Enter to exit the script.
- Exit SharePoint Online Management Shell.