cloudHQ can automatically backup all email messages to your cloud storage.
This support note explains how to automatic save of emails which part of a label to your cloud storage with our web interface.
If you do not have Gmail label configured and you want that Gmail automatically classifies your emails into Gmail labels the please check the following support note: https://support.cloudhq.net/how-to-organize-gmail-files-into-labels-and-sync/
Here are short instructions on how to set up a backup of a Gmail label to a folder in your cloud storage.
- Start the synchronization wizard to sync two cloud accounts:
- Click the Gmail icon:
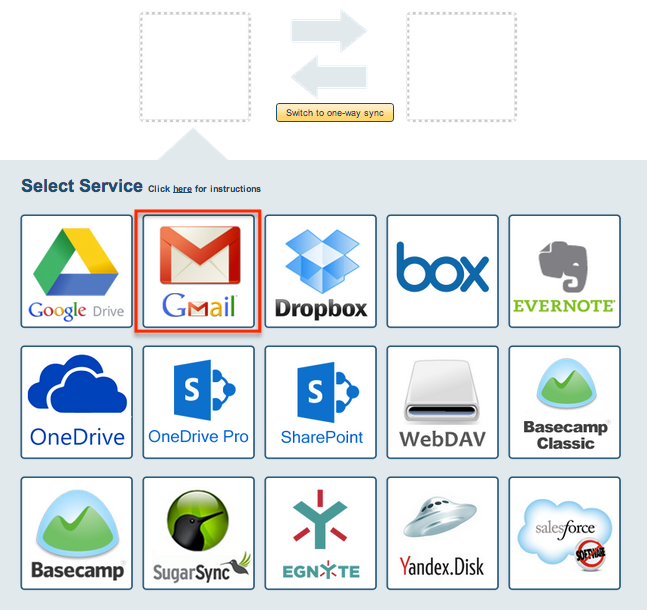
- Select an already-configured Gmail account or click “Add Gmail” to add a new Gmail account:

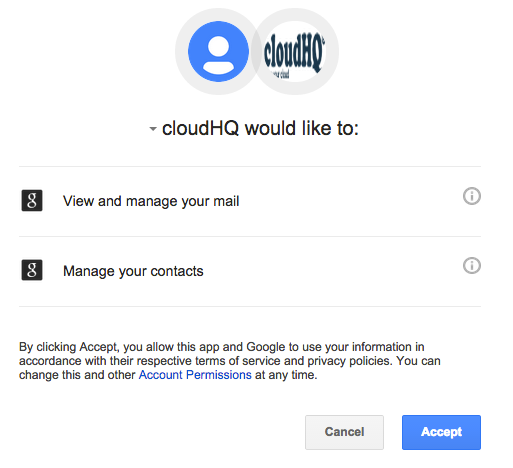
- If you click “Add Gmail,” you will be forwarded to authorize cloudHQ to access your account:
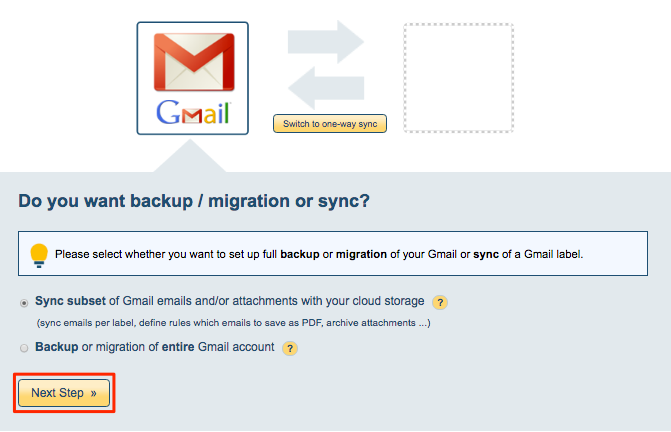
- Select “Sync subset of Gmail emails and/or add attachments with your cloud storage” then click “Next Step”:
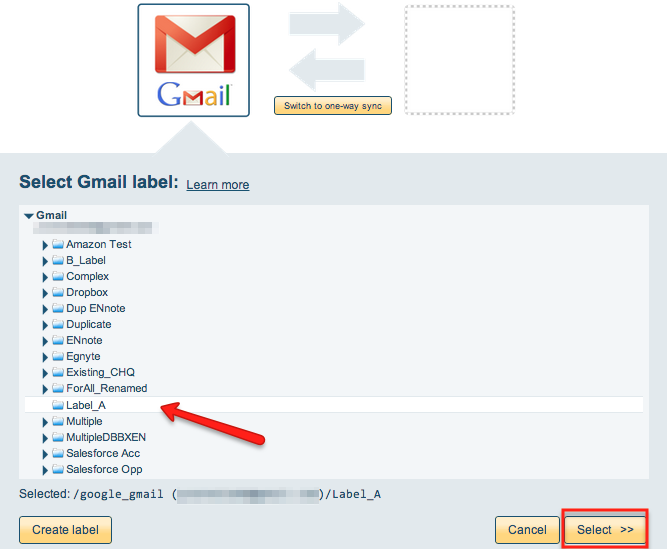
- Selected “Save (sync) all emails in selected label” then select a Gmail label to sync or click “Create label” to create a new Gmail label:
- Click on your the icon of your cloud storage. In this example, we will use Google Drive, so lets click the Google Drive icon:
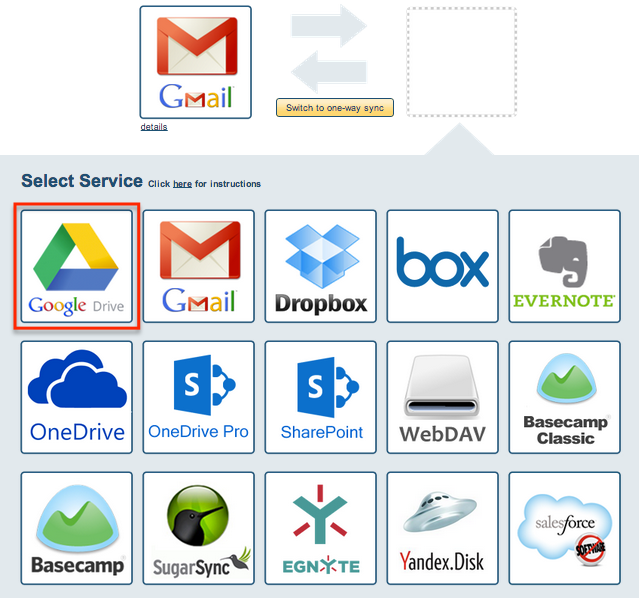
- Select an already-configured Google Drive account or click “Add Google Drive” to add a new Google Drive account:

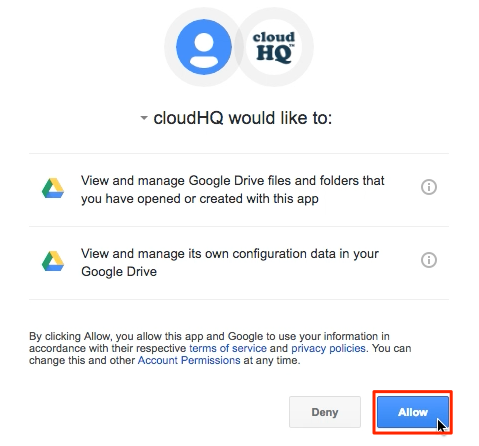
- If you click “Google Drive,” you will be forwarded to authorize cloudHQ to access your account:
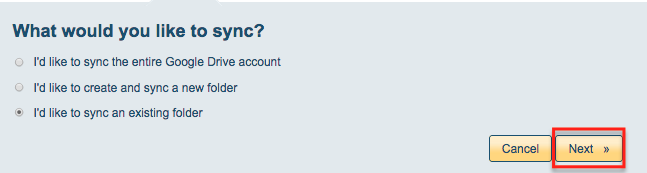
- Select what you’d like to sync, then click “Next”:
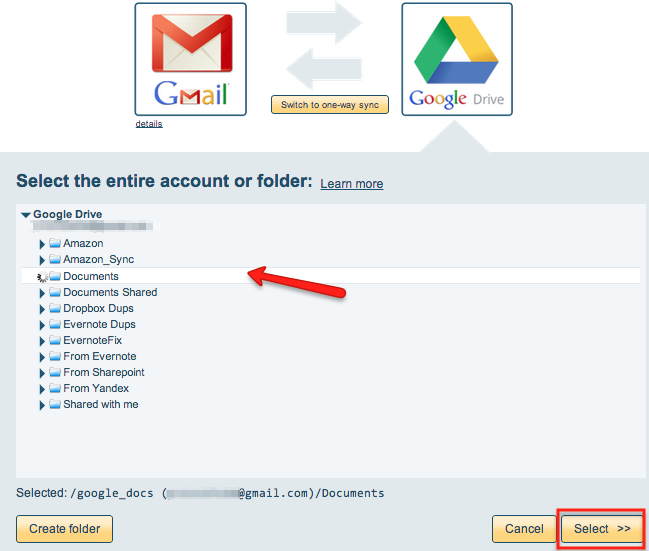
- Select the Google Drive folder you want to sync or click “Create Folder” to create a new one:
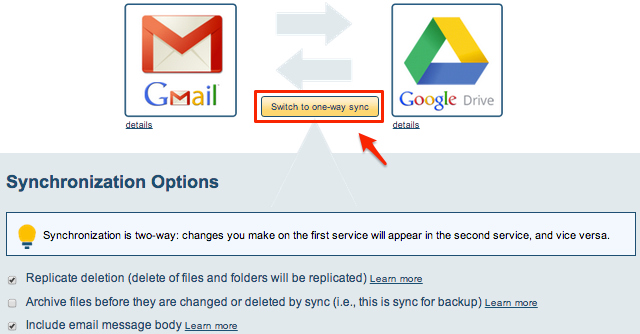
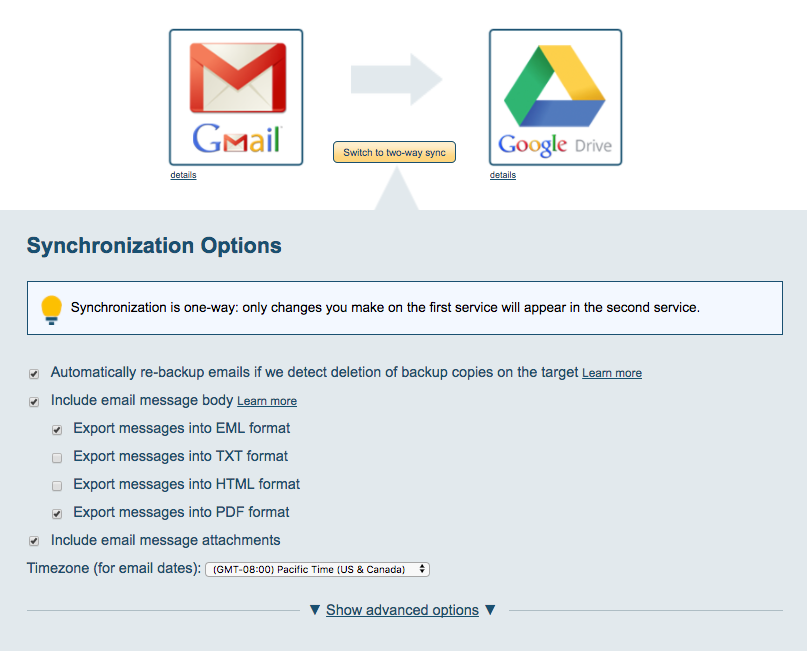
- Clik on the “Switch to one-way sync” so that this is a backup sync pair:
Then choose your sync options. For backup, you should enable export email in EML format.
- The synchronization status will display after the initial synchronization.
- Here is How to Monitor Status of Sync.
- An email will confirm the success of the initial synchronization.