cloudHQ can automatically save emails (or just attachment of emails) which are part inside your label to your cloud storage in PDF, HTML or TXT format. Here are steps for how to organize Gmail files into labels, then sync them in cloudHQ.
The idea here is that you might want to save messages from your Gmail label to a folder in Box, Dropbox, etc.
So to classify Gmail emails into labels and then setup sync (autosave) of emails in that label, you’ll need to:
- Create a Gmail filter that will identify emails that match certain criteria.
- Tell Gmail to add any email matching your criteria to a dedicated Gmail label.
- Setup sync (autosave) of that label using cloudHQ.
Here is the-step-by step procedure:
- Log into your Gmail Account
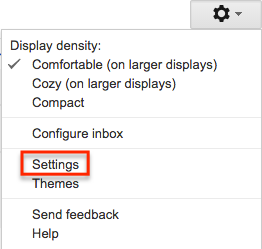
- Click the gear icon
 on the top right.
 - Select Settings:
- Click the “Filters” tab:

- Click “Create a new filter”:

- In the “Has the words” section, type the kind of file you want to filter separately in this format: filename:kind of file
For example, document files: filename:doc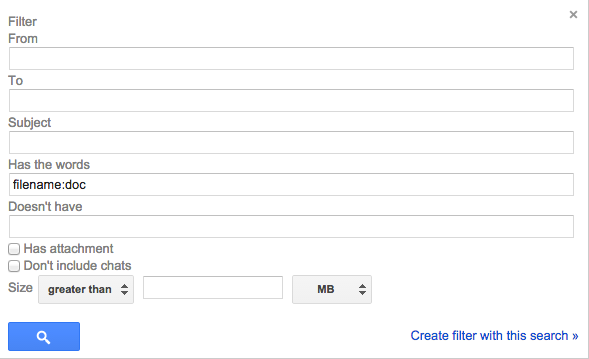
Or, if you want only emails with attachments, select the “Has attachment” option:

Note: For Microsoft 2007 files or later versions, use docx, pptx, xlsx
If you want to append another filter, use OR
To filter Word files: filename:doc OR filename:docx
To filter PowerPoint files: filename:ppt OR filename:pptx
To filter Excel files: filename:xls OR filename:xlsx
To filter Image files: filename:jpg OR filename:gif OR filename:png
To filter E-book files: filename:pdf OR filename:lit
To filter a combination of files: filename:docx OR filename:pptx OR filename:xlsx
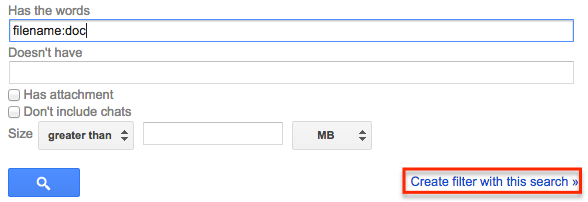
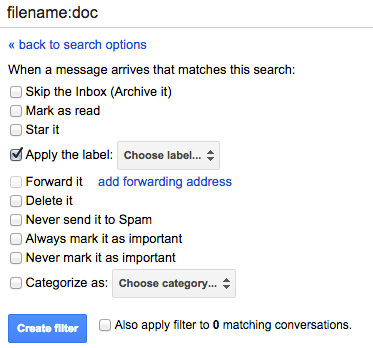
- Click “Create filter with this search.” You’ll be asked to choose an action for the messages containing the filtered attachments:
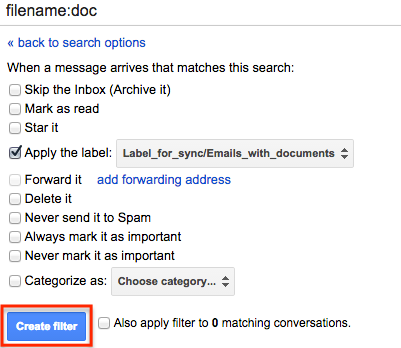
- Check the box next to “Apply the Label.” In the “Choose label” dropdown box, select “New label” to create a new one e.g. Label_for_sync/Emails_with_Documents
- Click “Create filter” and save your filter:
- From the filtered documents label, you can create a sync pair.
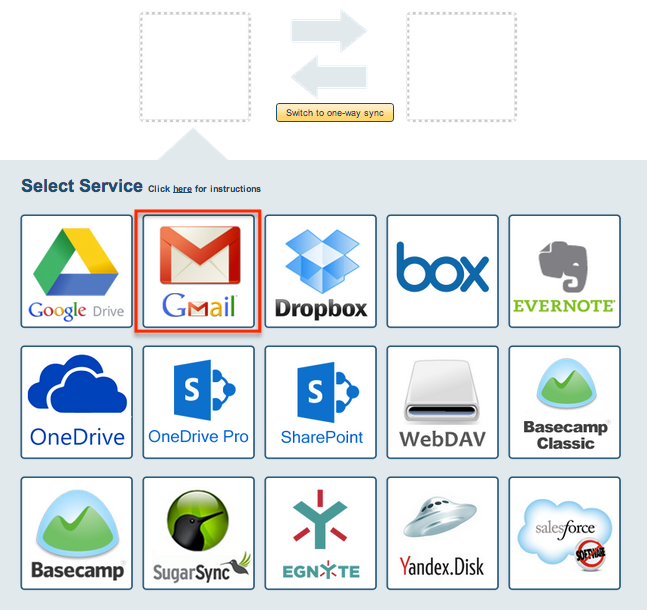
- Go to the Synchronization Wizard.
- Click the Gmail icon:
- Select an already-configured Gmail account or click “Add Gmail” to add a new Gmail account:

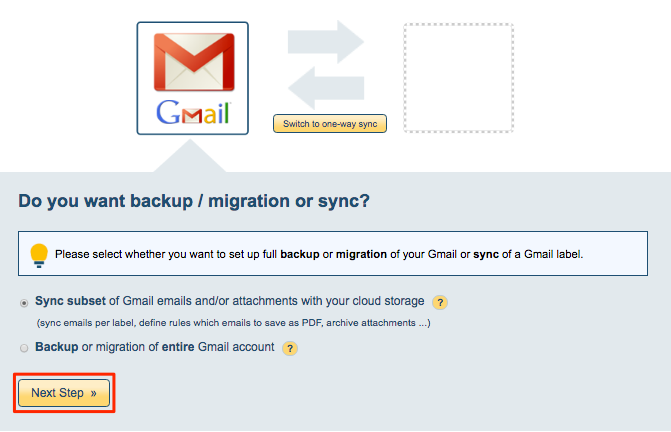
- Select “Sync subset of Gmail emails and/or add attachments with your cloud storage” then click “Next Step”:
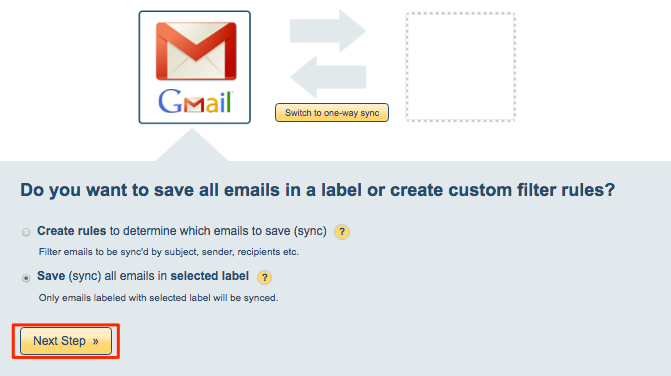
- Now you should choose to sync “Save (sync) all emails in selected label”. Then click “Next Step”:
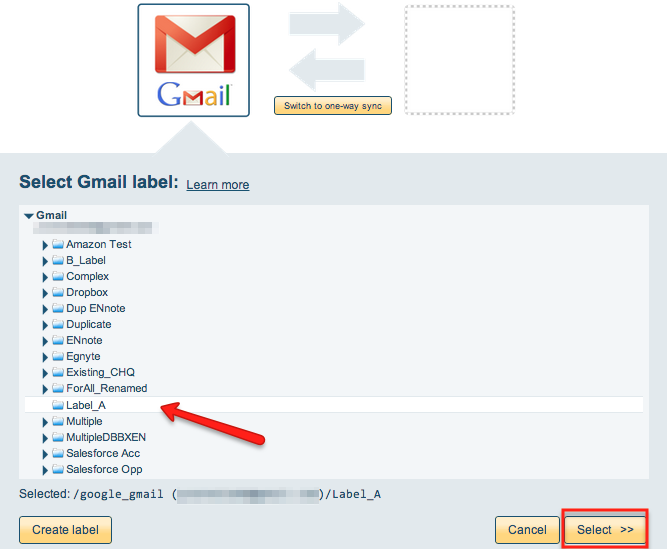
- Select a Gmail label we have created before to sync:
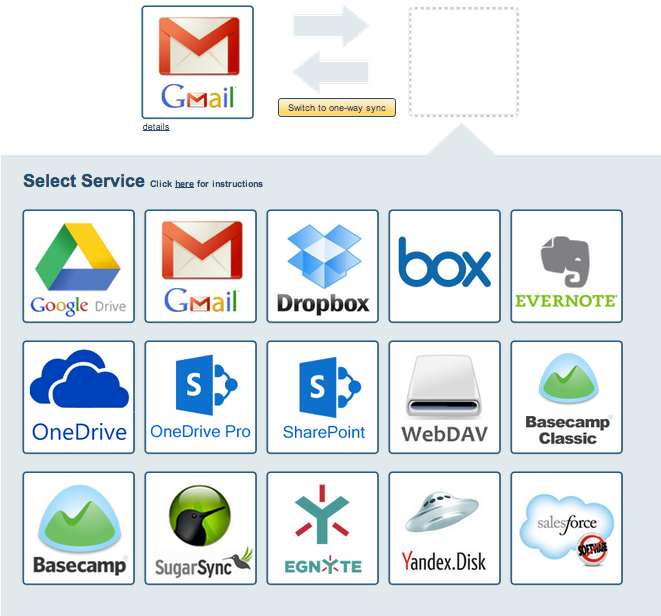
- Click the icon of the cloud service you want to sync with the Gmail label:
- Select the folder where you want to sync the Gmail label.
- Choose your options. Synchronization will start automatically.
- Here is How to Monitor Status of Sync.
- An email will confirm the success of the initial synchronization.
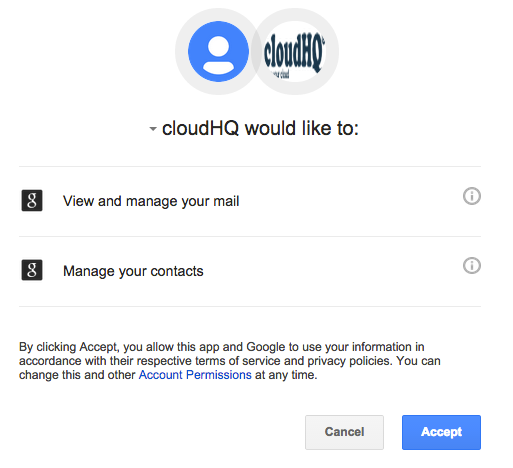
If you click “Add Gmail,” you will be forwarded to authorize cloudHQ to access your account: