Here are short instructions for how to set up synchronization between SharePoint and Dropbox.
NOTE: You must have a cloudHQ Business Plan to add SharePoint accounts using cloudHQ.
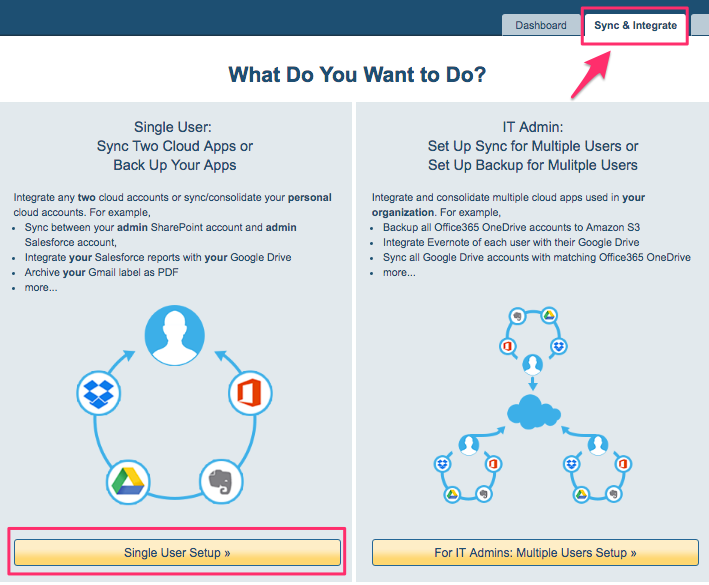
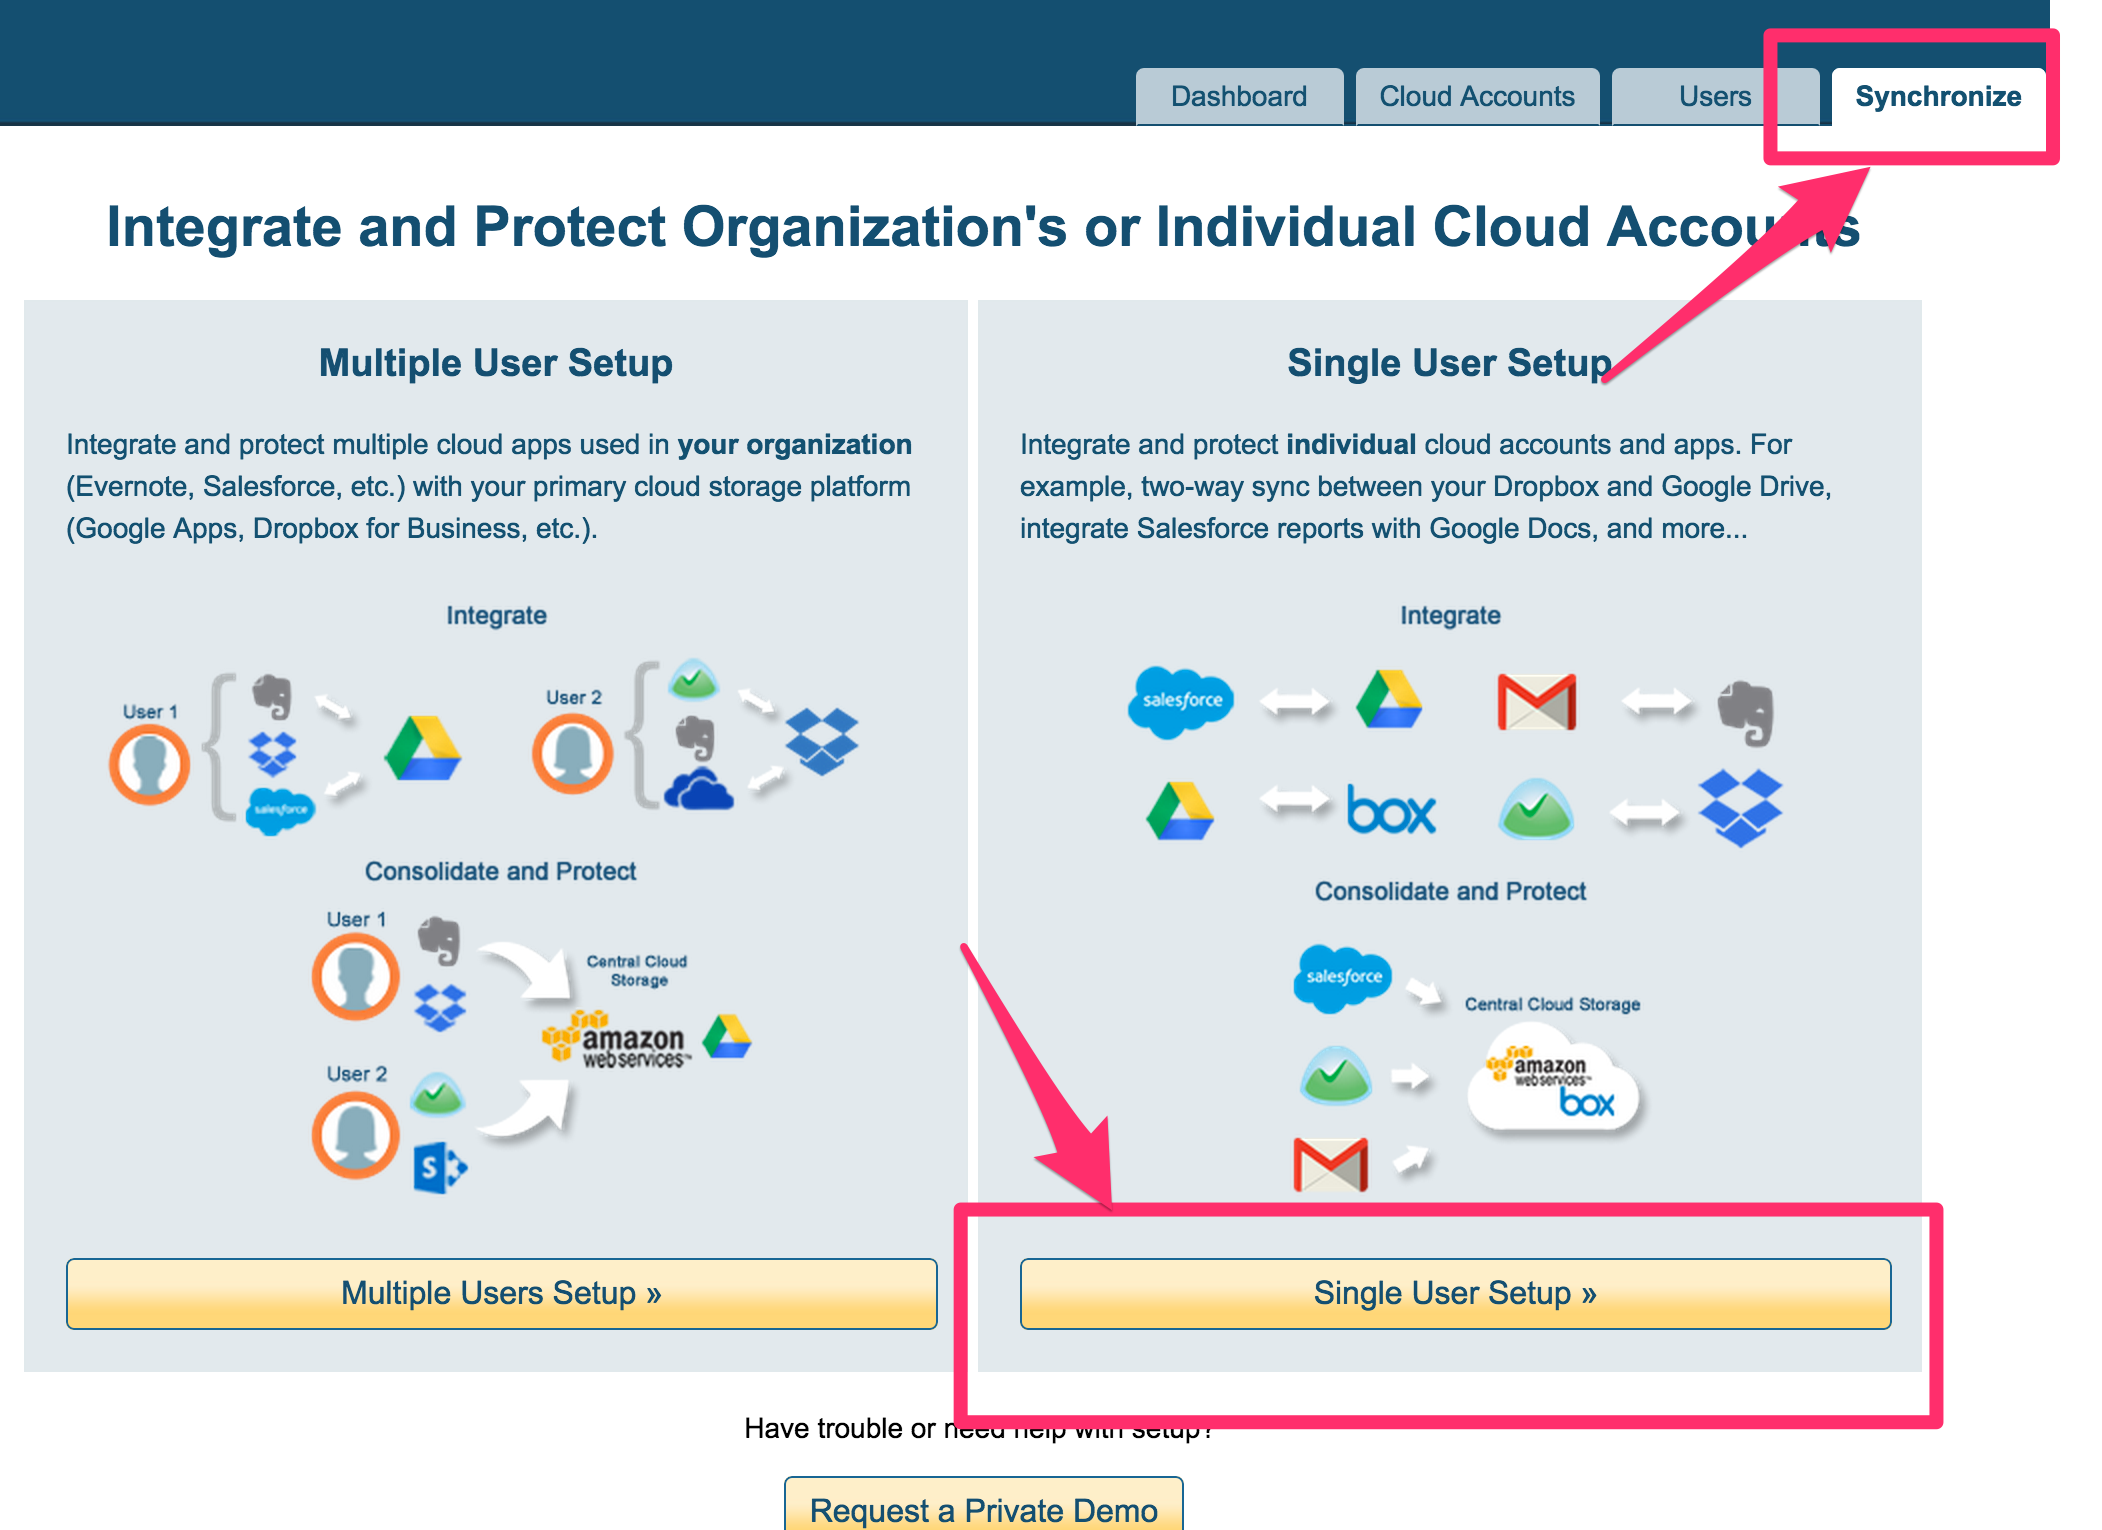
- Click the “Sync & Integrate” tab, then click on “Single User Setup“:
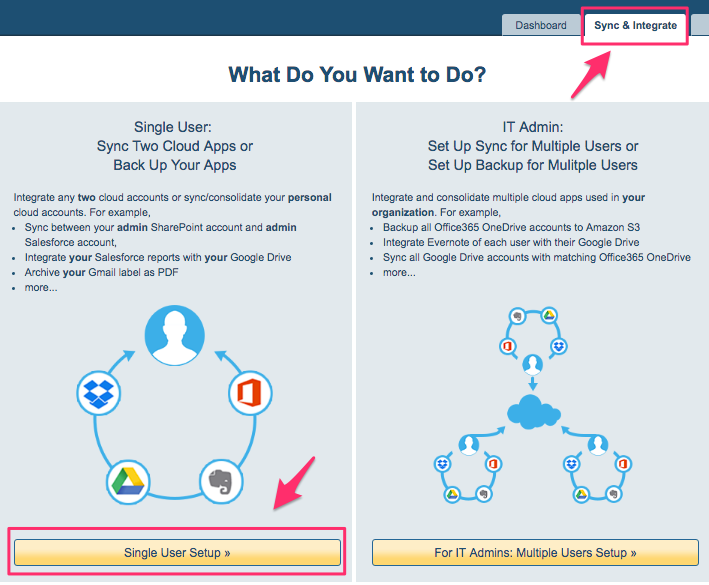
- Click “Single User Setup“:
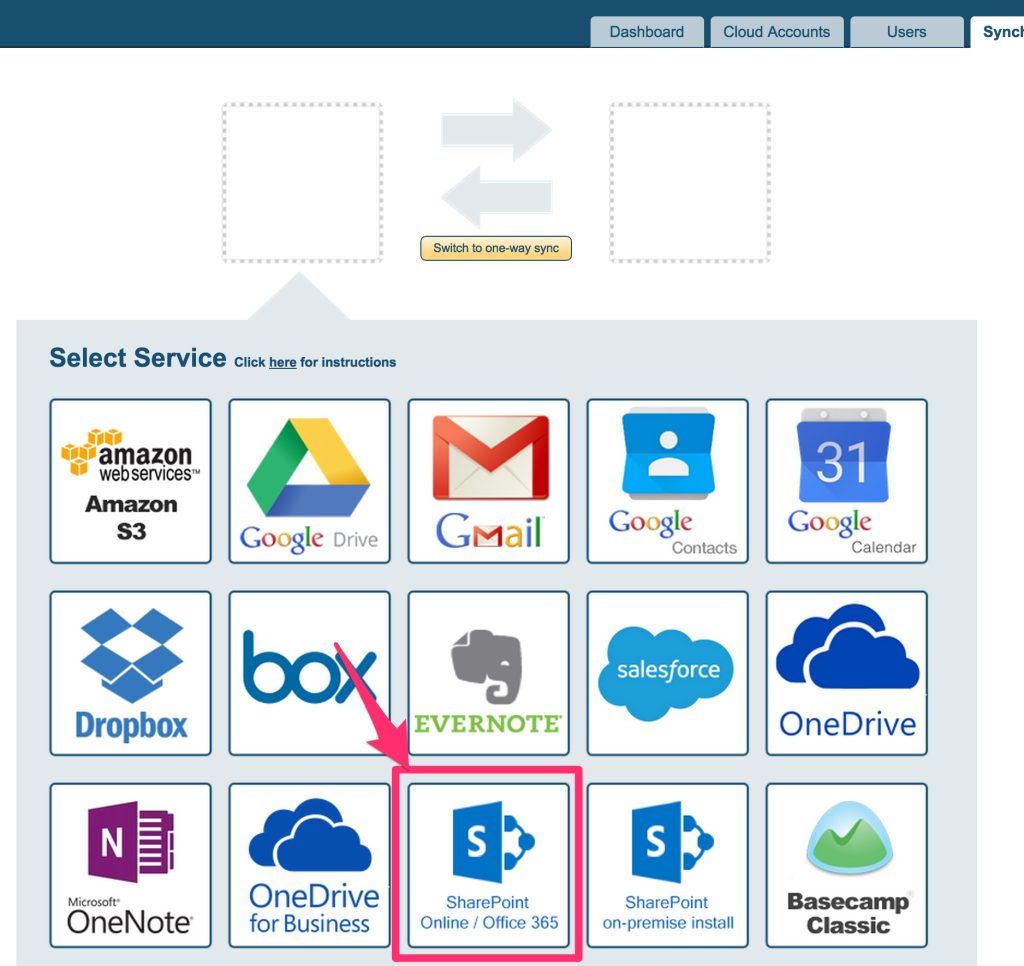
- Click the “SharePoint Online / Office 365” icon:
- Select an already-existing Office 365 SharePoint installation or authorize a new one.
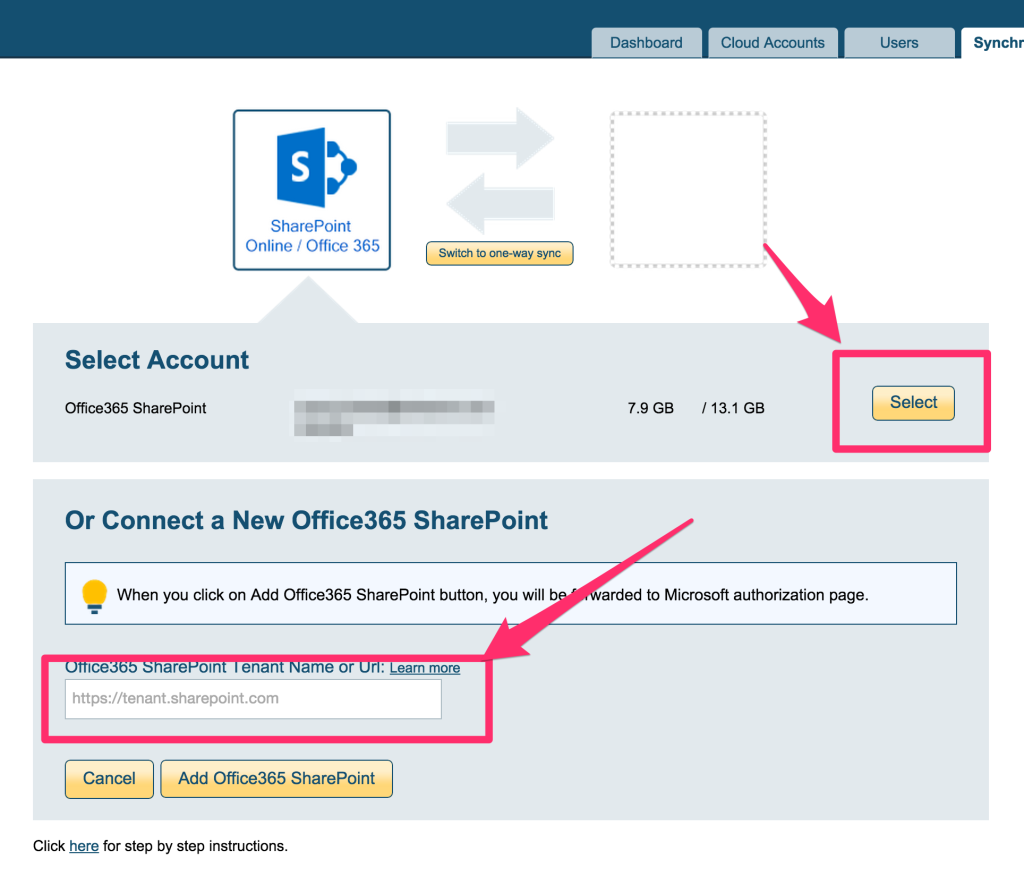
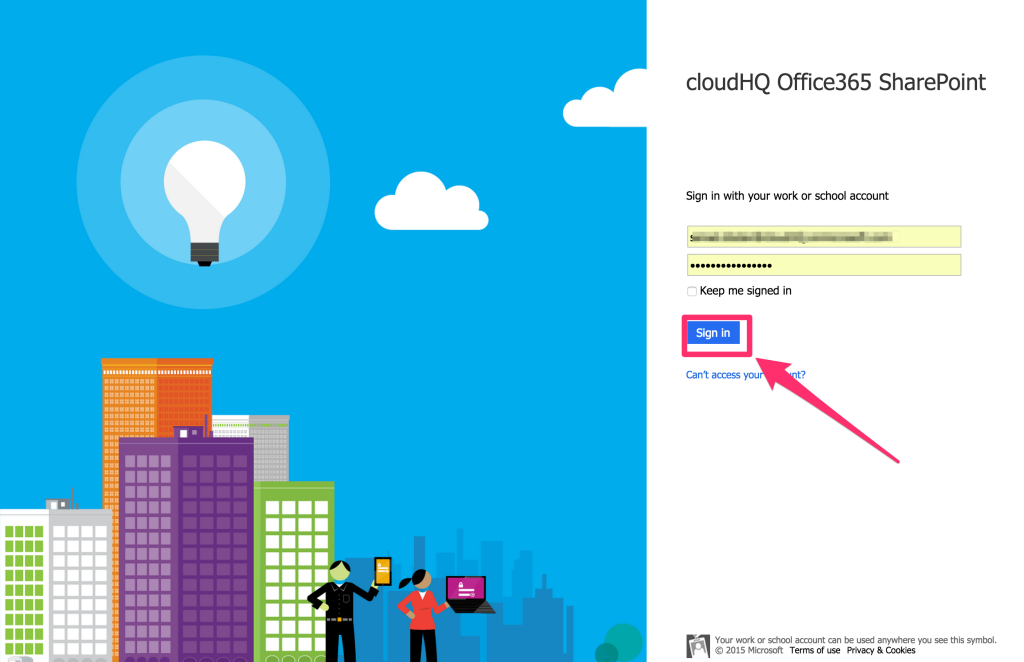
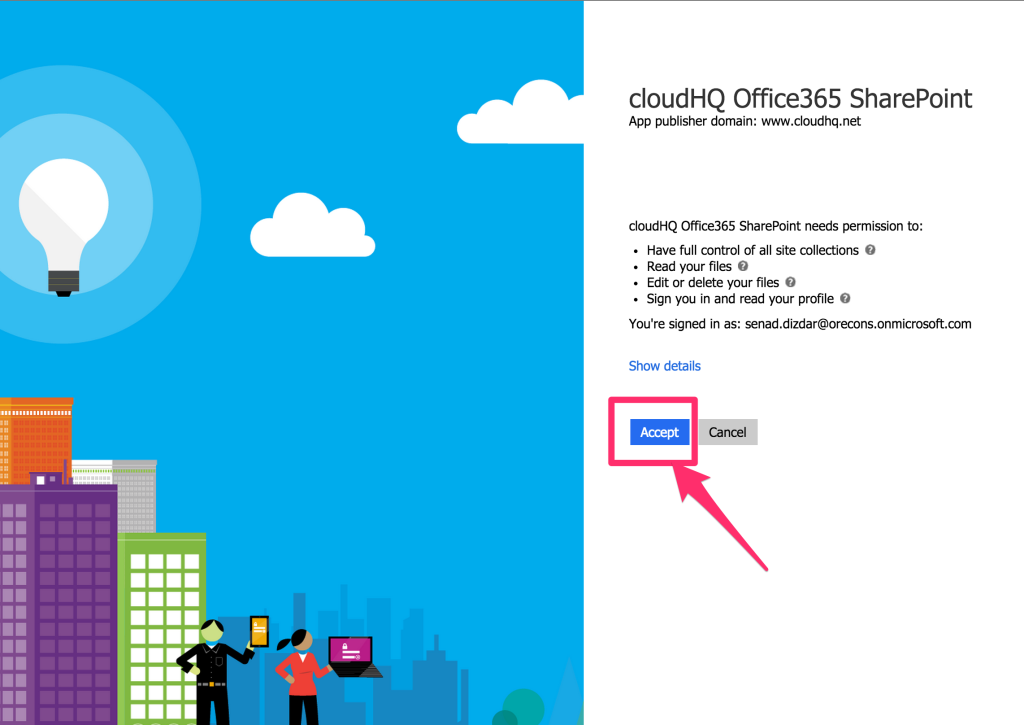
- If you select “Add Office365 SharePoint,” you will be forwarded to the Office 365 website to log in and authorize cloudHQ to access your account:
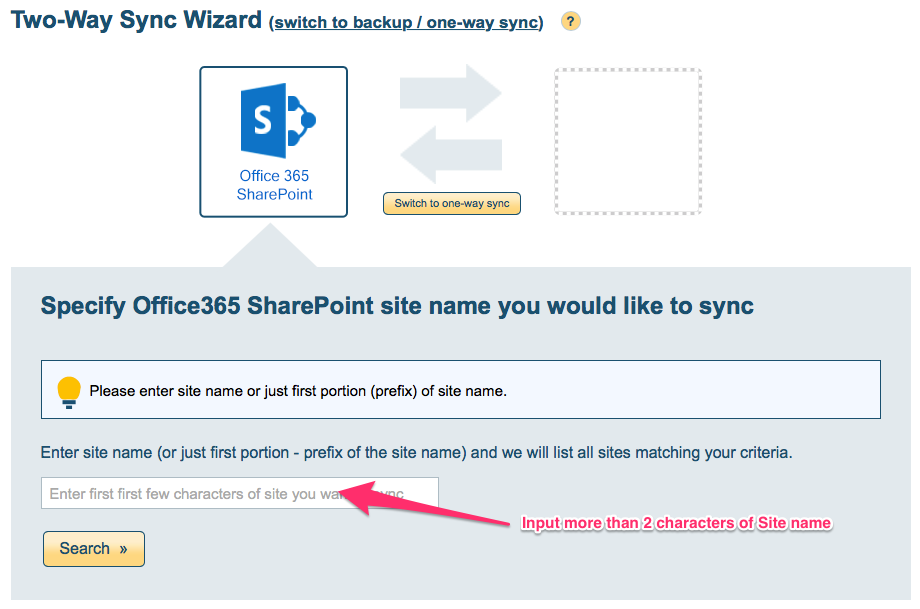
- Search SharePoint site you want to sync. Please type more than 2 characters of site name to search:
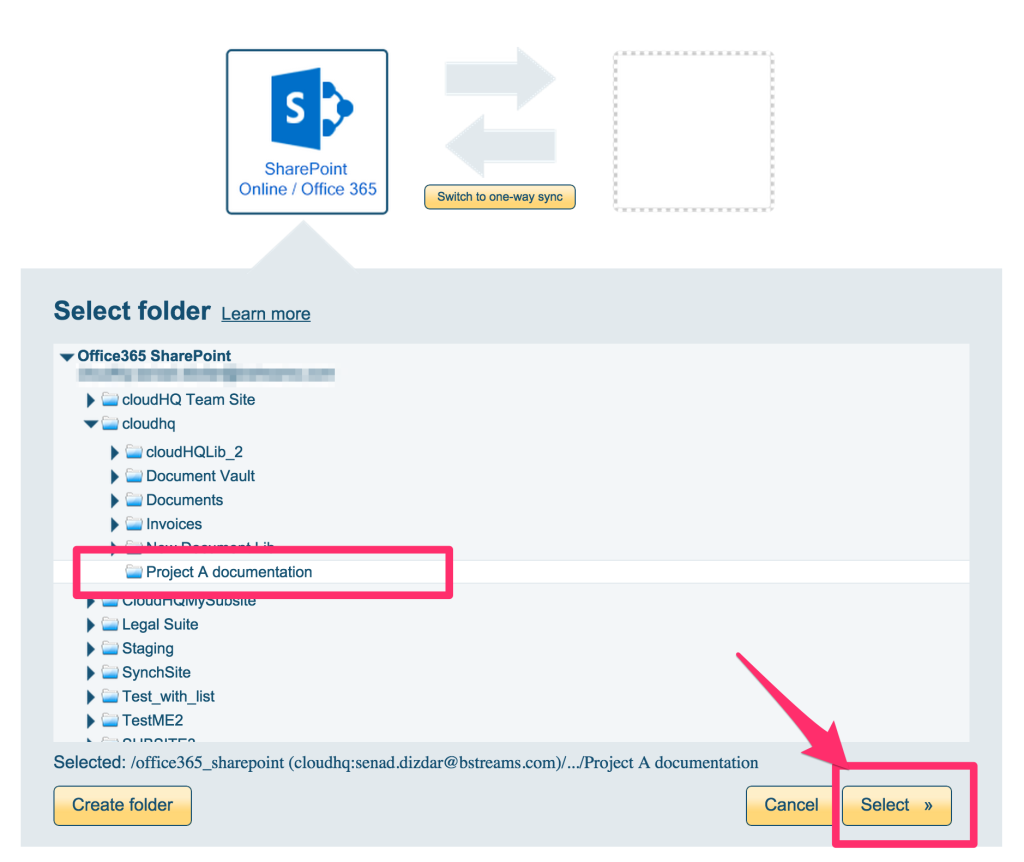
- You can select a SharePoint folder, SharePoint document library, or a SharePoint site to sync. The first folder levels are SharePoint sites, then second folder level represents SharePoint Document Libraries, and the third level represent folders:
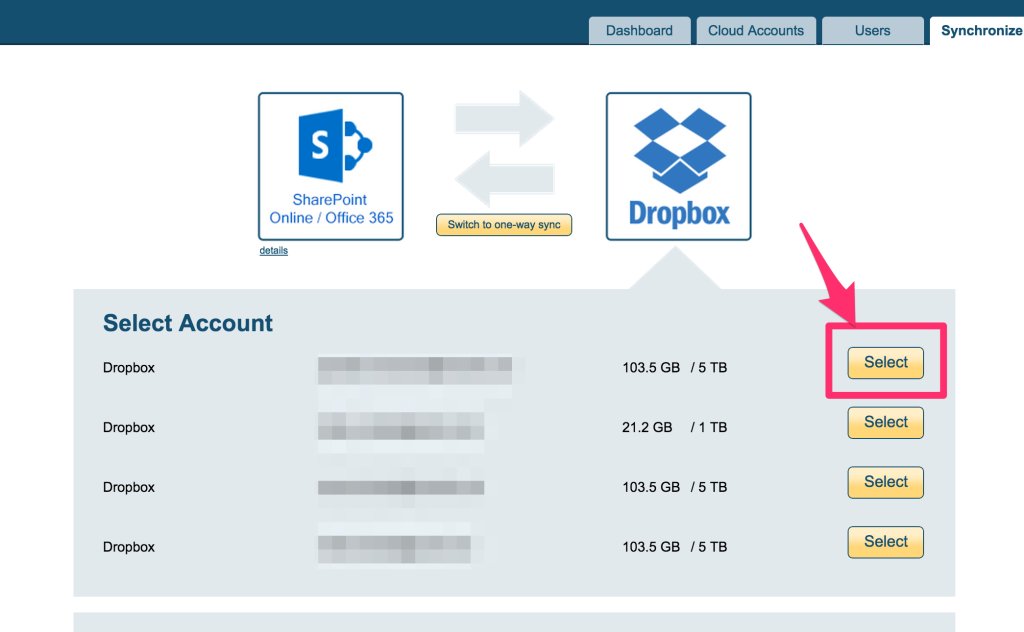
- Click the Dropbox icon and select a Dropbox account:

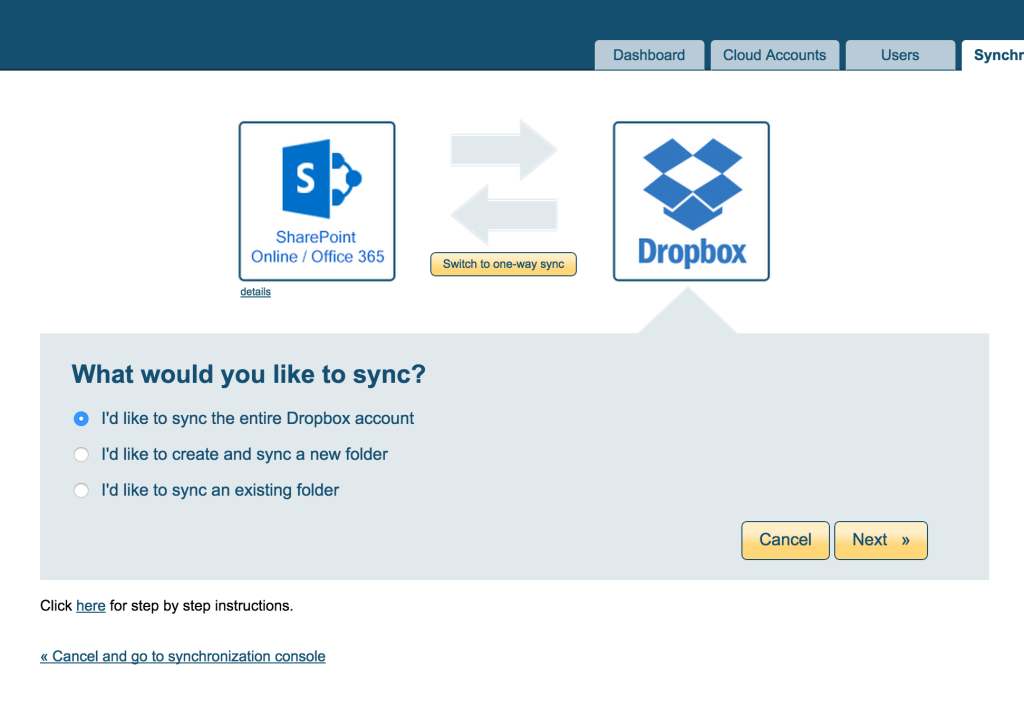
- Select whether to sync all Dropbox folders, create a new folder, or select an existing one:
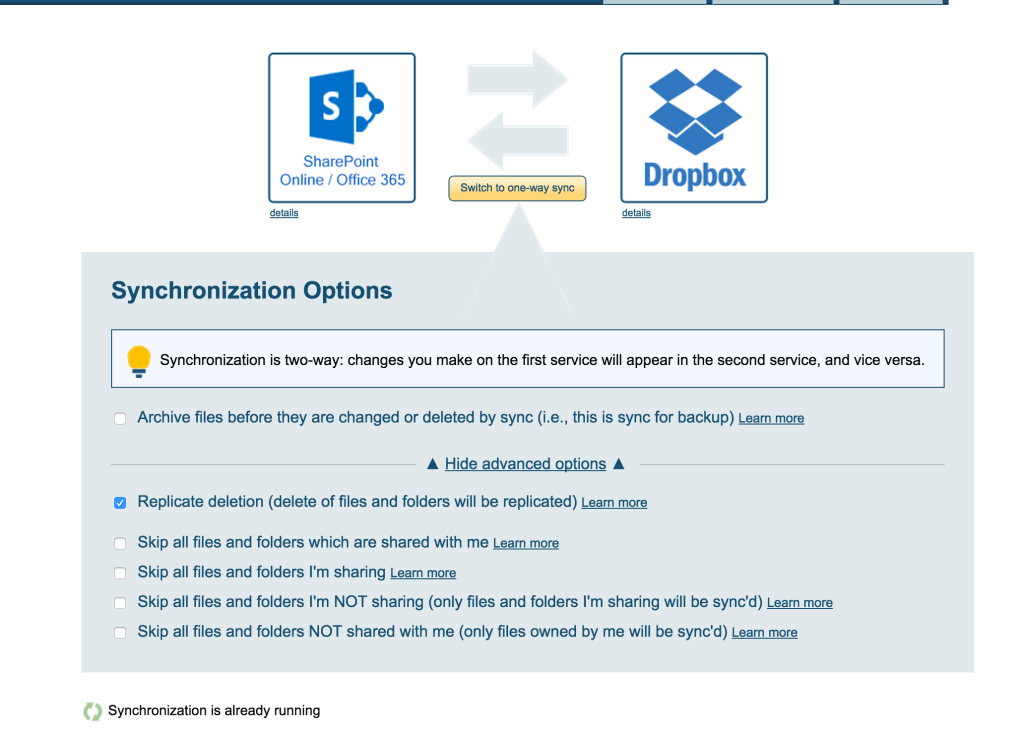
- After you select a Dropbox folder, specify your options:
