Here is how you can save email to OneNote with our chrome extension:
- Install the cloudHQ Chrome browser extension: Save emails to PDF from this location: https://chrome.google.com/webstore/detail/save-emails-to-pdf-by-clo/dngbhajancmfmdnmhhdknhooljkddgnk/.
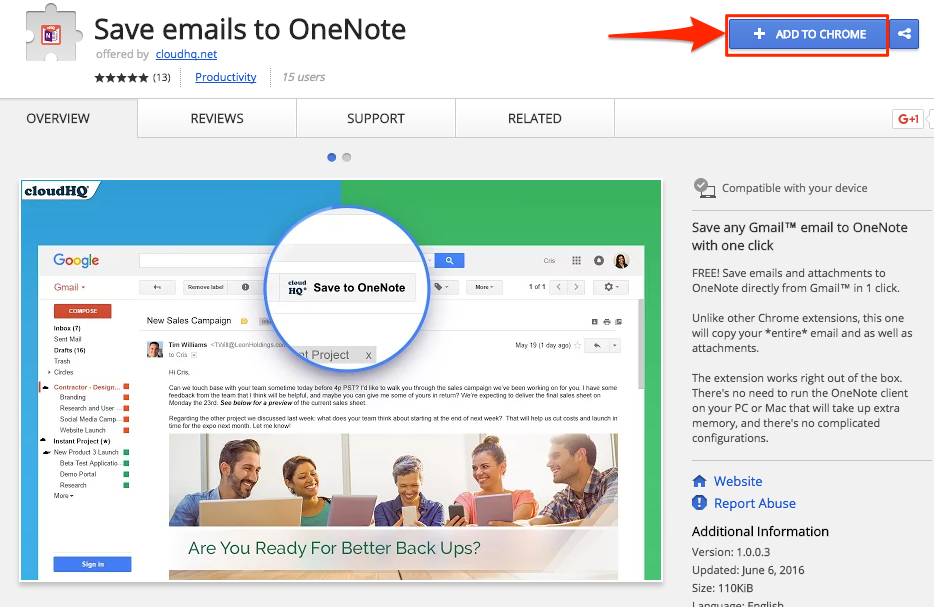
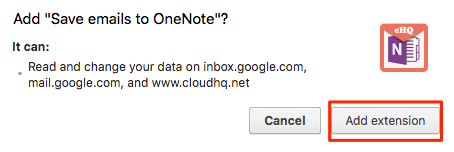
- Add this extension to Chrome so you will have the “Save to OneNote” button in your Gmail or Google Apps mail:
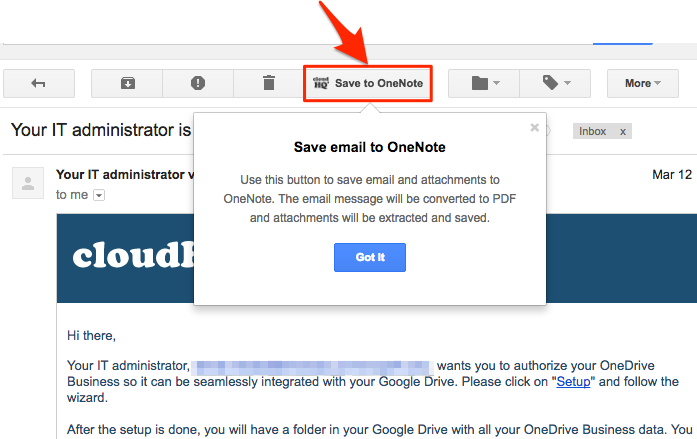
- Open an email and click the “Save to OneNote” button on your Gmail or Google Apps mail:
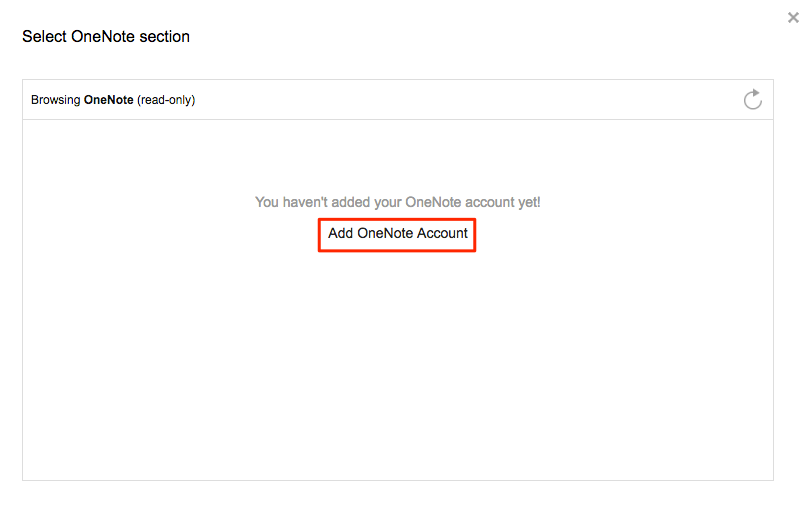
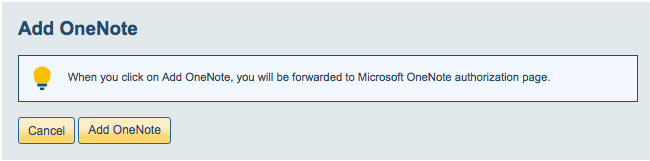
- Click “Add OneNote Account”:
- This will display for a few seconds, then automatically redirect to OneNote:
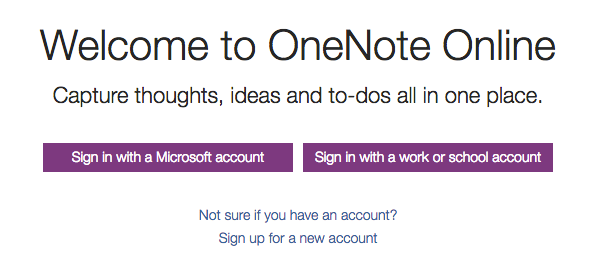
- Sign into your OneNote account:
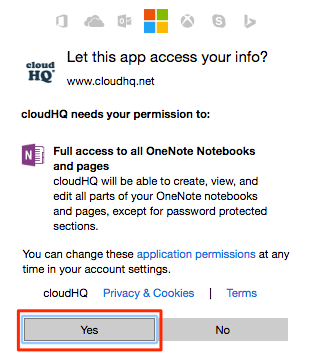
- Authorize cloudHQ in OneNote:
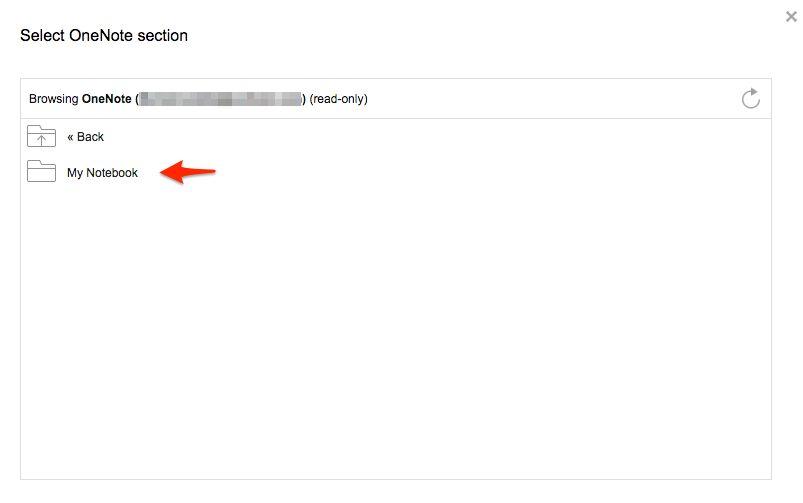
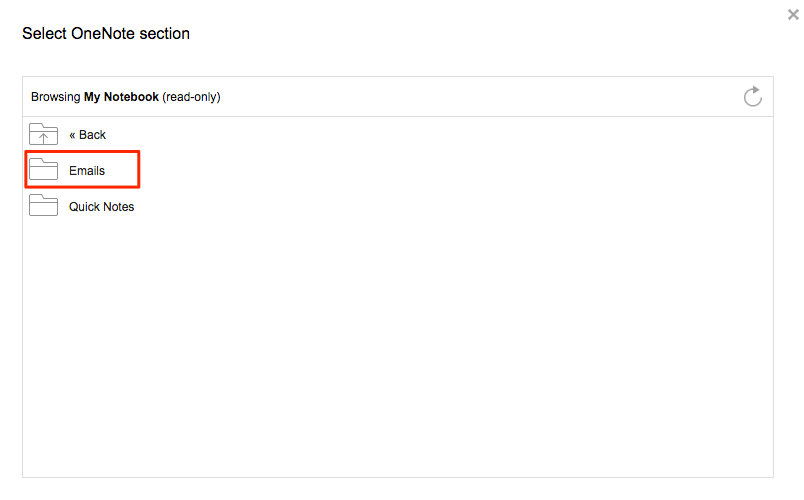
- Select the OneNote folder where you want to save your Gmail or Google Apps email:
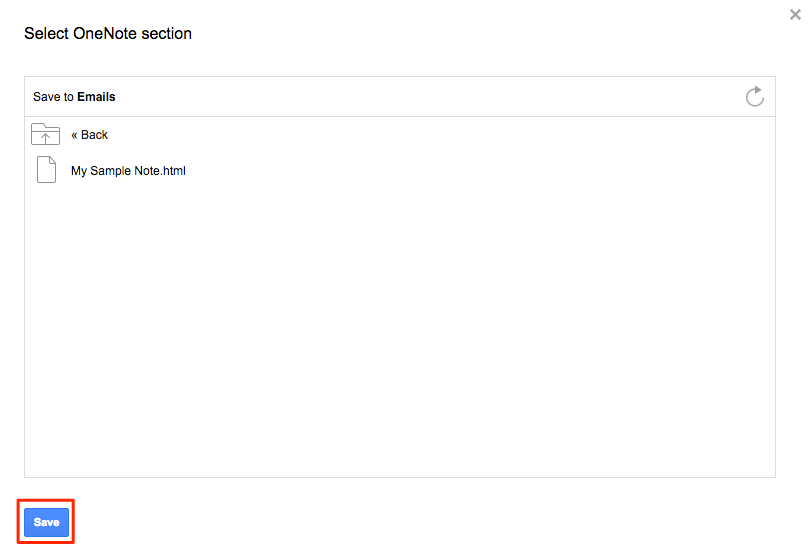
- You can also select a specific notebook in OneNote:
- Click “Save” once you have chosen the location in OneNote where to save:
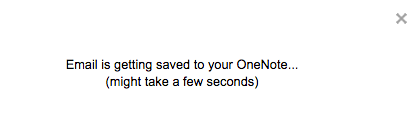
- You will get a message that your Gmail or Google Apps email is being saved to OneNote:
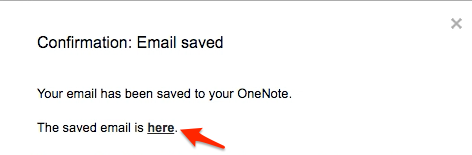
- Your email is now in OneNote. Click “here” if you want to see the message in OneNote:
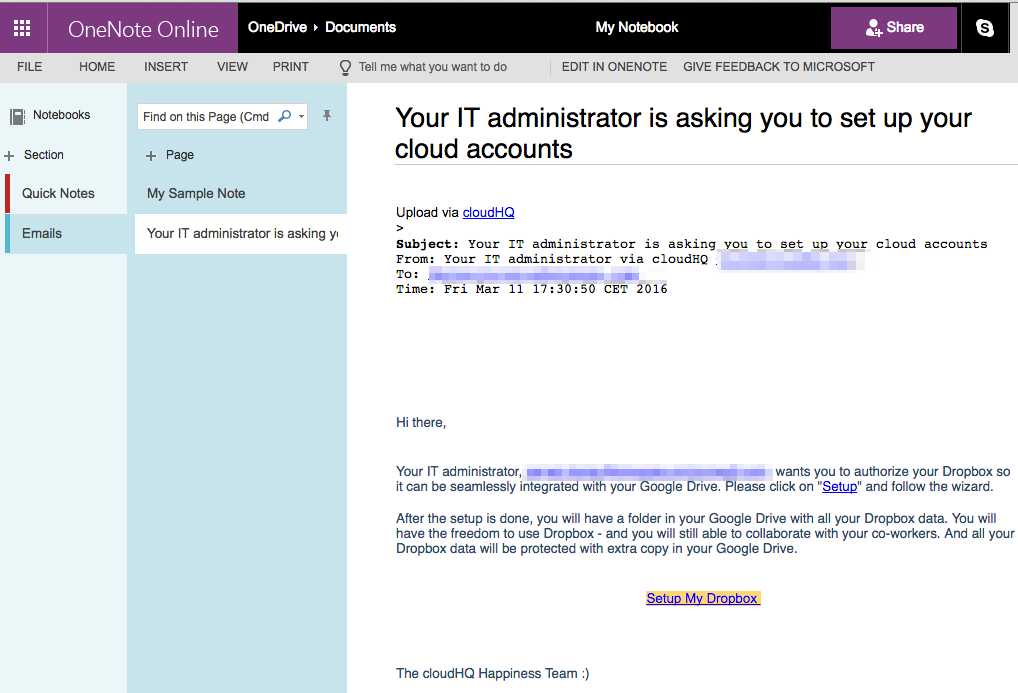
- Your Gmail or Google Apps email is now saved in OneNote:
If you get this notification, it means you need to authorize OneNote:

Then go back to your email and click the “Save to OneNote” button.
If you have emails with attachments, please refer to these instructions:
https://support.cloudhq.net/how-to-save-emails-with-attachments-to-onenote/