- Introduction
- Setup overview
- Amazon S3 preparation
- Authorize cloudHQ to access your Amazon S3
- Authorize cloudHQ to access your Egnyte
- Create backup sync pairs
Introduction
Here are short instructions for how to set up backup of Egnyte to Amazon S3.
These instructions will work also if you want to backup your Egnyte to OneDrive, Box, Drobpox or any other backup storage we support.
Setup Overview
You basically need to create backup sync pairs for your Egnyte Shared folder and Egnyte Private folder.
cloudHQ sync pair defines the following:
- what to sync (i.e., which folders to sync, which cloud accounts to sync, etc.), and
- how to sync (i.e., one-way sync, backup sync, sync for migration, two-way sync, how to convert documents, etc.).
So you will have something like this:
Egnyte (company.com)/Shared -> Amazon S3/backup_bucket/company.com/Egnyte Shared
Egnyte (company.com)/Private -> Amazon S3/backup_bucket/company.com/Egnyte Private
Amazon S3 preparation
Before we start the cloudHQ wizard to back up your Egnyte, we need first to create an appropriate Amazon S3 bucket, an Amazon AWS IAM user, and configure Amazon Glacier policies for your backup bucket—if needed.
- Create an Amazon S3 bucket to store your Egnyte backups.
- Create an Amazon AWS IAM user to own this backup. Instructions are here: https://support.cloudhq.net/how-to-create-amazon-iam-user-for-cloudhq-sync-backup-to-amazon-s3/.
- Optionally, you can set up Amazon S3 to Amazon Glacier archiving rules. Instructions are here: https://support.cloudhq.net/how-to-setup-archive-to-amazon-glacier/..
Authorize cloudHQ to access your Amazon S3
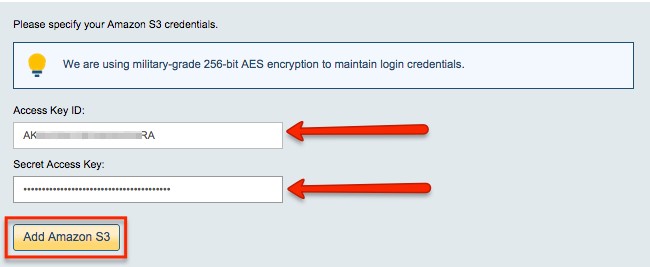
In order to back up to Amazon S3, cloudHQ needs to be authorized to access the Amazon S3 bucket you’ve dedicated for backup. To do that, you must provide the key ID and a secret access key of an IAM user with full read-write access to your backup bucket.
If you don’t know what that is, please check here: https://support.cloudhq.net/how-to-figure-out-your-access-key-id-and-secret-key-in-amazon-s3/.
- Go to https://www.cloudHQ.net/services and click the “Amazon S3” icon:

- Authorize your Amazon S3 account:
Authorize cloudHQ to access your Egnyte
In order to back up Egnyte, cloudHQ needs to be authorized to access your Egnyte.
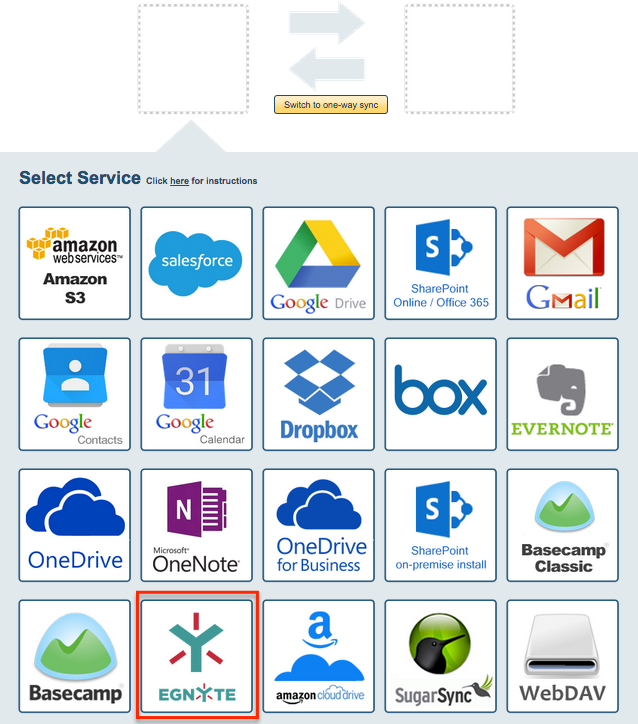
- Go to https://www.cloudHQ.net/services and click the Egnyte icon.
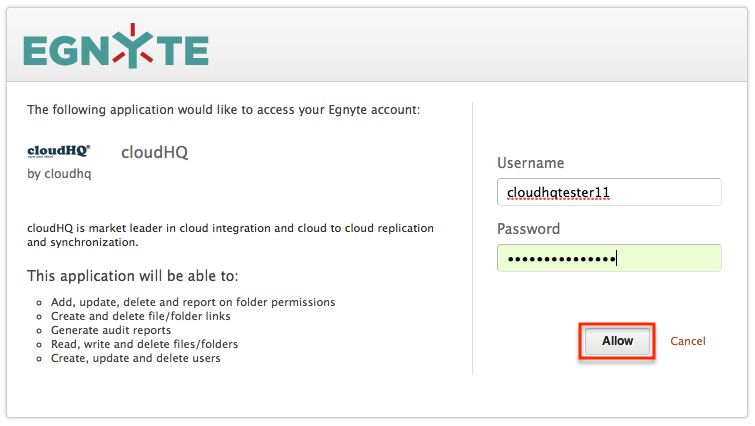
- Authorize your Egnyte account.
- NOTE: For Egnyte production backup, you must set up an Egnyte internal application and ask Egnyte Support to enable API access. See this guide: How to set up an internal application for Egnyte backup or sync
Create backup sync pairs
You will need to create two backup sync pairs:
- one for Shared folder
- one for Private folder
Egnyte (company.com)/Shared -> Amazon S3/backup_bucket/company.com/Egnyte Shared
Egnyte (company.com)/Private -> Amazon S3/backup_bucket/company.com/Egnyte Private
- Start the synchronization wizard to sync two cloud accounts.
- Click the Egnyte icon:
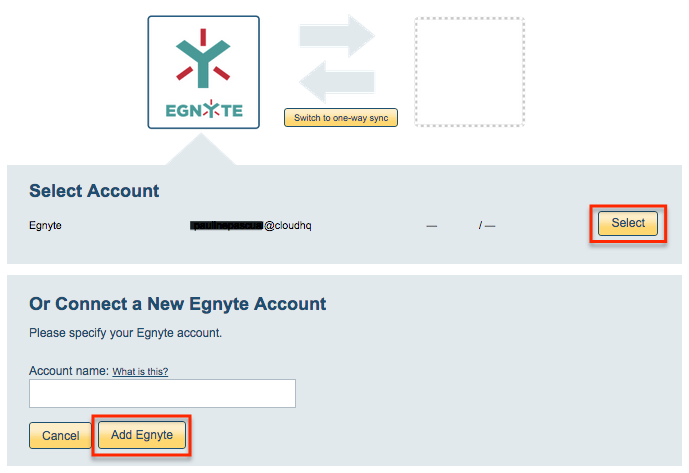
- Select an already-configured Egnyte account or input an account name and click “Add Egnyte” to add a new Egnyte account:
Here is how to determine your Egnyte account name:

- If you click “Add Egnyte,” you will be forwarded to authorize cloudHQ to access your account:
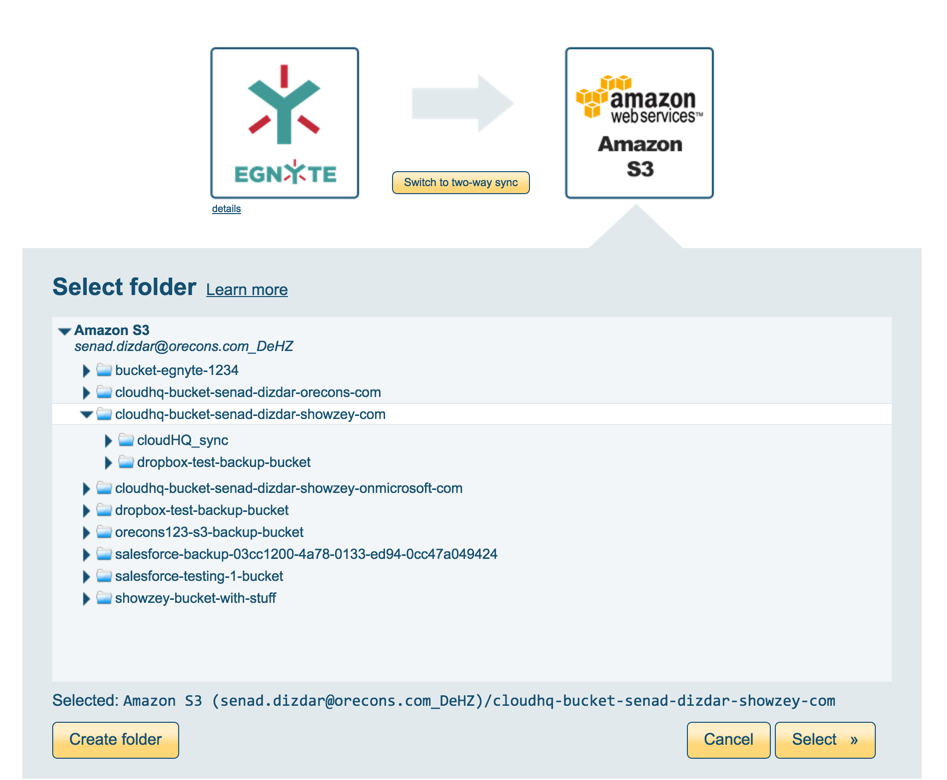
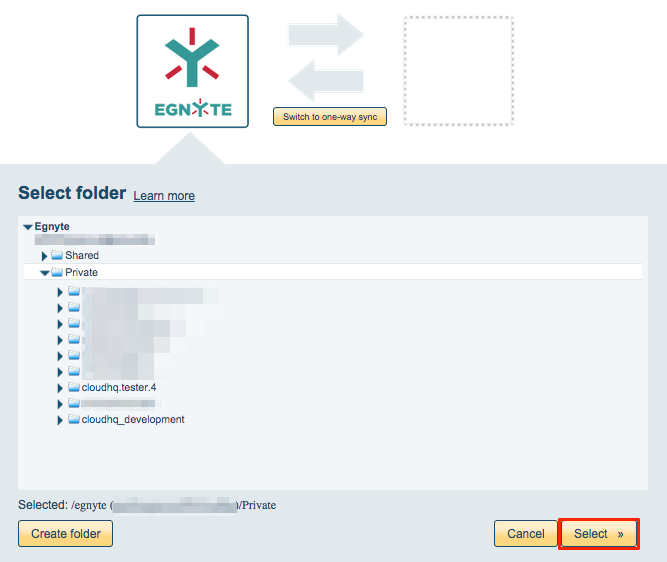
- Select the Egnyte folder you want to back up. Or you can select the root level to back up everything:
- Click the Amazon S3 icon.
- Select the Amazon S3 account you want to use for the backup.
- Select the folder or bucket you want to use for the backup:
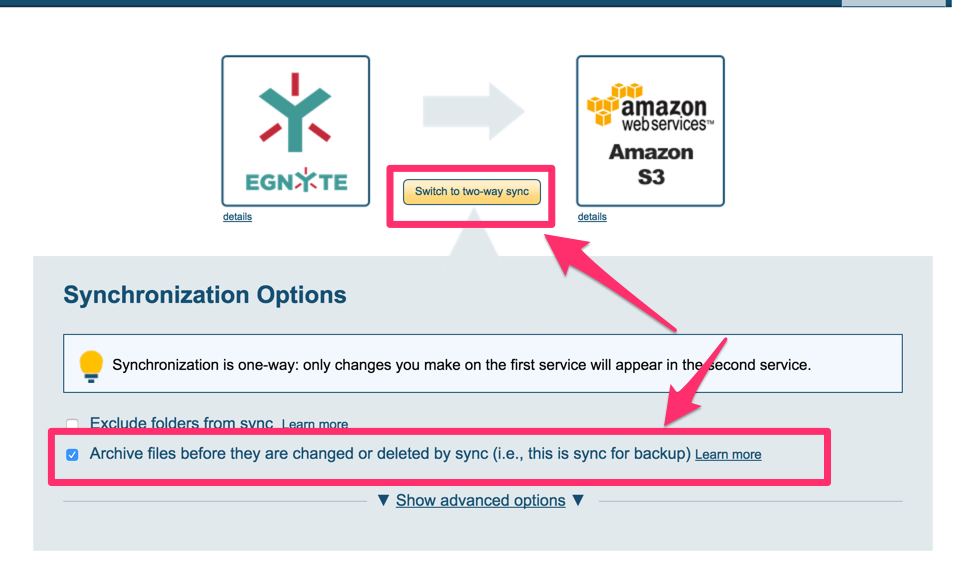
- Since we are doing a backup, you need to do the following two changes:
- Switch to one-way sync.
- Select “Archive files before they are changed or deleted by sync“:
- The synchronization pair will display after successful configuration.
- Here is How to Monitor the Status of Sync.