- Introduction
- Authorize cloudHQ so it can access Box folders
- Authorize cloudHQ to access your Microsoft 365 SharePoint
- Create migration sync pairs for each of Box shared folders
Introduction
If you are using Box only for shared data (i.e., you are not using Box for private storage), then it is best to migrate Box shared folders (team folders) to appropriate team SharePoint document libraries. To migrate Box accounts to Microsoft 365 SharePoint sites, you need to create one-way sync pairs like this:
Box (admin@acme.com)/team_folder_HR -> Office365 (admin@acme.com)/HR Site/Documents
Box (admin@acme.com)/team_folder_Production -> Sharepoint (alice@acme.com)/Production Site/Documents
Box (admin@acme.com)/team_folder_Finance   -> Sharepoint (bob@acme.com)/Finance Site/Documents
...
The above will create a one-way sync of each Box team folder with Office365 SharePoint. The data will be migrated and kept in sync, allowing you a seamless transition.
cloudHQ will also replicate all sharing information and permissions from Box to SharePoint.
Here are step-by-step instructions on how to set up data migration sync pairs.
Authorize cloudHQ so it can access Box folders
If you need to replicate sharing metadata from Box to Sharepoint, install cloudHQ on your Box domain: IT Admin: How to install cloudHQ to your Box Business or Box Enterprise. If you do not need to replicate sharing meta-data, then you do not need to install cloudHQ on your Box domain.
Next, authorize all Box accounts that own team folders you want to migrate. If folders are owned by co-admins, you must authorize all Box co-admin accounts that own these team folders even if you installed cloudHQ on your Box admin. Installing cloudHQ on the Box domain does not grant access to folders owned by co-admins, so if folders you plan to migrate are owned by co-admin, then you will need to authorize them too.
To do this, follow these steps:
- Log in to Box with the account that owns the team folders you want to move.
- Log in to cloudHQ.
- Go to Cloud Accounts.
- In the Storage section, click the Box icon.
- Follow the prompts.
Authorize cloudHQ to access your Microsoft 365 SharePoint
You need to authorize a Microsoft 365 account with full permissions to access the sites and document library you want to migrate into.
To do this, follow these steps:
- Ensure you are logged into a Microsoft 365 account with full permissions to access the sites and document library.
- Log into cloudHQ.
- Go to Cloud Accounts.
- Scroll down to the Storage section and click the Microsoft 365 SharePoint icon.
- Follow the prompts.
If you need to migrate sharing metadata, you must install cloudHQ on your Microsoft 365. The instructions are here: IT Admin: How to install cloudHQ to your Microsoft 365 (Office 365) domain
Create migration sync pairs for each of Box shared folders
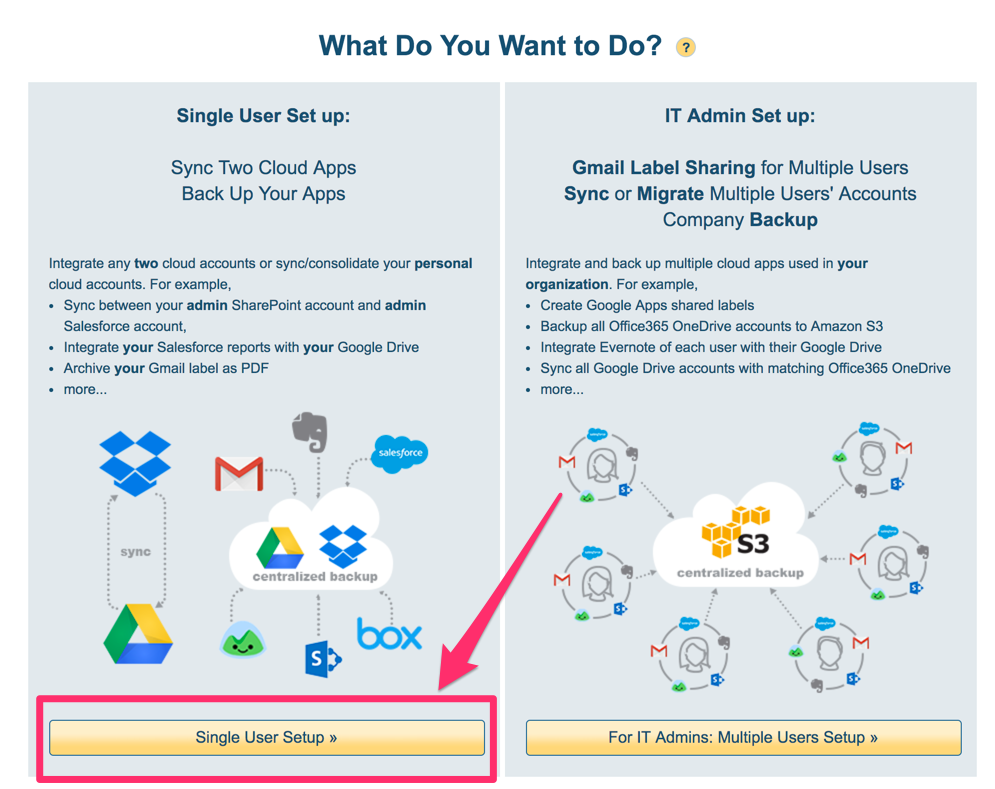
- Start the wizard and select “Single User Setup”:
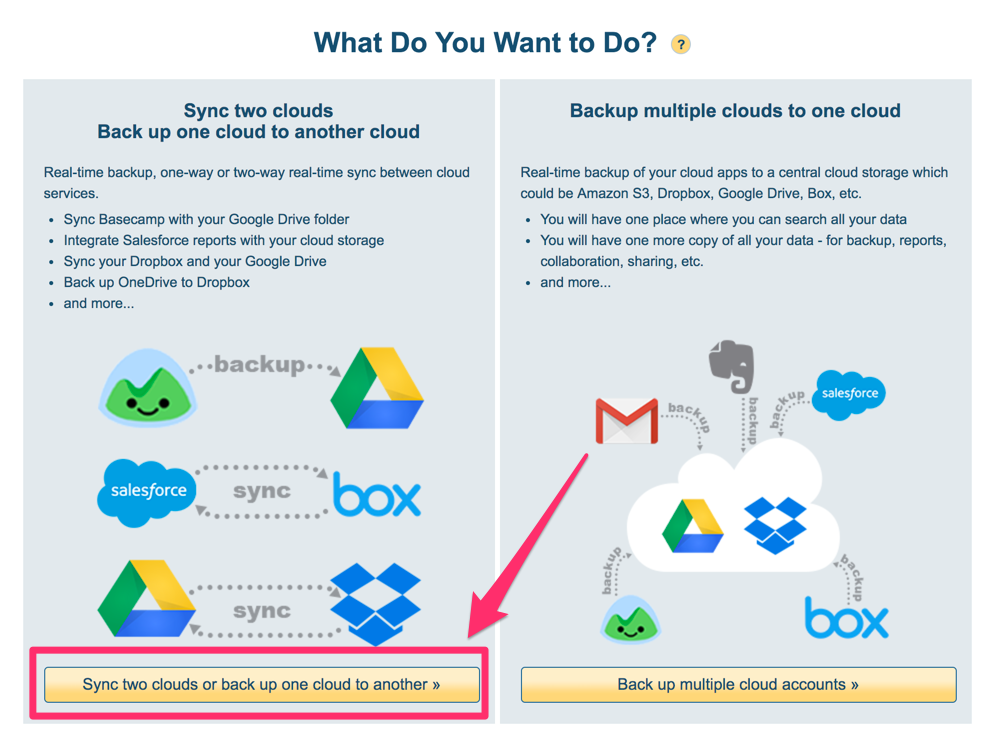
- On the next page select “Sync Two Clouds”:
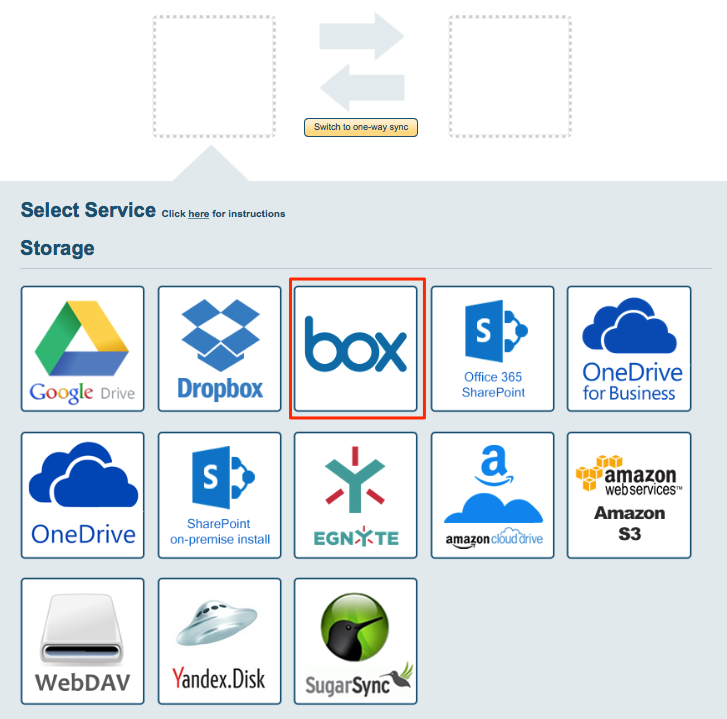
- Click on the Box icon
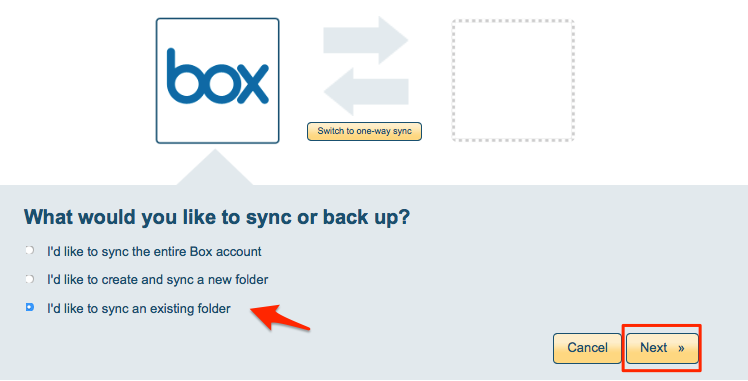
- Authorize Box account and choose migration type (entire account or existing folder):
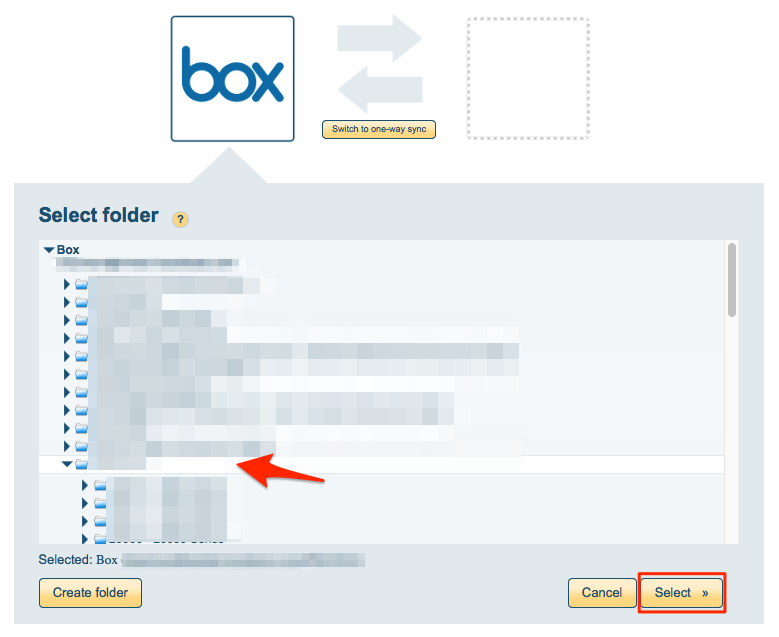
- Select the Box folder which contains data that needs to be migrated to SharePoint, then click “Select”:
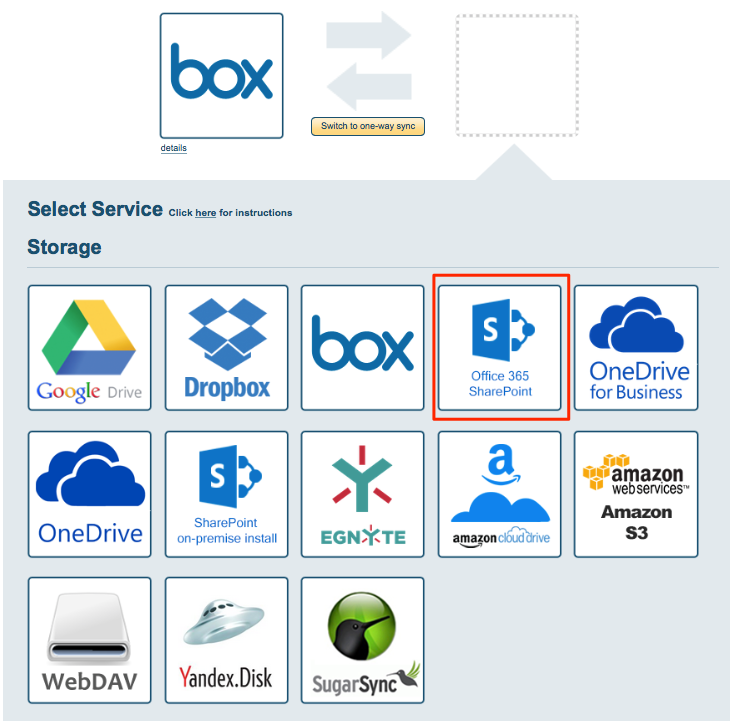
- Click on the Office365 SharePoint icon
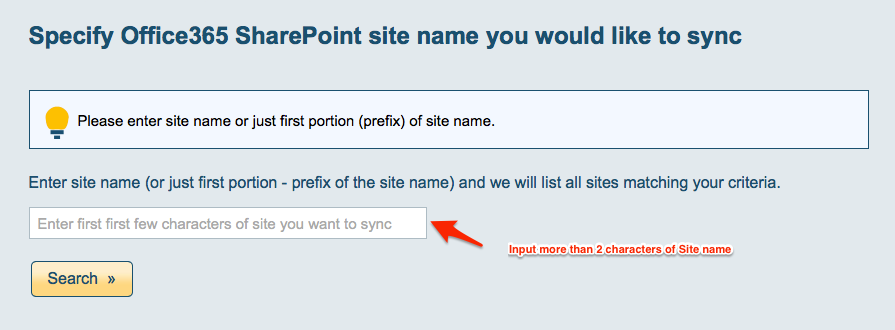
- Enter Site name or Site URL to search SharePoint site.
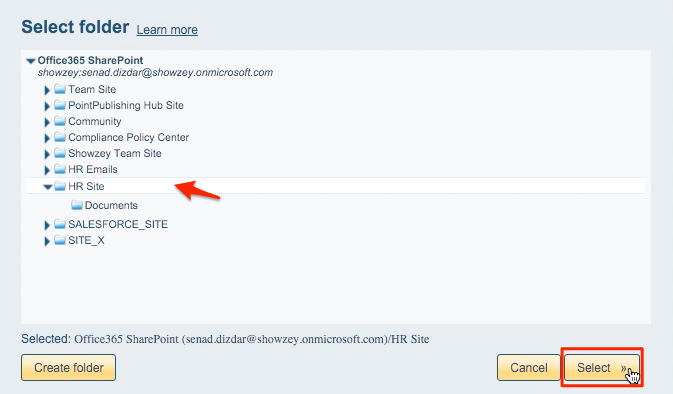
- Select the SharePoint document library or sub-folder or click “Create Folder” to create a new folder, then click “Select”.
- Select the following two options:
- Replicate sharing meta-data for files I own Learn more
- Sync only files I own (skip all files and folders which are shared with me)

- The synchronization status will display after the initial synchronization.
- Here is How to Monitor Status of Sync.
- An email will confirm the success of the initial synchronization.