With cloudHQ, you can set up a real-time backup of all your Microsoft 365 Mail accounts to Amazon S3 / Glacier.
Real-time data backup will automatically make a backup copy of every new email that arrives in your Microsoft 365 email. This means that cloudHQ is essentially capturing every single email received by Microsoft 365 mail, then saving them to Amazon S3 / Glacier.
You can back up your organization’s Microsoft 365 Mail accounts to Amazon S3 or any storage service supported by cloudHQ (e.g. Dropbox, Google Drive, etc.).
To set up real-time backup of Office 365 Mail accounts, you need to create backup sync pairs:
Office365 Mail (bob@acme.com) -> Amazon S3/Backup_bucket/bob@acme.com/Microsoft 365 Mail (bob@acme.com)
Office365 Mail (ali@acme.com) -> Amazon S3/Backup_bucket/alice@acme.com/Microsoft 365 Mail (ali@acme.com)
Office365 Mail (tom@acme.com) -> Amazon S3/Backup_bucket/tom@acme.com/Microsoft 365 Mail (tom@acme.com)
Office365 Mail (jen@acme.com) -> Amazon S3/Backup_bucket/jen@acme.com/Microsoft 365 Mail (jen@acme.com)
...
The backup structure of emails will look like this:
- cloudHQ_sync
  - Backup_bucket
    - <email of user1>
      - Microsoft 365 Mail (<email of user1>)
        -  year
           - month
             - day
               - email1
               - email2
                 ..
    - <email of user2>
      - Microsoft 365 Mail (<email of user2>)
        -  year
           - month
             - day
               - email1
               - email2
                 ...
Here are the instructions for how to back up and consolidate all your Microsoft 365 email accounts to cloud storage (e.g., Amazon S3):
Microsoft 365 preparation:
- Microsoft 365 Mail accounts have to be fully provisioned. cloudHQ will not provision Office 365 Mail accounts on your behalf. This means that each of your Office 365 users needs to log in at least once to their Microsoft 365 Mail account.
Amazon S3 preparation:
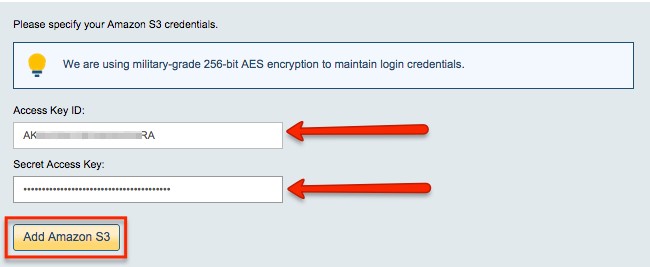
- Amazon S3 needs to be authorized in cloudHQ. You must have an access key ID and a secret access key. If you don’t know what that is, please click here: https://support.cloudhq.net/how-to-figure-out-your-access-key-id-and-secret-key-in-amazon-s3/.
- Go to https://www.cloudHQ.net/services and click the “Amazon S3” icon:

- Authorize your Amazon S3 account:
Authorize cloudHQ to access your Office 365 domain
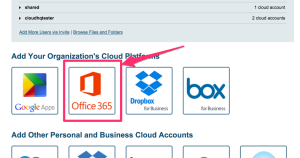
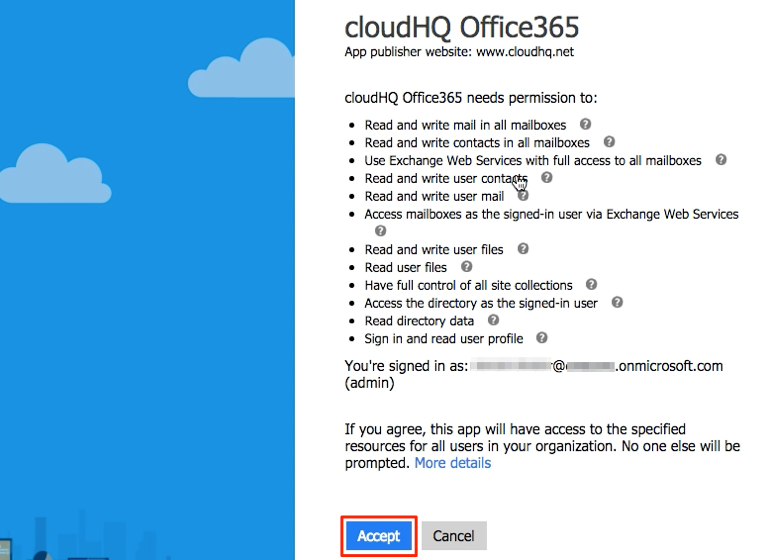
- Go to https://www.cloudHQ.net/services and click the “Office365” icon:
- Accept Office 365 authorization:

Set up a backup sync pair between Microsoft 365 Mail and Amazon S3
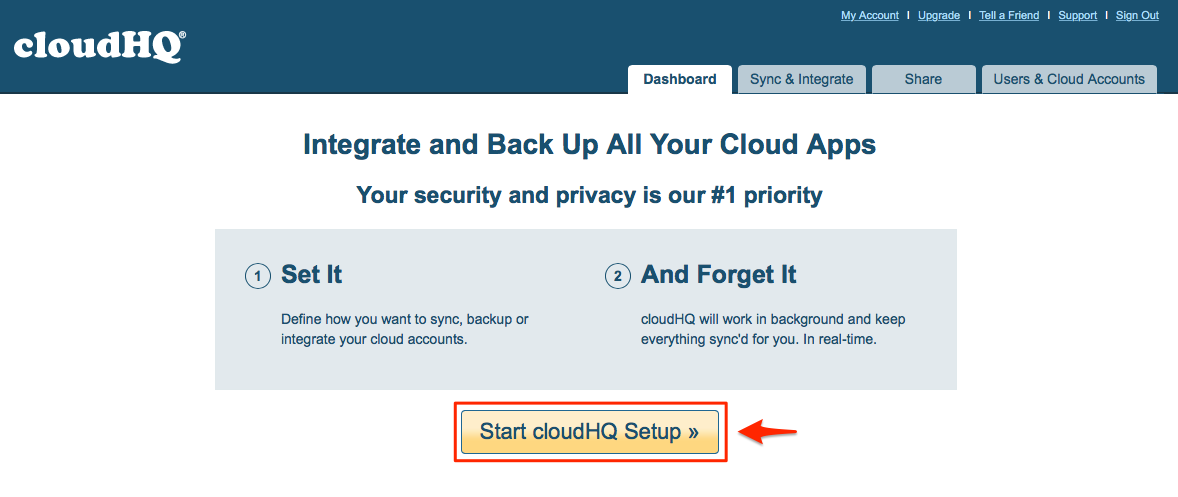
- Click “Start cloudHQ Setup”:
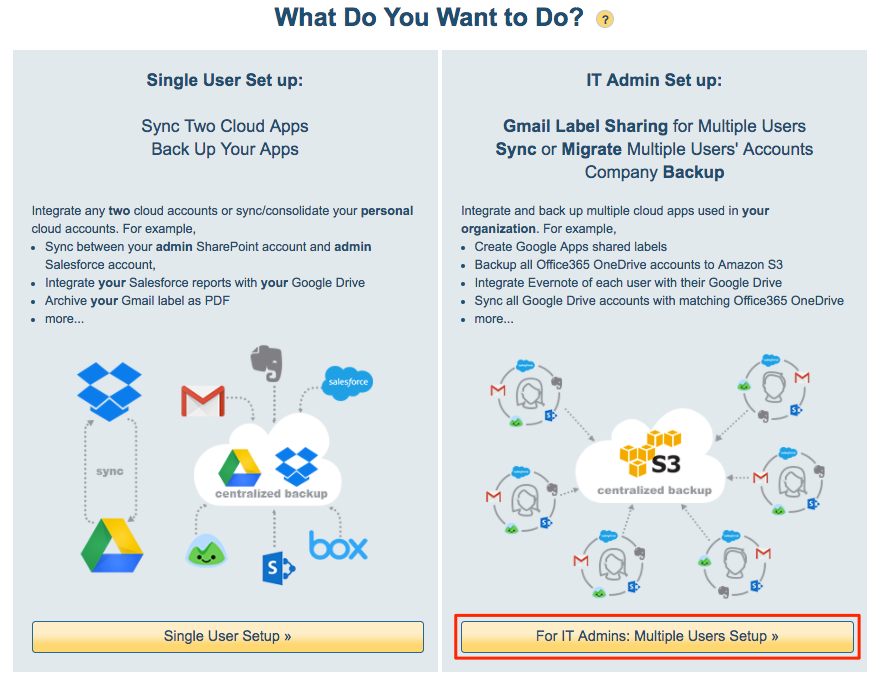
- Select “For IT Admins: Multiple Users Setup” as the type of sync:
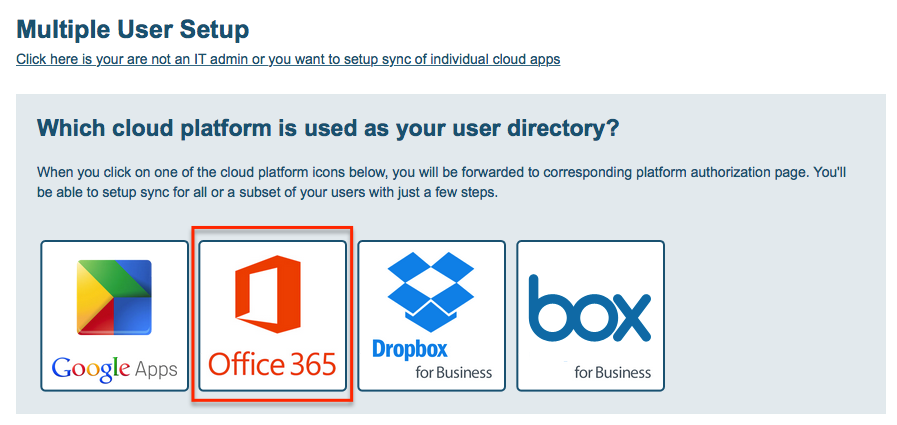
- Select “Microsoft 365” as your organization’s cloud platform:
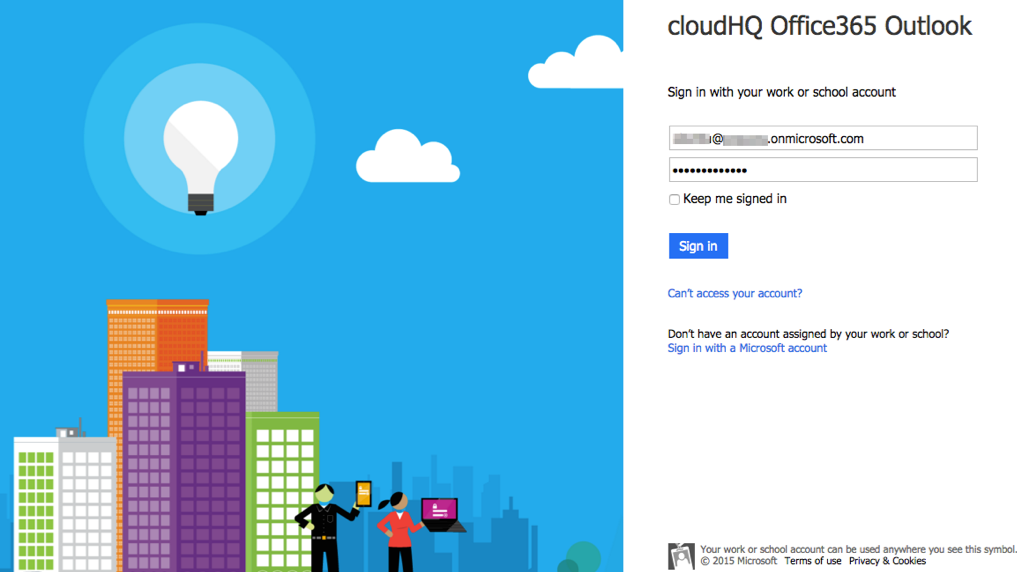
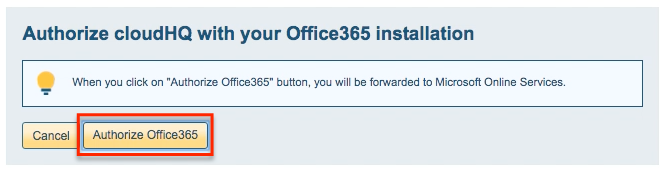
- Authorize your Microsoft 365 account in cloudHQ:

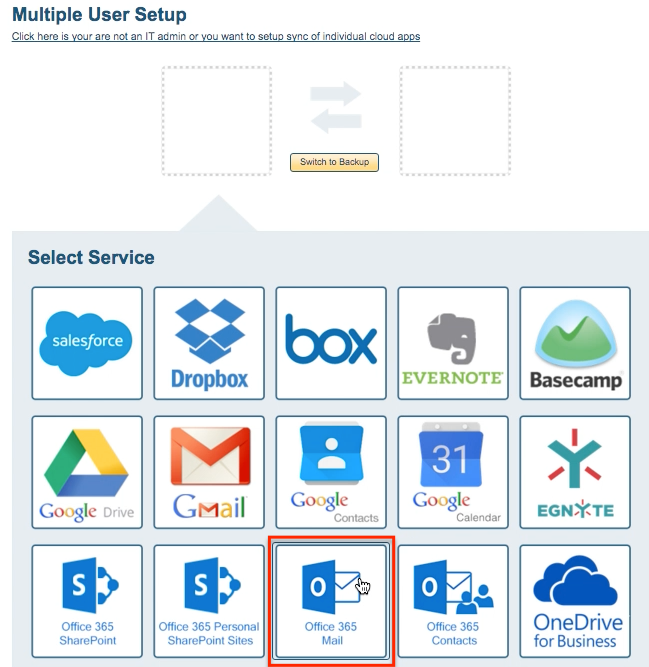
- Click the Microsoft 365 Mail icon to choose the account you want to back up. You may also drag the icon to the left empty box:
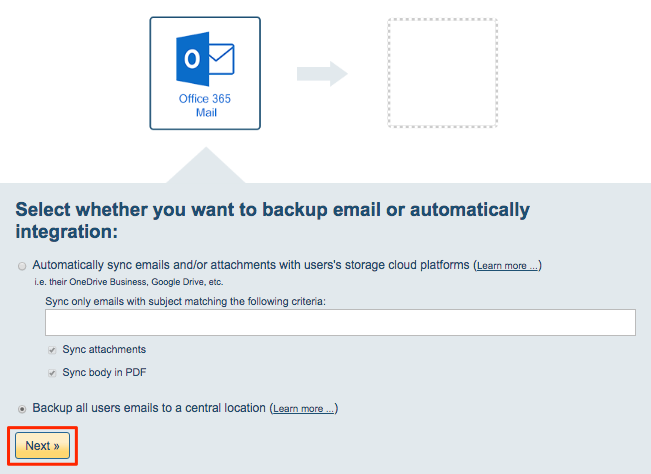
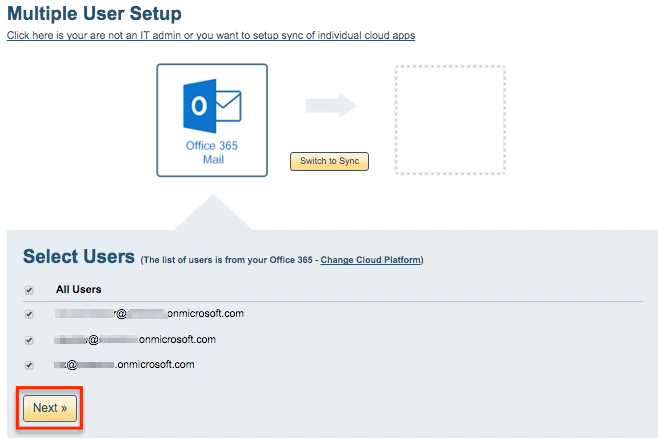
- Select that you want to back up all users’ Microsoft 365 Mail:
- Select the users whose apps you want to sync. cloudHQ will get a list of users from your Office 365 account and ask which user accounts you want to sync:
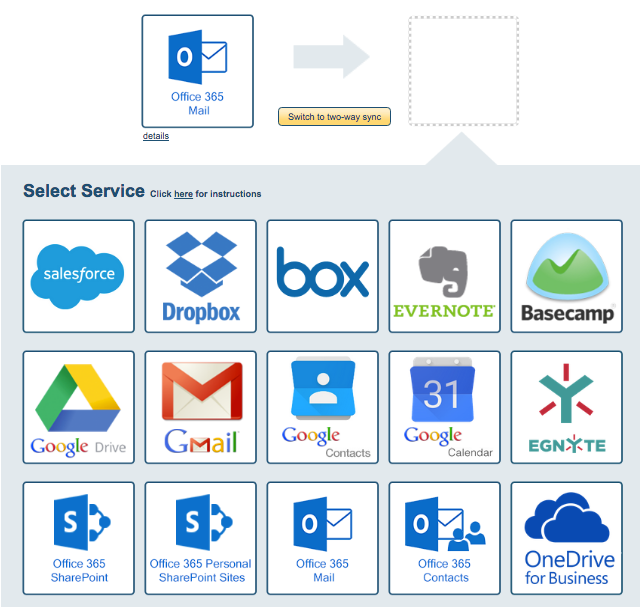
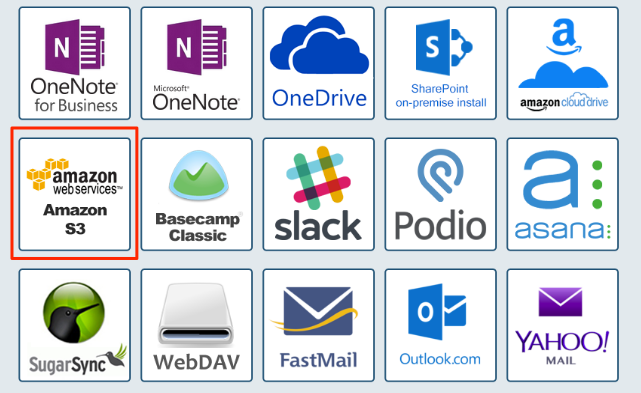
- Click the icon of the service you want to host your backup or drag the icon to the right empty box (e.g. Amazon S3):
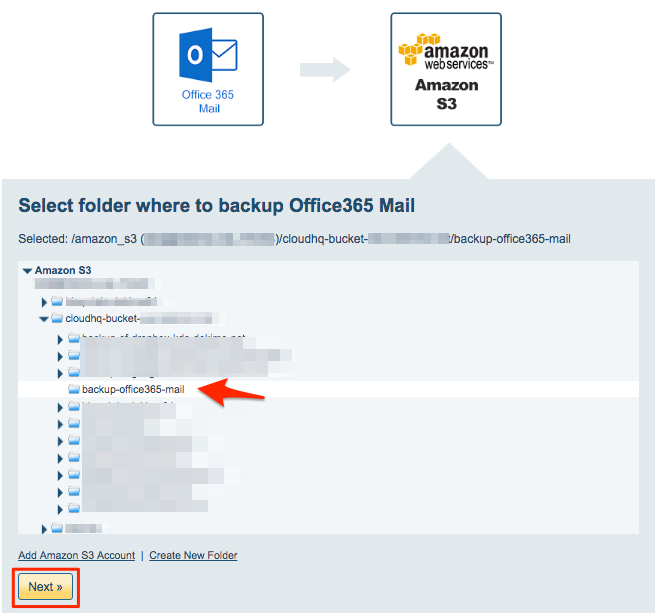
- Choose the folder in Amazon S3 where you want to store your backup:
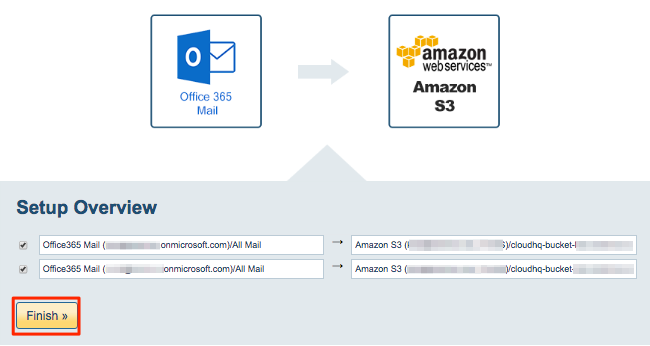
- Review users’ sync pairs, then click “Finish”:
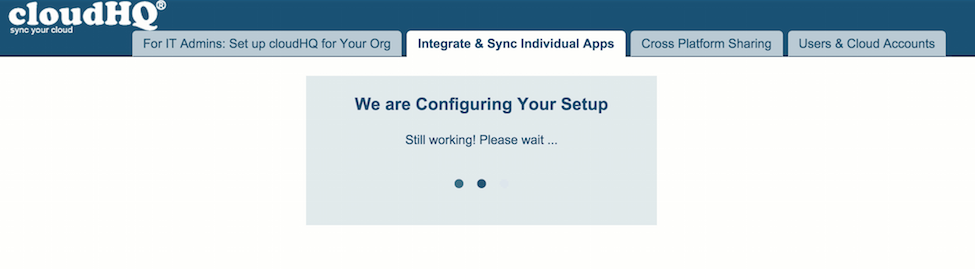
- Configuration will be done by cloudHQ:
- Synchronization pairs will be automatically created by cloudHQ:
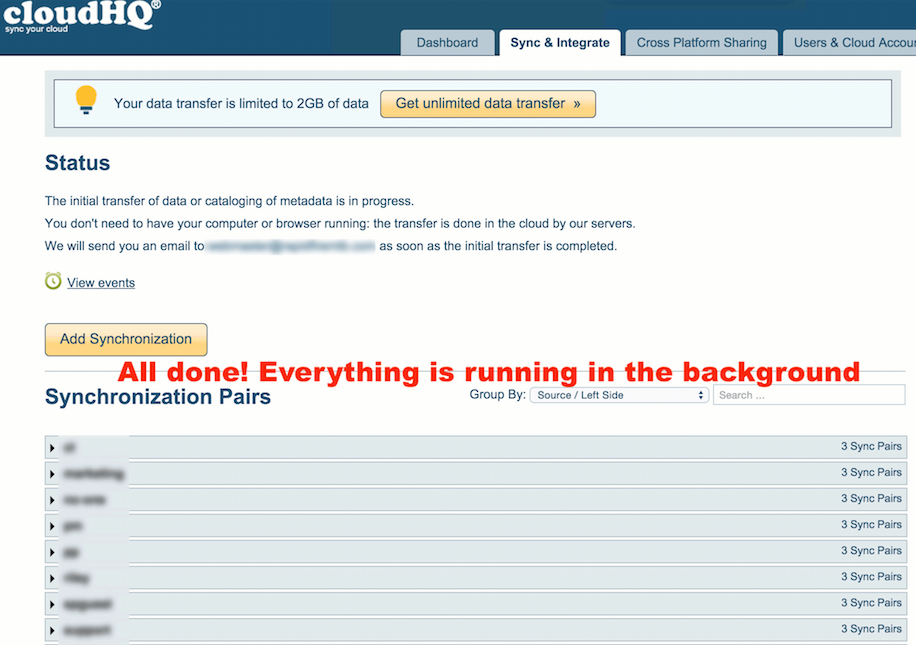
- Synchronization will start. Here is How to Monitor Status of Sync.