Introduction
cloudHQ can migrate all messages from one Gmail account to another, and you need to do nothing extra for that. Is the email address correct? Has your name changed, or that of your business? Was it an oversight or a mistake? For example, you might be using one Google Workspace Gmail for company source.com (i.e., alice@source.com) account, but then you have migrated to another account (i.e., alice@target.com).
Migration Overview
cloudHQ will ensure that all emails stored in your first Gmail account are replicated to your new one. This means you can use your old email address during migration without worrying about emails not reaching you.
cloudHQ will ensure that your new Gmail account is an exact replicate of your original one:
- All email labels will be preserved and replicated.
- All email dates and other metadata (such as sender, cc, etc.) will be preserved.
- All email flags (such as unread, important, etc.) will be preserved.
- Migration is continuous. You can use both email accounts, and cloudHQ will ensure that all new emails from your old Gmail account are automatically replicated to your new one.
NOTE: The sent emails will be inside the Gmail label named ‘Sent from (source email address)’. An explanation about this is in this support note named Understanding Gmail Sent label.
Migration Setup
The migration setup is as simple as creating a sync pair from one Gmail to another:
Gmail (account@source.com) -> Gmail (account@target.com)
Step-by-Step Instructions
Here are short instructions for how to set up migration from one Gmail account to another:
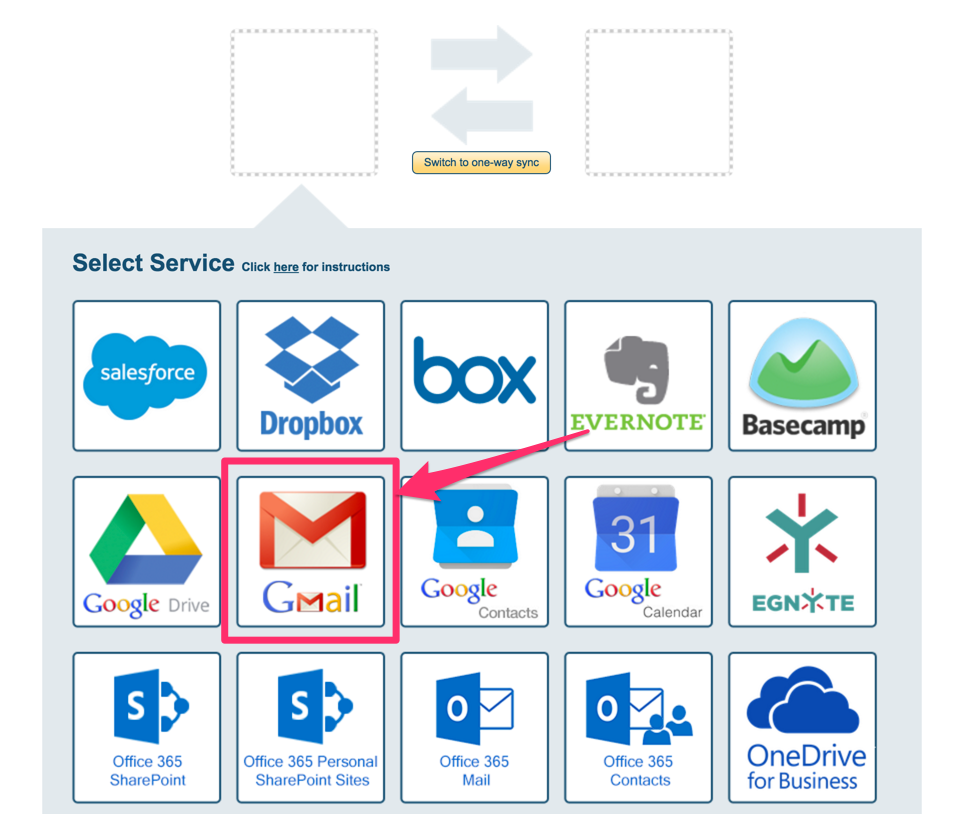
- Start the synchronization wizard to sync two cloud accounts.
- Click the Gmail icon:
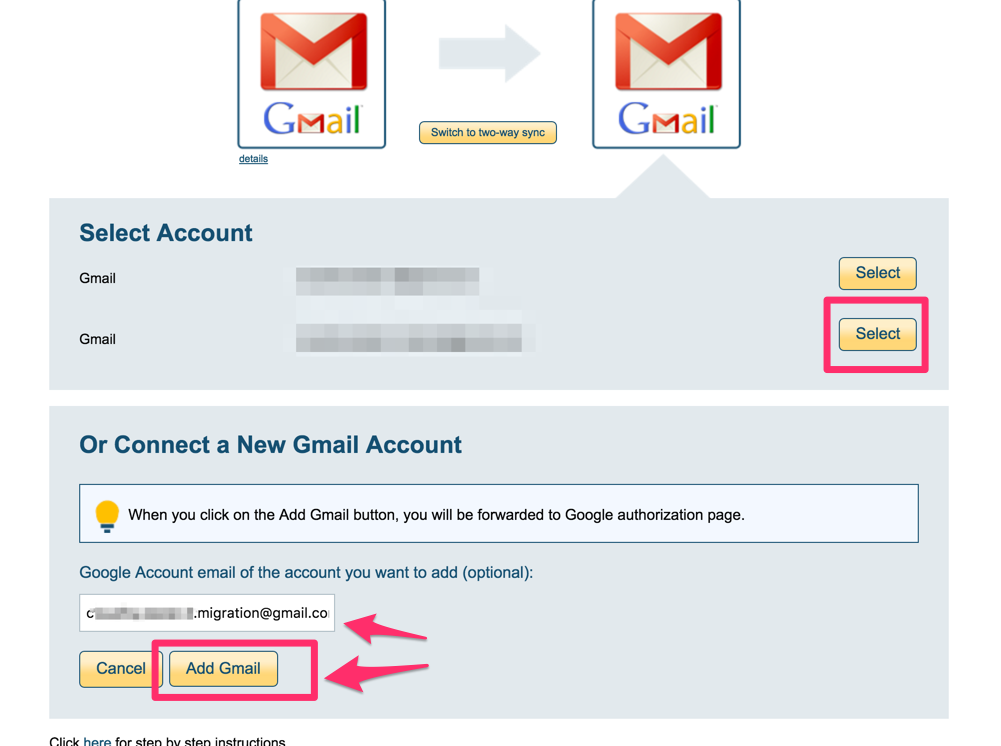
- Select an already-configured Gmail account. If you do not have an account configured, enter the email address of your Gmail account and click “Add Gmail.”
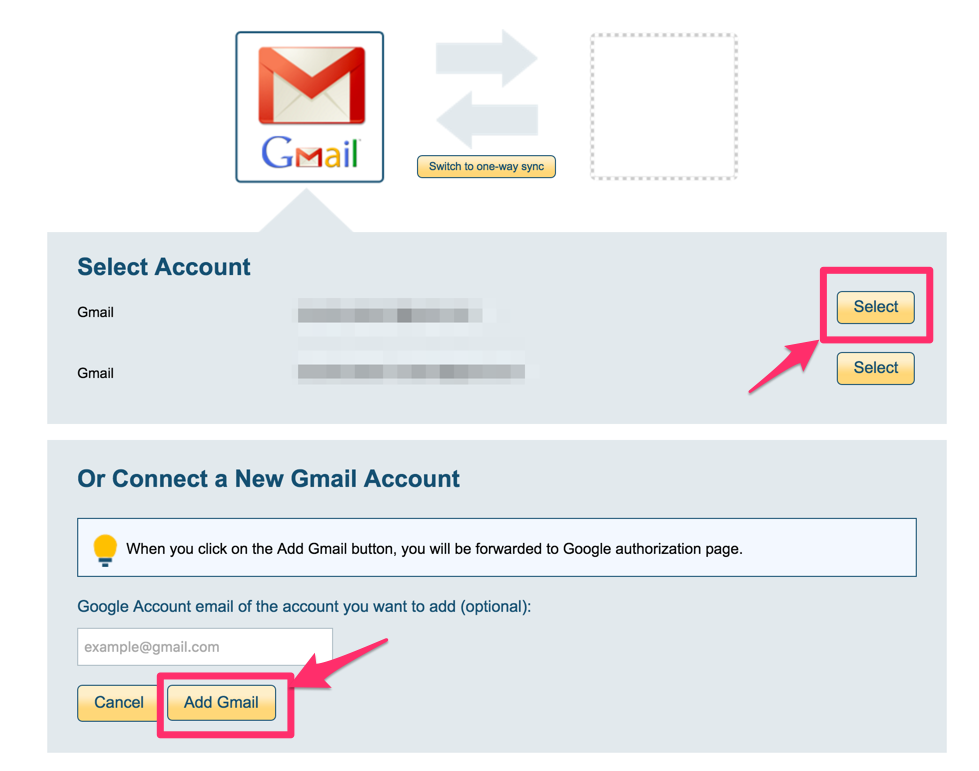
- If you click “Add Gmail,” you will be forwarded to authorize cloudHQ to access your Gmail account.
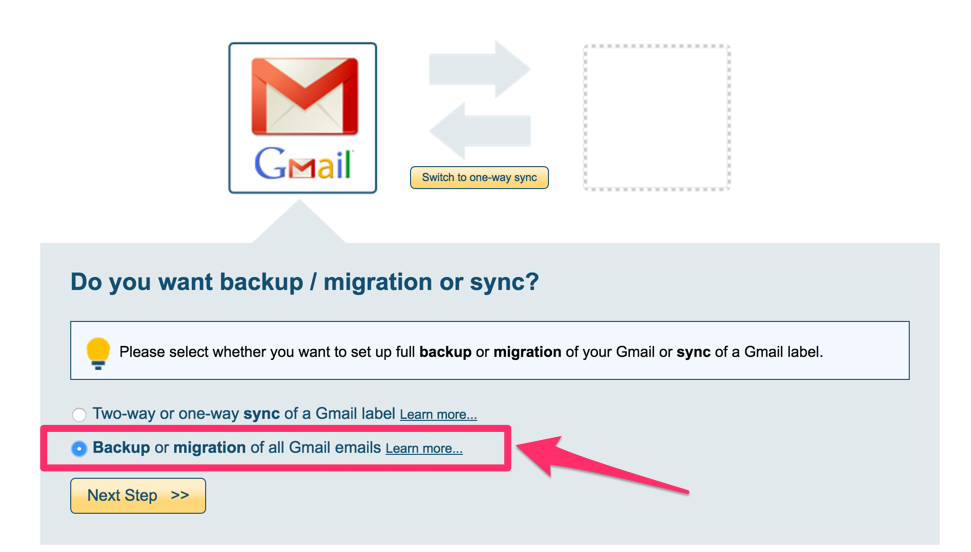
- Select “Backup or migration of all Gmail emails,” then click “Next Step”:
- Since we are doing Gmail to Gmail migration, click the Gmail icon:
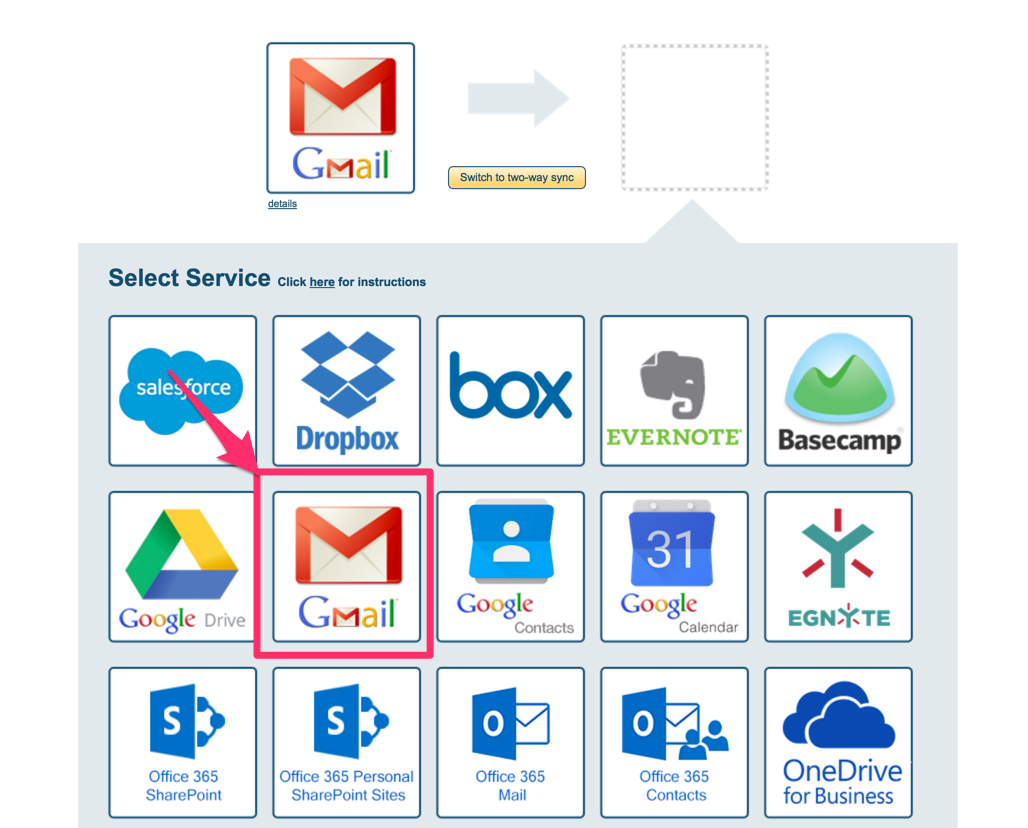
- Select an already-configured Gmail account. If you do not have a new Gmail account configured in cloudHQ, enter the email address of your second Gmail account and click “Add Gmail”:
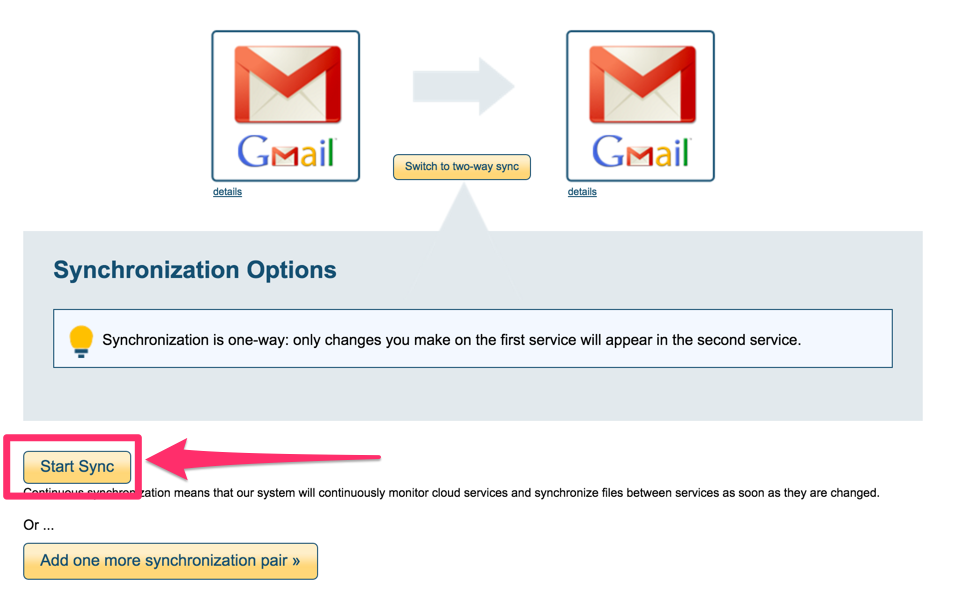
- Start the sync.
- Here is How to Monitor the Status of Sync
- You will receive an email to confirm the success of the initial migration.