To learn more about the Highlight Emails by cloudHQ, visit the Highlight Emails website.
To install the extension, choose your browser from the links below:
To install the extension, choose your browser from the links below:
How to use this extension
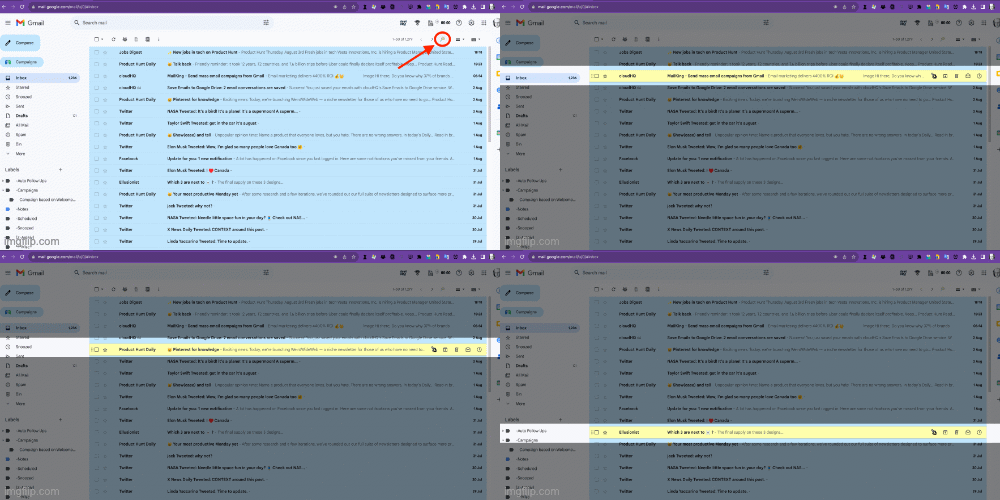
After successfully installing the Chrome extension named Highlight Emails in Gmail offered by cloudHQ, in your Gmail you will see two icons.
-
The first icon is the cloudHQ icon, which appears with the alt text “cloudHQ Gmail apps” when you hover your mouse over it. This button-icon is used to manage cloudHQ apps installed in your browser. If you have already installed any of the cloudHQ apps, the icon will be visible. Otherwise, it will be installed with your cloudHQ extension “Highlight Emails.” You can find this cloudHQ icon, labeled “cloudHQ Gmail apps,” near the Gmail search bar at the top of the page. Clicking on this icon will open a list of cloudHQ apps. Scroll down through the list and click on “Highlight Emails.” On the right panel, you will see four link items:
- Highlight Rows (ON/OFF) – This function is to turn on or off the highlighting of rows.
- Reading Focus (ON/OFF) – This function is to turn on or off reading focus.
- Settings – Clicking this link will take you to the cloudHQ dashboard, where you can personalize the appearance and behavior of your email interface. Here’s a breakdown of the available customization options:
- Unread Email Color – You can choose to turn this feature on or off, and select a specific color for unread emails.
- Selected Email Color – Similarly, you have the option to turn this feature on or off, and pick a color for selected emails.
- Mouse Hover Color – Customize the color that appears when your mouse hovers over an email. You can turn this option on or off.
- Color-code emails from domains: This feature allows you to add specific domain names, and then choose a color that will be applied to all emails in your Inbox from that domain. It helps in quick recognition of emails from particular senders, enabling you to organize your Inbox more efficiently.
These settings empower you to make the Highlight Emails extension suit your individual needs and the visual theme of your email domain, providing a personalized and engaging email experience. This aids in rapidly identifying emails from certain senders, enhancing your Inbox organization. For example,- If you choose “example.com” as a domain and select the color blue, all emails from “example.com” will appear blue in your Inbox.
- For the domain “myschool.edu”, you might opt for a green color, making all emails from this domain stand out with a green hue.
- Color-code emails from senders: This convenient feature enables you to assign specific colors to designated email addresses, resulting in all incoming emails from these particular senders appearing in your Inbox in the chosen color. This facilitates easy recognition and efficient organization of emails.
The customizability of the Highlight Emails extension accommodates your unique preferences and aesthetic desires for your email domain, offering a dynamic and personalized email viewing experience. It aids in the speedy identification of emails from distinct senders, and thus improves your overall Inbox management. For instance,- By adding “support@cloudhq.net” and designating the color blue, all emails from “support@cloudhq.net” will display in blue in your Inbox.
- For the domain “info@myschool.edu”, you may prefer a green color, so all emails from “info@myschool.edu” will manifest with a green tint.
-
The second icon is labeled “Reading Focus” (this is the alt text on mouse hover) and is typically found at the top and bottom of the email list, to the right of the “Newer” and “Older” buttons used to navigate through your emails. If you wish to activate Reading Focus (ADHD) Mode, locate the “Highlight Emails” icon in the upper right corner of your screen and click on it.
