Table of Contents
Congratulations!
You’ve successfully installed the Chrome Extension Manager by cloudHQ – your ultimate app for organizing and managing all your Chrome extensions. Here’s how it helps you:
- See All Extensions: View every extension you’ve installed, even the hidden ones.
- One-Click Toggle: Instantly turn extensions on or off as needed.
- Custom Groups: Organize extensions into personalized groups for easy management.
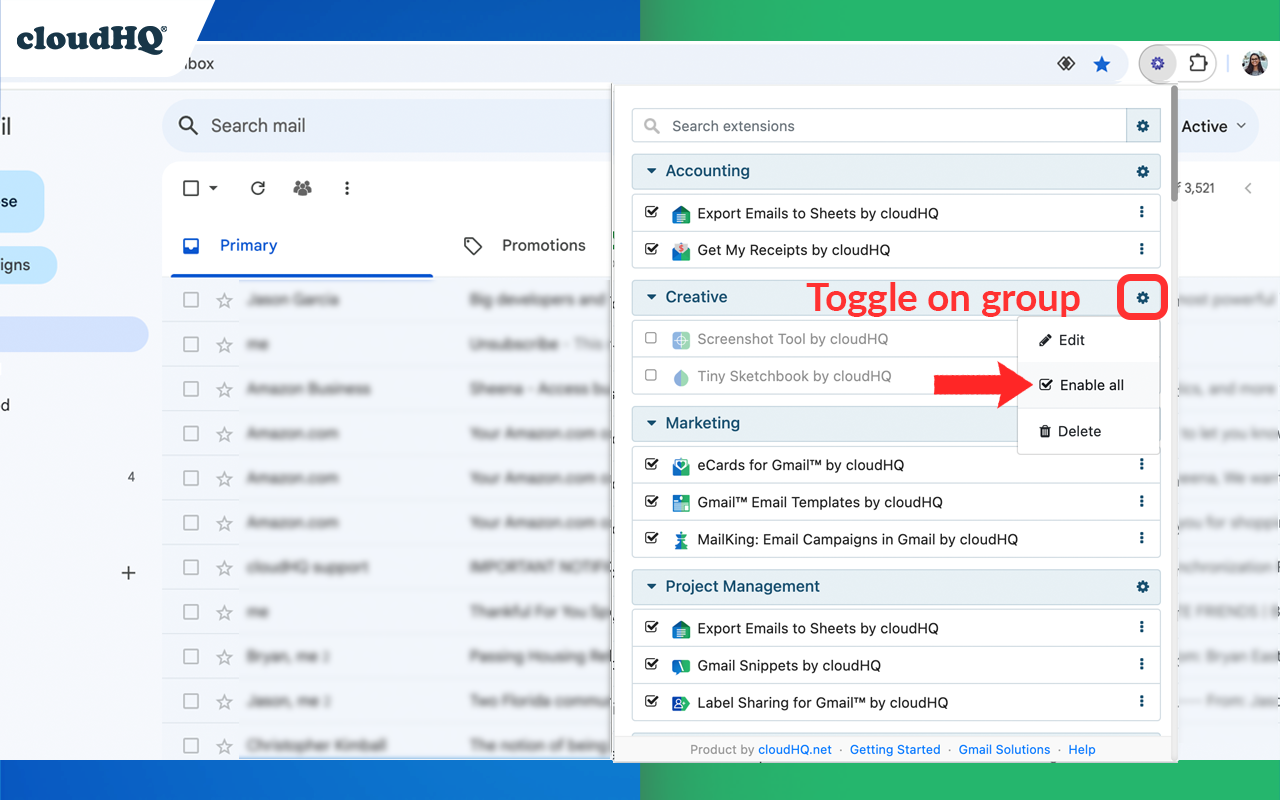
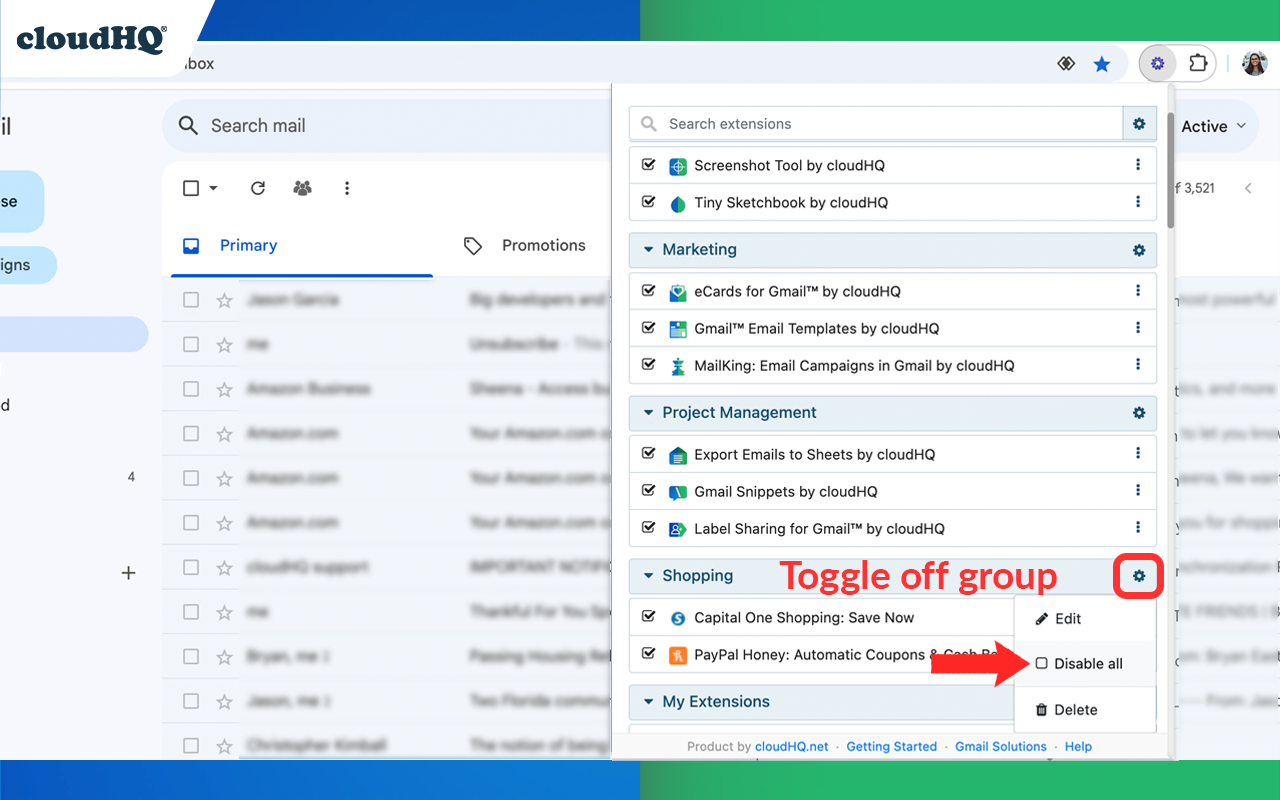
- Quick Group Control: Enable or disable entire groups in just seconds.
This easy-to-use app gives you complete control over all your Chrome extensions, keeping everything organized.
Chrome Extension Manager: Support Guide
1. How to Pin Your Chrome Extension Manager
To keep the Chrome Extension Manager easily accessible in your toolbar, follow these steps:
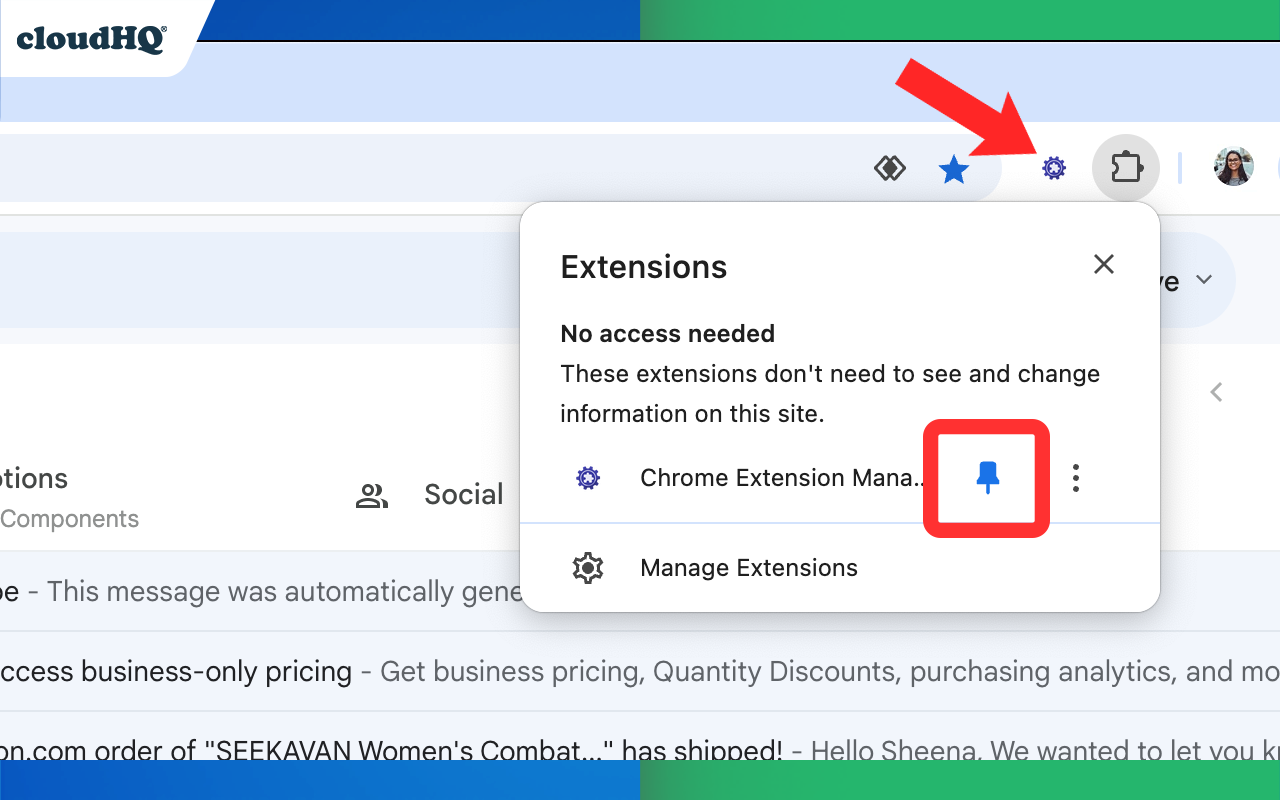
- Click the puzzle piece icon (Extensions) in the top-right corner of your Chrome browser.
- Find Chrome Extension Manager in the list.
- Click the pin icon next to it. This will keep the extension visible in your toolbar for quick access.
2. Create a Chrome Extension Group
Organize your extensions into custom groups based on your needs:
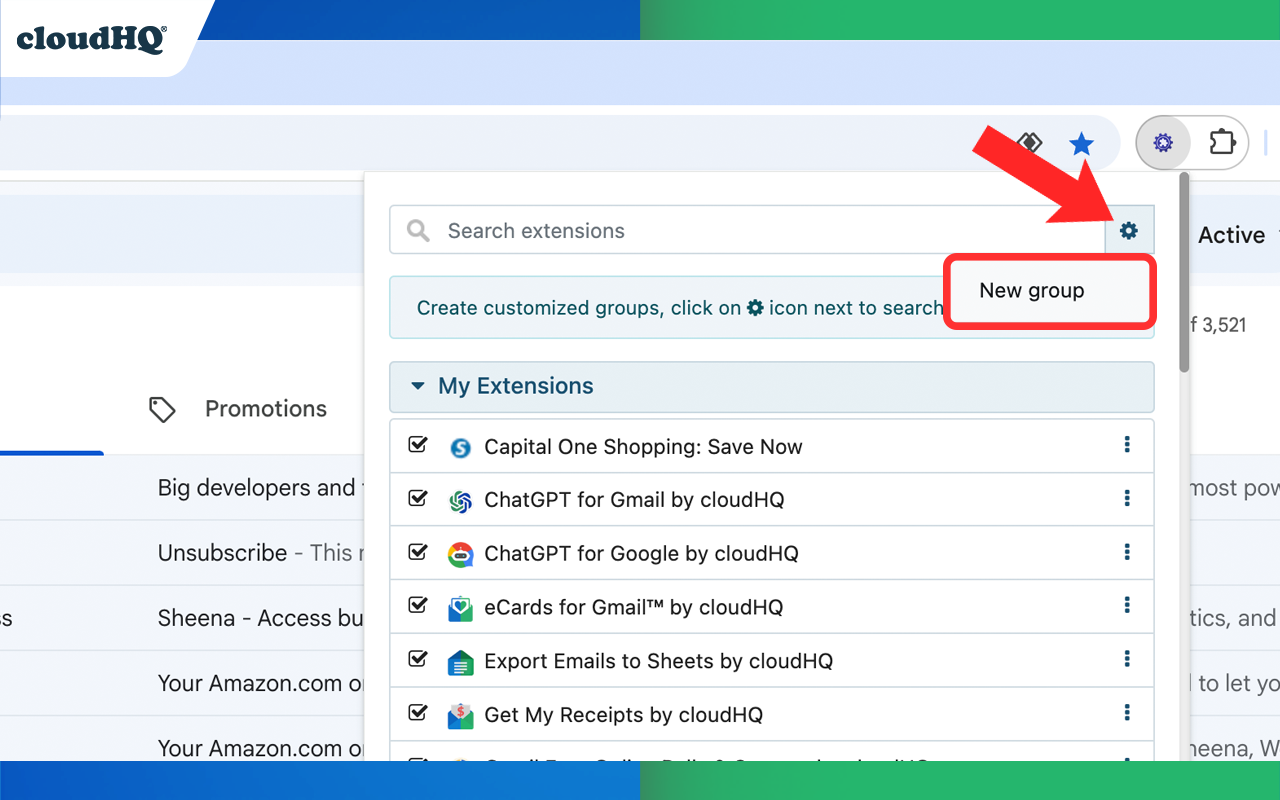
- Open the Chrome Extension Manager by clicking the icon in your toolbar.
- Click on the “Settings” icon to create your new Chrome extension group.
- Name your new group and select the extensions you want to include.
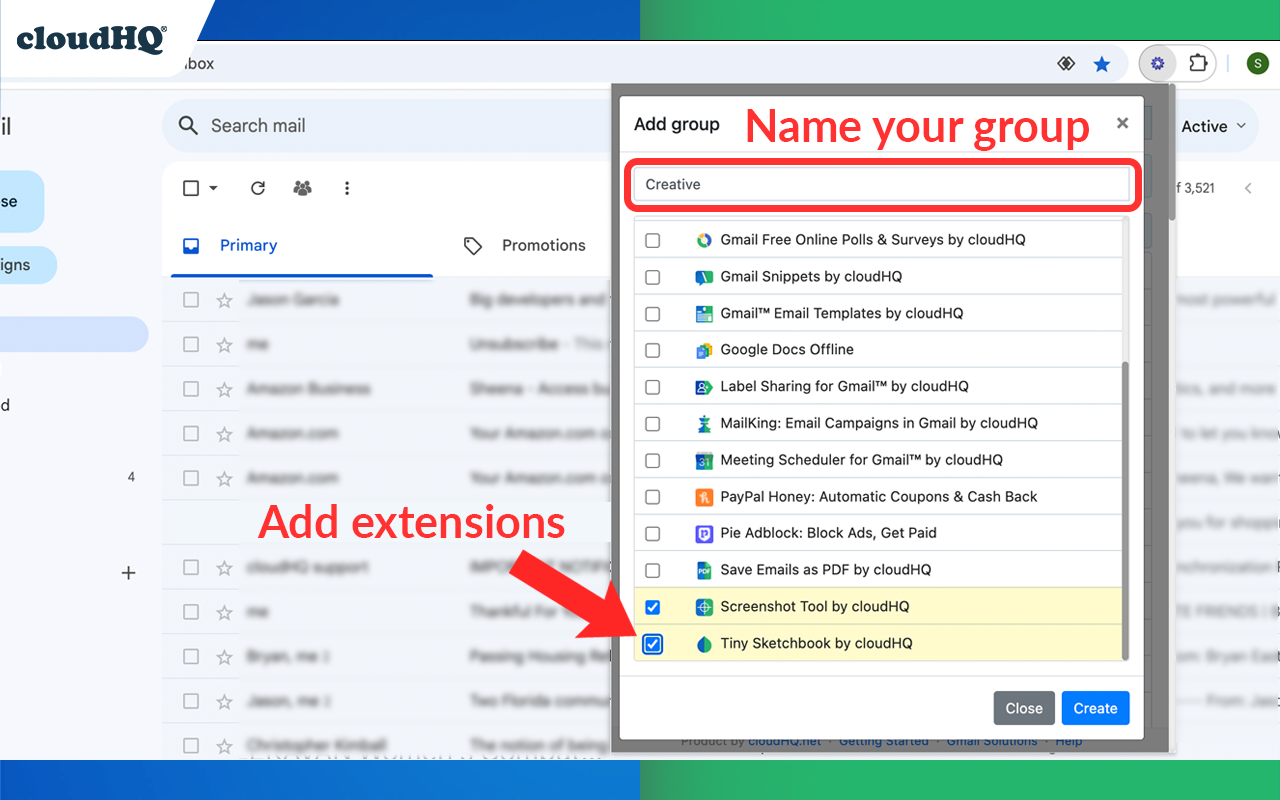
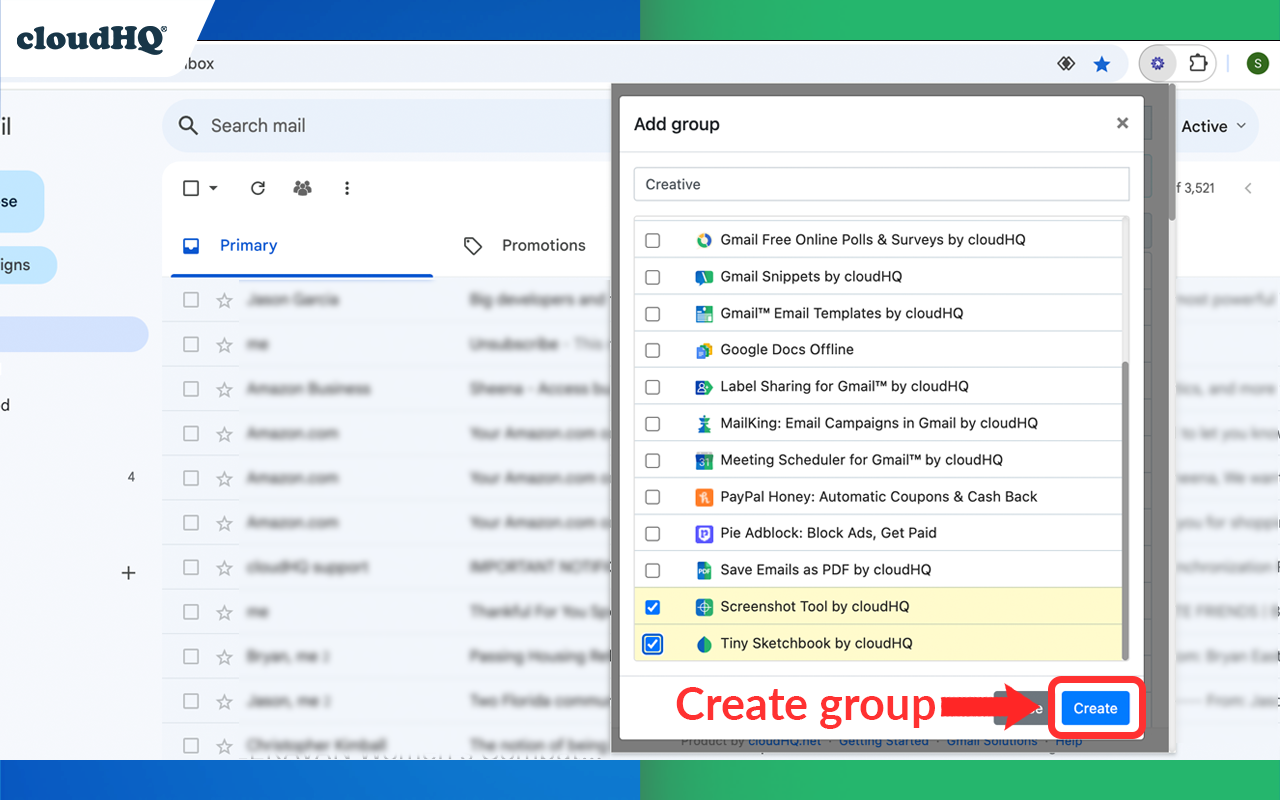
- Finalize creating the group by clicking on “Create.”
3. Enabling and Disabling Chrome Extension Groups
Manage your extensions effortlessly by enabling or disabling groups:
- Open the Chrome Extension Manager.
- In the groups list, toggle the switch next to each group to enable or disable all the extensions within that group at once. This helps you quickly adjust your browser for different workflows.
